Ingest Object Storage Data
The page provides a walkthrough to demonstrate how to ingest data from object storage into a database.
We have provided a weather dataset, hosted on each of the major cloud providers, for use in this walkthrough.
No kdb+ knowledge required
No prior experience with q/kdb+ is required to build this pipeline.
You must create the insights-demo database, as described in the create a database walkthrough, before you begin using the Import Wizard to create the pipeline.
The following sections describes how to:
-
Create the pipeline and add it to the
insights-demopackage created here. This pipeline is comprised of the following nodes:-
Readers. To read data from its source. Either Google Cloud Storage, Amazon S3 or Microsoft Azure Storage.
-
Decoders. To decode the ingested csv data.
-
Schema. To convert the data to a type compatible with a kdb+ database.
-
Writers. To write the data to a kdb Insights Enterprise database.
-
-
Deploy the pipeline. To run the pipeline you have just created to ingest data into the insights-demo database.
- Teardown the pipeline. The pipeline can be torn down after data has been ingested. This frees up resources and is good practice.
Create the pipeline
Use the Import Wizard to create the pipeline:
-
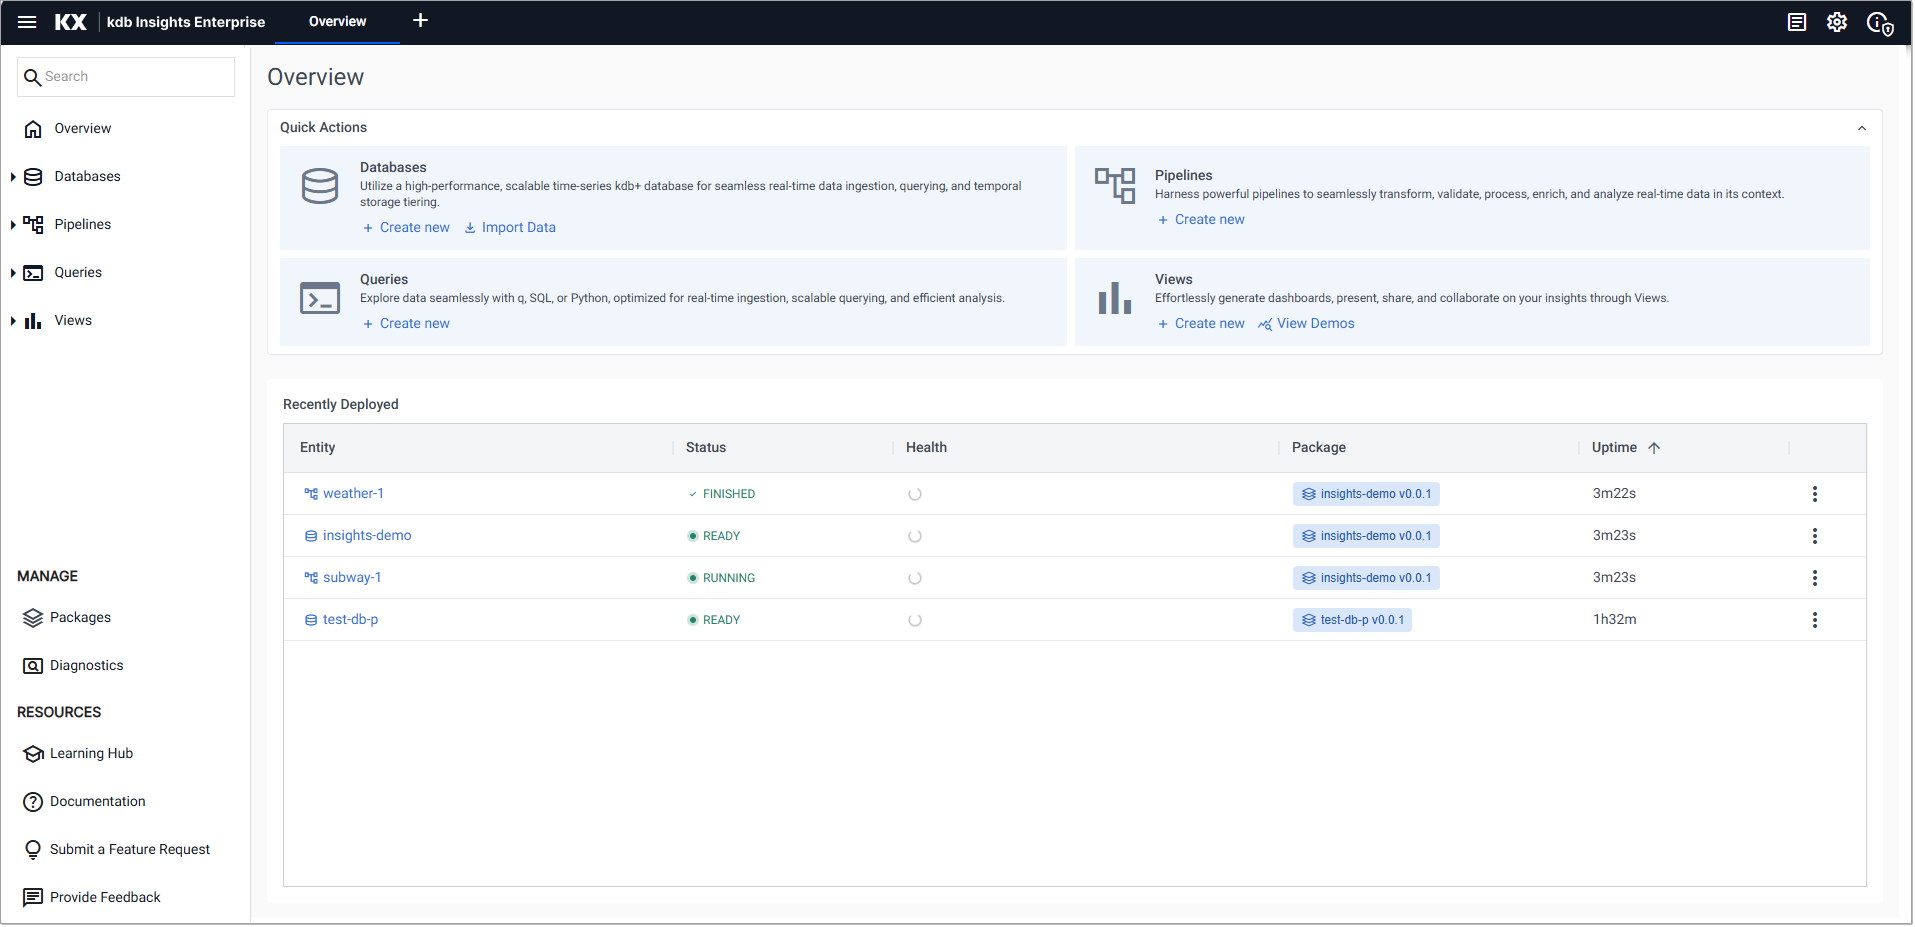
Click Import Data under Databases on the Overview page, in the Quick Actions section.
-
In the Import your data view, select a cloud provider. For this walkthrough select either Google Cloud Storage, Microsoft Azure Storage, or Amazon S3.
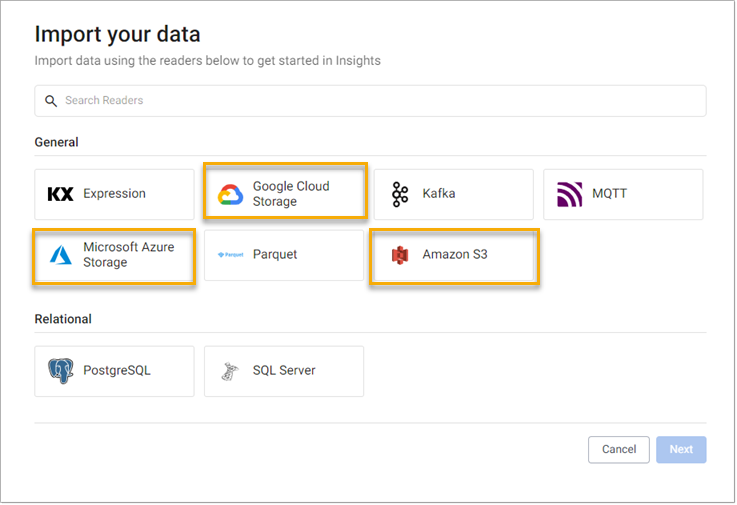
-
Complete the applicable reader properties for the selected cloud provider.
Note
The tables below list all available settings. The fields shown in the web interface may vary depending on the selected version (for example, Version 1 or Version 2).
Properties
Setting Value Select Version* Version 1GS URI* gs://kxevg/weather/temp.csvProject ID kx-evangelismTenant Not applicableDomain Not applicableFile Mode* BinaryOffset* 0Chunking* AutoChunk Size* 1MBUse Watching NoUse Authentication NoProperties
Setting Value Select Version* Version 2MS URI* ms://kxevg/temp.csvAccount* kxevgTenant Not applicableDomain Not applicableFile Mode* BinaryOffset* 0Chunking* AutoChunk Size* 1MBUse Watching UncheckedUse Authentication UncheckedProperties
Setting Value Select Version* Version 2S3 URI* s3://kxs-prd-cxt-twg-roinsightsdemo/weather.csvRegion* eu-west-1Tenant kxinsightsDomain Not applicableAddress Style* VirtualFile Mode* BinaryOffset* 0Chunking* AutoChunk Size 1MBUse Watching NoUse Authentication No -
Click Next.
-
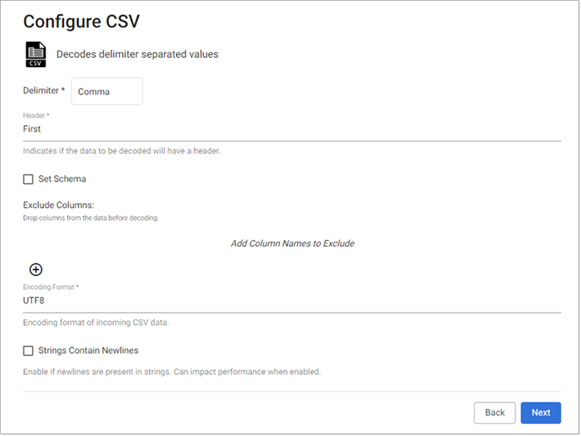
Click CSV in the newly-opened Select a decoder view, as the weather data is a CSV file. This opens the the Configure CSV view.
-
In the Configure CSV view, keep the default CSV decoder settings and click Next.
-
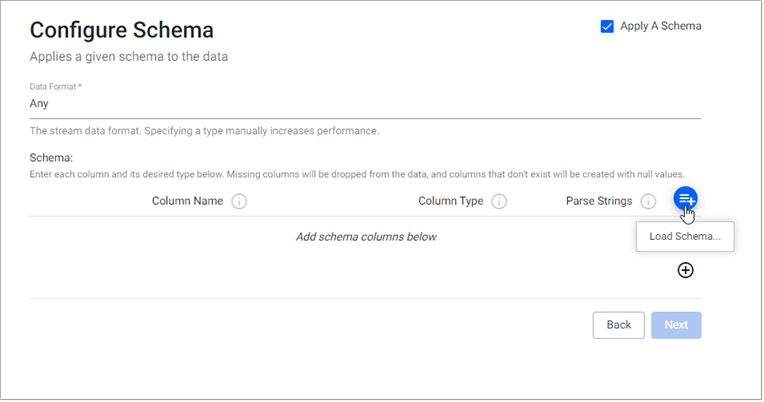
In the newly-opened Configure Schema view:
-
Leave the following unchanged:
Setting Value Apply a Schema EnabledData Format Any -
Click the Load Schema
 button, set the following values, then click Load:
Setting Value Database insights-demoTable weatherThis loads the schema columns for the weather table.
-
-
Click Next. This opens the Configure Writer view.
-
In the Configure Writer view, configure the writer settings as follows:
Setting Value Select Version* Version 2Database insights-demoTable weatherLeave the remaining settings unchanged.
-
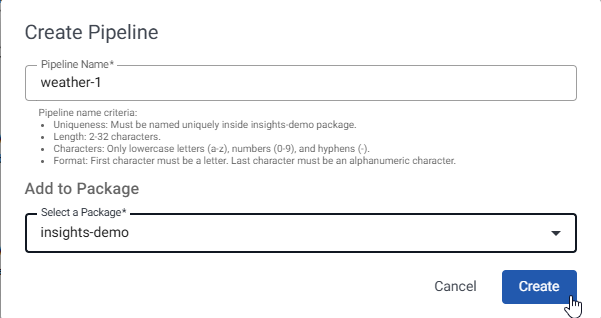
Click Create Pipeline. This opens a new pop-up dialog, Create Pipeline.
-
In the Create Pipeline pop up, set the following values:
Setting Value Pipeline Name weather-1Select a Package insights-demo -
Click Create.
If
insights-demodoes not show on the packages list, create it as described in the database creation guide. -
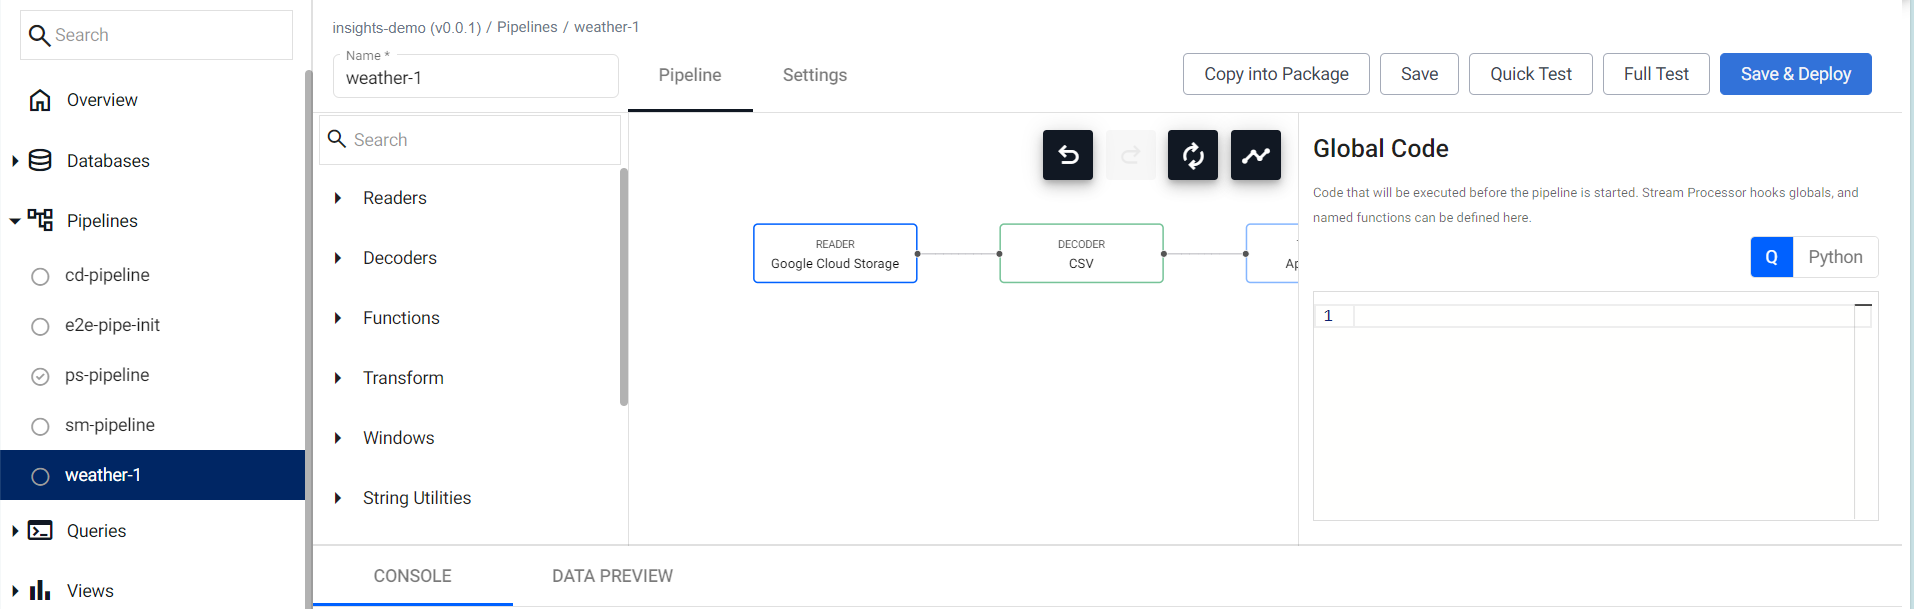
You can review the Pipeline as shown below. Note that the first node in the pipeline differs depending on the selected reader type.
-
Click Save.
At this stage, you are ready to deploy the pipeline to ingest the data.
Deploy the pipeline
Deploy the package containing the database and pipeline in order to ingest the data into the database.
-
On the left-hand side, click Packages under Manage.
-
Find the
insights-demopackage, click on the three dots beside it, and click Deploy.Note
It may take Kubernetes several minutes to spin up the necessary resources to deploy the pipeline.
-
Go to the Overview tab to check the progress of the pipeline under the Recently Deployed panel. The data is ready to query when Status is
Finished.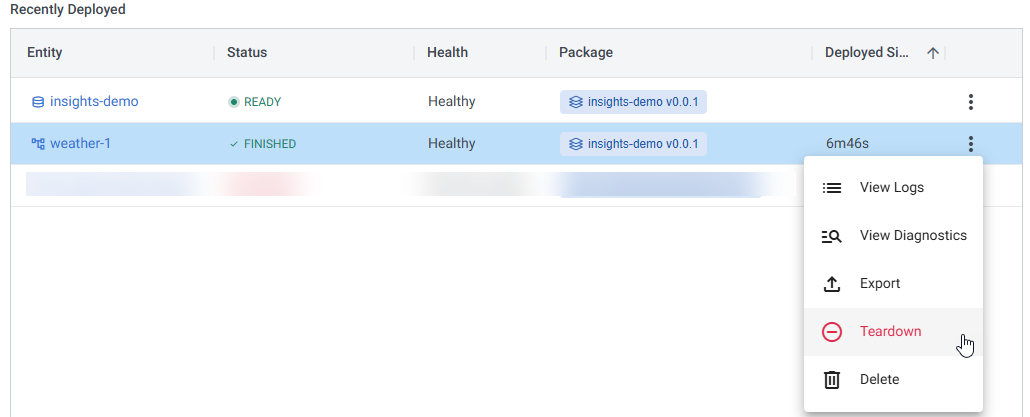
Pipeline warnings
Once the pipeline is running some warnings may be displayed in the Running Pipelines panel of the Overview tab, these are expected and can be ignored.
Pipeline teardown
Once the CSV file has been ingested, the weather pipeline can be torn down. This is a one-time batch ingest rather than a continuous stream, so the pipeline is no longer required after the data has been loaded.
While deployed, pipelines continue to consume cluster resources. Tearing down the pipeline frees these resources and helps avoid unnecessary usage.
To tear down the pipeline:
-
Click the three vertical dots for
weather-1in the Recently Deployed panel on the Overview tab. -
Click Teardown.
-
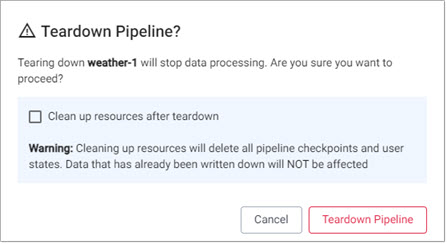
Check Clean up resources after teardown as these are no longer required now that the CSV file has been ingested.
-
Click Teardown Pipeline.
Troubleshoot pipelines
If any errors are reported they can be checked against the logs of the deployment process. Click View diagnostics in the Running Pipelines panel of the Overview tab to review the status of a deployment.

Next steps
Now that data has been ingested into the weather table you can:
Further reading
Use the following links to learn more about specific topics mentioned in this page: