Create and run reports
Create the report template
Use the Report Management dashboard component to set up the report template:
- Generate a new report template. Click on the Template Editor tab, then the Create button, and name the template.
- Select the report analytic that provides the basis of the report.
- Select the target engine.
- Select the report action analytic(s). This determines how the report data are presented.
Create the report instance
After saving the template, use the Instance Editor tab of the Report Management dashboard component to create a report instance and set the scheduling and action parameters.
- Select the Create button at the top of the screen and name the report instance. Associate it with the report template created previously.
- Edit and save the report instance details.
-
Schedule the report:
once,daily,weekly,monthly, or at a specified time.
-
Set the permission for users and user groups.
- In the Advanced Details tab set an override target engine – if you want the report instance to query a different process. Select additional report actions or set parameters for existing report actions. For example, the mailing list and file location are set here.
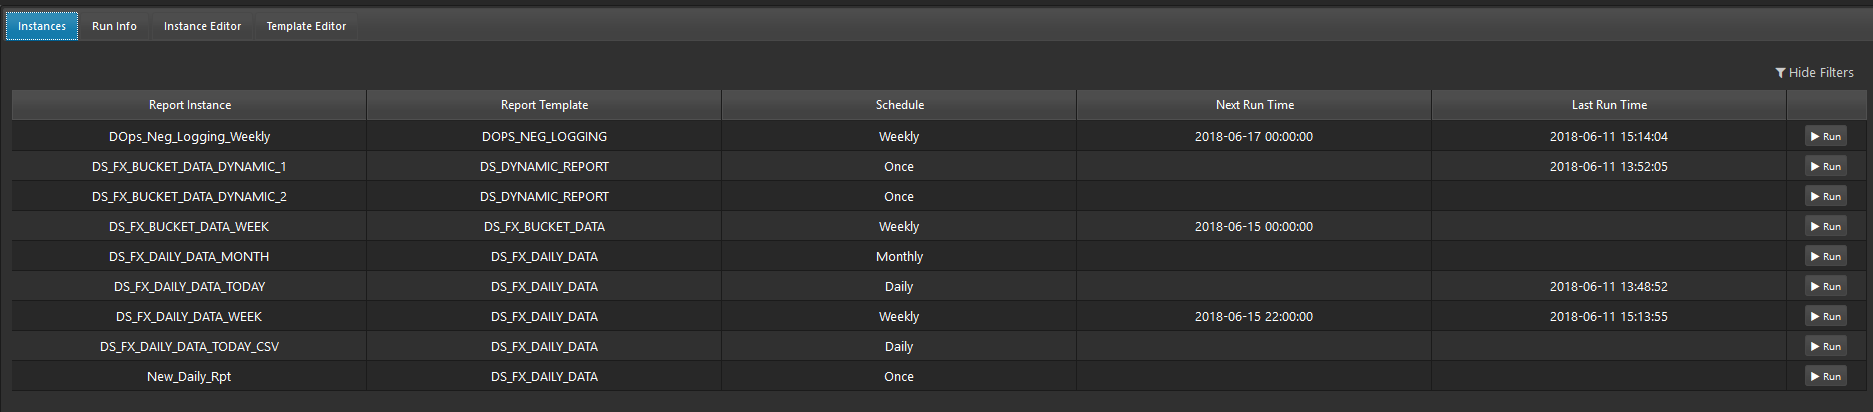
Run the report
Use the Run button (in the Report Management dashboard component’s Instances tab) to run a report manually. With the scheduling parameters set, the report can either be run directly from the Instances tab, or set to run as scheduled, e.g. at end of day.
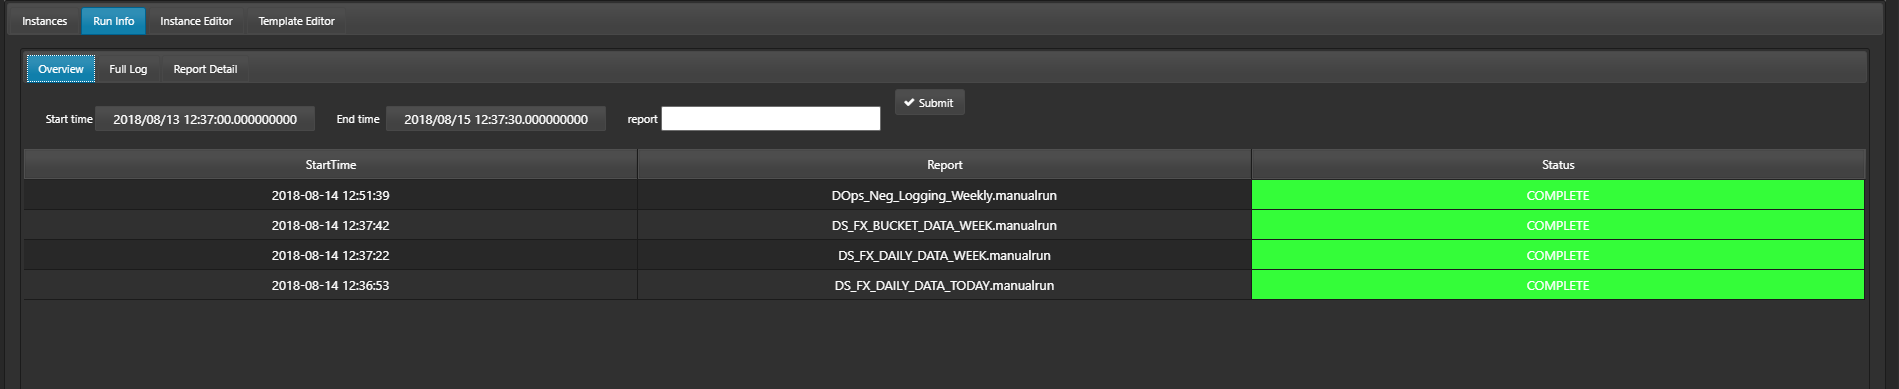
The Run Info tab shows information about past reports. This can be searched by report name and start and end times.
Displaying report management in UTC
To have the run information of past reports displayed in UTC time instead of server time a configuration parameter should be created called DS_REPORT_UTC:DEFAULT

This should have an attribute called UTC of boolean type. Set this to true and restart the environment to display run info in UTC time, i.e. restart Control and the report workflow.