KX Connect
KX Connect is an application provided as part of the KX Enterprise KX Delta Platform application. It provides the means to design and implement a custom external facing API on to of any solution built within the KX Delta Platform framework. Data can be retrieved via a RESTful and WebSocket interface and streaming data is available through the WebSocket interface. The primary goals of KX Connect are:
- Provide a dynamic and secure API interface to solutions
- Structured self-documenting data modelling
- Data retrieval on request and streaming
- Highly extendable for communication and messaging protocols
- Scalable
Architecture
Connect provides a web-facing interface between clients looking for data and the backend servers holding the data. Two data retrieval means are available:
- Request/Response - A client requests specific data available via a defined API
- Streaming Data - A client requests streaming updates of data available via a defined API
Connect will expose the ability to authenticate a client; handle sessions data; request/response executions against the application tier and manage subscriptions on a per client basis.
RESTful interface
A RESTful interface is exposed via Connect which accepts requests messages in the form of JSON messages. These messages are translated; authorized and executed on the application tier via scalable query management nodes with the results being mapped to specific clients and published back as response messages in JSON form. More info on how to build these messages and manage responses is in the Message Formats section.
WebSocket interface
A WebSockets interface is also available; which similarly supports a request/response query structure using JSON as the messaging protocol. It also offers the ability to subscribe to streaming updates for APIs supported through Streaming Analytics within the solution. See Message Formats for more information.
Dynamic and secure API
The client API is built on server start-up; and is composed of Analytics defined and implemented as functions in q. As well as the API being dynamically built, so is the documentation. This allows the developer to set up the API as he requires and have the documentation needed by the client to login and access the API auto-generated and available at the Connect for KX base end-point within the deployment. See API Documentation for more information for an example API and documentation.
The API interface is SSAE16 compliant with regular security reviews covering the OWASP top ten specifically.
Like Kdb+, Connect is a high performance interface and fully scalable. A single node can have more than 100 clients, 10 streams of data, 4 updates a second; resulting in 3500 mgs/second.
KX Connect API
The specification is the representation of the Connect API. It lists everything that is exposed on the API and breaks them down in to three parts, Requests, Responses and Entities. Requests and Responses are the inputs and outputs from the system. Each Entity is essentially a grouping of methods (or KDB analytics) that can be invoked on the API by a client. A method has inputs and outputs defined, the Request and Response, and it maps to a single Kdb+ analytic that it will invoke.
At application start-up the API is dynamically built from the details of all public analytic groups. To expose an analytic over the API the following steps need to be fulfilled.
API definition requirements
Naming conventions:
- Analytic Groups should be named
API.<groupName> - Analytics should be named
.<groupName>.<functionName>
Analytic Group Entity requirements:
- Must be a public Analytic Group
- API Analytics must be in Analytic Group
- Analytic Group must be permissioned for the calling user(s)

Analytic Entity Requirements:
| field name | description | required | example |
|---|---|---|---|
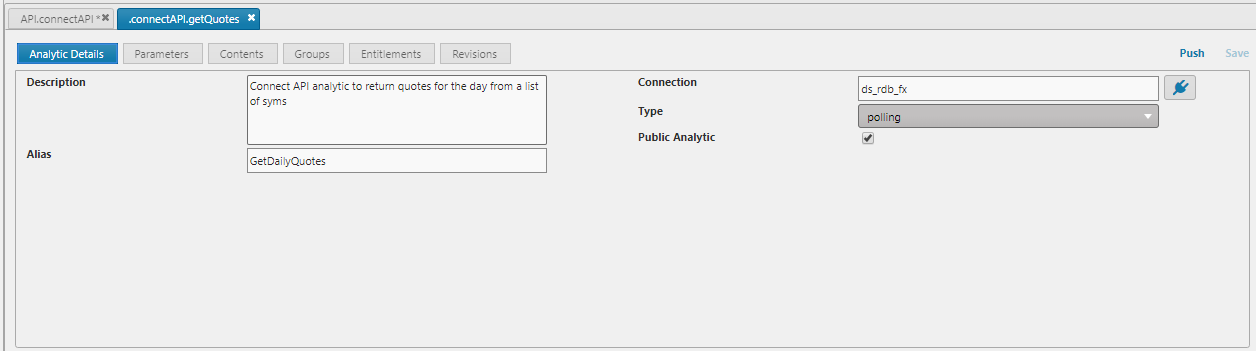
| Description | Used for auto documentation to detail what the analytic is to the end user | No | Get Daily Trades for provided ccy pairs |
| Alias | User friendly name for the analytic. Used in auto documentation and API construction | Yes | GetDailyTrades |
| Connection | Connection or Connection Group the Analytic should be executed on | Yes | ds_rdb_fx |
| Type | Polling/streaming analytics | Yes | polling |
| Public Analytic | Whether the Analytic is exposed | Yes | Yes |
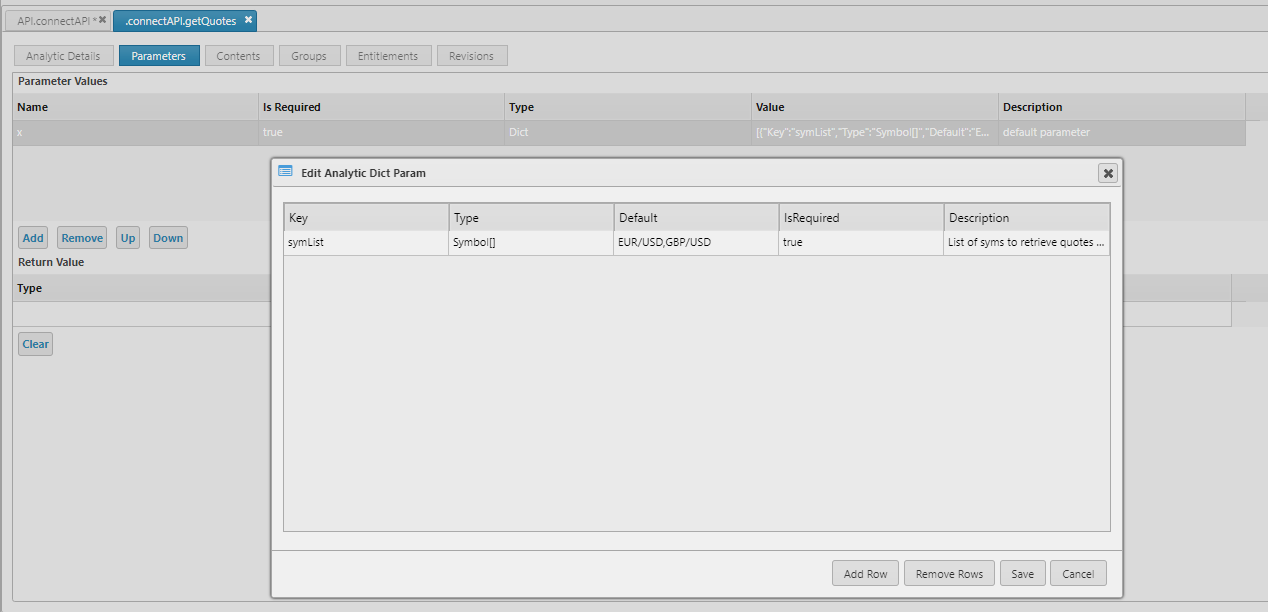
In addition, the Analytic function must follow a specific structure:
- Zero or one input argument
- Input argument must be a dictionary or table containing only types detailed in Table 2. No nested types are support; nor are inconsistent number of keys/columns
- Zero or one return arguments can be defined
- The returned data must be a dictionary or table (or exception)
- If no return type defined, API auto documentation will be unable to provide an example of data returned, so if possible providing the return type is desirable
KX Connect supports atomic types for input and return arguments. A full list of support is detailed below along with their associated Java object types.
Arrays are also supported
The kdb+ type is the same value, but positive; and the Java object is an Array of that type.
   kdb+ type     Java object type
----------------------------------
boolean     -1   java.lang.Boolean
byte        -4   java.lang.Byte
short       -5   java.lang.Short
integer     -6   java.lang.Integer
long        -7   java.lang.Long
float       -8   java.lang.Double
double      -9   java.lang.Double
character  -10   java.lang.Character
symbol     -11   java.lang.String
timestamp  -12   java.sql.Timestamp
month      -13   java.lang.String
date       -14   java.sql.Date
dateTime   -15   java.util.Date
timespan   -16   java.lang.String
minute     -17   java.lang.String
second     -18   java.lang.String
time       -19   java.sql.Time
Message formats
Currently KX Connect supports JSON messages sent over a RESTful API or WebSockets API.
The base message structure for both RESTful and WebSockets is the same; with minor additional wrapping for WebSocket messages to support the authorization information.
The first two characters of a property name must be lower-case.
So for example MYID, mYID and MyID are all invalid but myID is acceptable.
ConnectRequest
| parameter | description | mandatory |
|---|---|---|
| type | The type of the ConnectRequestMessage being sent in the request. Its name will always have the suffix Req |
Yes |
| msg | The ConnectRequestMessage – always a list structure. |
Yes |
| id | For tracking purposes a string value ID can be added to the message. This will be returned on the response message. A UUID value that must be 16 bytes in length | No |
| date | Date is a timestamp at which the message was generated. Date is the RFC1123 format. | Yes |
The msg field is an array containing the contents arguments for the request. These will differ depending on the API that has been built. The auto-generated API document will have details of this structure along with examples.
Example:
{ "msg" : [{ "id" : "1", "amount" : 10000 }], "type" : "RateStreamReq", "id" :
"e133598e-7b9e-429a-b3e5-bda881c47024", "date" : "Wed, 24 Sep 2014 18:35:53 UTC"
}
ConnectResponse
| parameter | description | mandatory |
|---|---|---|
| type | The type of the ConnectResponseMessage being sent in the response. Its name will always have the suffix Resp |
Yes |
| id | The ConnectResponseMessage – always a list structure |
Yes |
| msg | The tracking string value ID provided at request time; or one generated by the Connect API. A UUID value that will be 16 bytes in length | Yes |
| date | Date is a timestamp at which the message was generated. Date is the RFC1123 format. | Yes |
The msg field will be the contents of the response; the data in a structure defined by the API; or dynamically. Full details of each APIs msg structure will be in the auto-generated API document along with examples.
Single-result example:
{ "msg" : [ { "symbol" : "EUR/USD", "instrumentType" : "textValue", "path" :
"textValue", "product" : "EUR/USD", "asset" : "EUR", "counterAsset" : "USD",
"counterAssetTradeable" : true, "primaryUnit" : "textValue" } ], "type" :
"GetInstrumentsResp", "id" : "e133598e-7b9e-429a-b3e5-bda881c47024", "date" :
"Wed,24 Sep 2014 18:35:53 UTC" }
Multiple-result example:
{
"type" : "GetMarketDepthResp", "msg" : [ { "level" : 3, "bidParty" : "textValue"
,"bidVolume" : 1.2354235, "bidPrice" : 1.2354235, "askPrice" : 1.2354235,
"askVolume" : 1.2354235, "askParty" : "textValue", "spotDec" : "textValue",
"pricePrec" : "textValue" }, { "level" : 3, "bidParty" : "textValue", "bidVolume"
: 1.2354235, "bidPrice" : 1.2354235, "askPrice" : 1.2354235, "askVolume" :
1.2354235, "askParty" : "textValue", "spotDec" : "textValue", "pricePrec" :
"textValue" }, { "level" : 3, "bidParty" : "textValue", "bidVolume" : 1.2354235,
"bidPrice" : 1.2354235, "askPrice" : 1.2354235, "askVolume" : 1.2354235,
"askParty" : "textValue", "spotDec" : "textValue", "pricePrec" : "textValue" } ],
"id" : "e133598e-7b9e-429a-b3e5-bda881c47024",
"date" : "Wed, 24 Sep 2014 18:35:53 UTC"
}
No-results example:
{ "msg" : [], "type" : "InstrumentResp",
"id" : "e133598e-7b9e-429a-b3e5-bda881c47024" }
ErrorResponse
| parameter | description | mandatory |
|---|---|---|
| group | If the original ConnectRequest was properly parsed by the API the group requested will be returned |
No |
| method | If the original ConnectRequest was properly parsed by the API the method requested will be returned |
No |
| exceptionMessage | A message for the error that occurred | Yes |
| requestMessage | The original ConnectRequest message if it could be parsed. This will also include the tracking ID if available |
Yes |
Example error response:
{"msg":[{"requestMessage":{"type":"LoginReq","msg":[{"username":"","password":
"password"}],"id":"e520e6c9-63a0-45e0-88e9-68d499207998","date":
"Fri, 28 Jun 2019 13:18:58 GMT"},"method":"login","exceptionMessage":
"Field 'username' may not be empty.","group":"Auth"}],"type":
"ErrorResponseMessage","id":"e520e6c9-63a0-45e0-88e9-68d499207998",
"date":"Fri, 28 Jun 2019 13:18:59 GMT"}
WebSocket messages
As mentioned, WebSockets require additional wrapping around these messages to provide additional details, which are needed as there are no HTTP headers to use.
ConnectWebSocketRequestMessage
| parameter | description | mandatory |
|---|---|---|
| content | The main content of the message. Contains the group, method and ConnectRequestMessage as detailed earlier | Yes |
| authHeader | The authorization header built from the message, username and sessionId. See Authorized WebSocket request for details on how this is constructed | Yes |
An example WebSocketRequestMessage with the additional wrapping is shown below:
{ "content" : { "group" : "Taker", "method" : "subVwap", "request" : { "type" :
"SubVwapReq", "msg" : [ { "sym" : "EUR/USD", "size" : 1.2354235 } ], "id" :
"e133598e-7b9e-429a-b3e5-bda881c47024", "date" : "Tue, 11 Nov 2014 14:47:11 GMT"
}},
"authHeader" : { "authorization":"usernameXXXXX:vKIWIeN193434uQIVNdojJYcJMPo="}
}
ConnectWebSocketResponseMessage
Responses will always be received over WebSockets in the form:
| parameter | description | mandatory |
|---|---|---|
| group | The target group for the response | Yes |
| method | The target method for this response | Yes |
| response | The core ConnectResponse message as defined earlier |
Yes |
An example ConnectWebSocketResponseMessage with the additional wrapping:
{ "group" : "Taker", "method" : "getlnstruments", "response" : { "msg"
: [{ "symbol" : "EUR/USD", "instrumentType" : "textValue", "path" :
"textValue", "product" : "EUR/USD", "asset" : "EUR", "counterAsset" :
"USD", "counterAssetTradeable" : true, "primaryUnit" : "textValue" }],
"type" : "GetInstrumentsResp", "id" : "e133598e-7b9e-429a-b3e5- bda881c47024"
} }
Similarly to RESTful responses, multiple rows can be returned in a single ConnectWebSocketResponseMessage:
{ "group" : "Taker", "method" : "subVwap", "response" : { "type" :
"SubVwapResp", "msg" : [ { "time" : "2014-08-25T19:35:53.260000000",
"sym" : "EUR/USD", "price" : 1.2354235, "size" : 1.2354235, "id" :
32552352 }, { "time" : "2014-08-25T19:35:53.260000000", "sym" :
"EUR/USD", "price" : 1.2354235, "size" : 1.2354235, "id" : 32552352 },
{ "time" : "2014-08-25T19:35:53.260000000", "sym" : "EUR/USD", "price"
: 1.2354235, "size" : 1.2354235, "id" : 32552352 } ], "id" :
"e133598e-7b9e-429a-b3e5-bda881c47024" } }
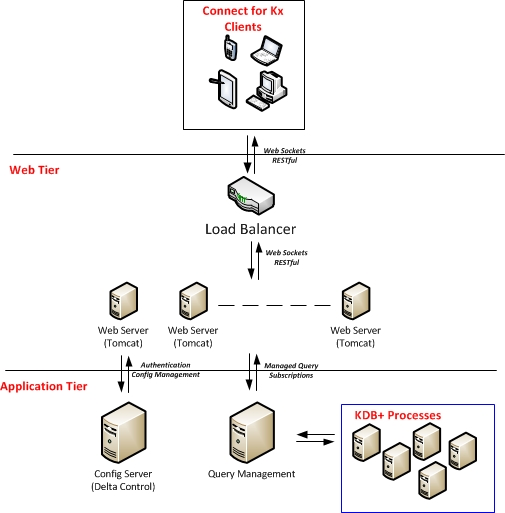
Security and authentication
A fundamental part of the Connect API is the ability to interact securely. Clients of the system should be able to able to authenticate with the system, have their interactions managed through a session and have an authorized set of functions they can perform through the API.
How KX Connect achieves this is outlined in the diagram below:
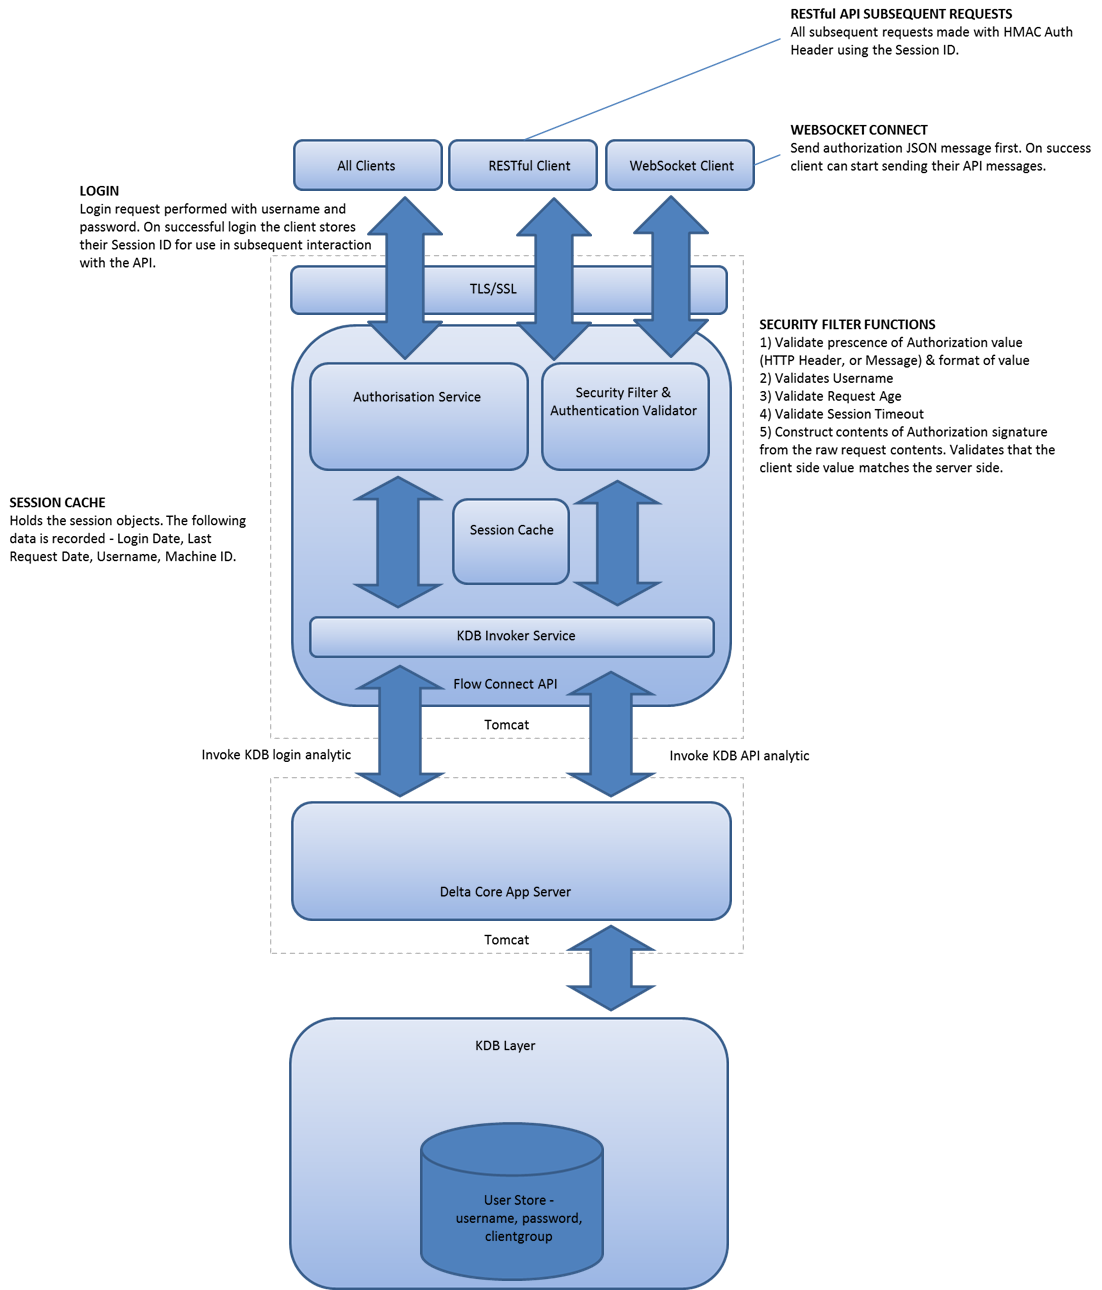
The details to authenticate and authorize messages is detailed in full within the auto-generated Connect for KX API endpoint within your deploy. This page provides also provides these details with examples.
Security can be broken down into a number of sections:
Authentication
All users accessing the KX Connect API must log in before they can do any further requests. Once logged in they will have a unique session ID assigned that they will use for further authentication and authorization in the system. The authentication component is exposed over a RESTful interface and delegates authentication to KX Control.
Login
The login request is made using a POST call to the following path:
https://<host>:<port>/connect/api/auth/login
Client must send a ConnectRequest JSON message of type LoginReq with their credentials. For example:
{ "msg" : [{ "username" : "user", "password" : "userPassword" }],
"type" : "LoginReq", "id" : "e133598e-7b9e-429a-b3e5-bda881c47024",
"date" : "Thu, 25 Sep 2014 07:25:41 GMT" }
Their response will be a ConnectResponse JSON message of type LoginResp containing their session identifier. For example:
{ "msg" : [{ "sessionId" : "rvsJFFNFKSYbnnn23" }], "type" :
"LoginResp", "id" : "e133598e-7b9e-429a-b3e5-bda881c47024" }
Logout
The logout request is made using a POST call to the following path:
https://<host>:<port>/connect/api/auth/logout
Clients must send a ConnectRequest JSON message of type LogoutReq with their user identifier (username and last 5 characters of session ID concatenated). For example:
{ "msg" : [{ "userldentifier" : "usernnn23" }], "type" : "LogoutReq", "id" :
"e133598e-7b9e-429a-b3e5-bda881c47024", "date" : "Thu, 25 Sep 2014 07:25:41 GMT"
}
Their response will be a ConnectResponse JSON message of type LogoutResp containing their session identifier. For example:
{ "msg" : [{ "userldentifier" : "usernnn23" }], "type" : "LogoutResp",
"id" : "e133598e-7b9e-429a-b3e5-bda881c47024" }
Session management
Sessions will be managed on the KX Connect API server post login. All requests are validated for compliance with the Connect security component. Hard and soft session expiry will exist for all transports and when expiry occurs the client will be forced to login again. Soft session is prolonged on every request from a client. Client session will be pinned to one IP only. The time between request creation on client side and the time they are received on the server will be validated. Failing the security checks on a message immediately terminates a session.
Authorized RESTful request
Prerequisite: client must be logged in and have a valid session ID.
When making a request to the API, the client will need to create an Authorization HTTP header string so that their data can be validated on the server side. This will allow us to ensure that no malicious tampering of data can occur as well as preventing man in the middle attacks.
The steps to do so can be summarized as:
- Build
StringToSign - Create message signature
- Set authorization
The selected elements used to construct the signed input string are:
| element | description or example |
|---|---|
| HTTP-Verb | Usually POST |
| RequestPath | URL path: {protocol}://{host}:{port}/connect/api/{group}/{method} |
| username | Username used at login |
| Content-MD5 | CryptoJS.MD5("{"type":"MethodNameReq","msg":[{"param1":"value1","param2":"value2"}],"id" : "e133598e-7b9e-429a-b3e5-bda881c47024", "date" : "Tue, 11 Nov 2014 14:47:11 UTC"}") |
| Content-Type | application/json |
| Date | Date in RFC1123 format: EEE, dd, MMM yyyy HH:mm:ss zzz |
| sessionId | Session ID of the valid login |
Using the above information, the StringToSign becomes
StringToSign = HTTP-Verb + "\n" + RequestPath + "\n" + username + "\n" +
Content-MD5 + "\n" + Content-Type + "\n" + Date + "\n" + sessionId;
We then need to create a signature
Signature = Base64( HMAC-SHA1( sessionId, UTF-8-Encoding-Of( StringToSign ) ) );
which is then used to create an authorization header using the user name and last 5 characters of the session ID along with the signature value.
// The AUTHORIZATION HTTP header is the username with the last 5 characters
// of the session id, colon, Signature value.
Authorization = username + sessionId.substring(sessionId.length() - 5,
sessionId.length()) + ":" + Signature;
HMAC-SHA1
HMAC-SHA1 is an algorithm defined by RFC 2104. The algorithm takes as input two byte-strings, a key and a message. For Connect API request authentication, use the session ID as the key, and the UTF-8 encoding of the StringToSign as the message. The output of HMAC-SHA1 is also a byte string, called the digest. The Signature request parameter is constructed by base-64 encoding this digest.
Authorized WebSocket request
Prerequisite: Client must be logged in and have a valid session ID.
Due to a limitation within WebSockets and its fallback SockJS it is not possible to add an authorization header to the initial WebSocket request. A new approach needs to be used as a replacement but still building on the same style used as part of the HMAC algorithm used for the RESTful approach. The following sections discuss this approach in detail.
After user login (via REST), unlike the RESTful interface the first message sent from client to server when the WebSocket opens must be a WebSocketAuthenticationReq JSON message. This authorizes the WebSocket connection.
WebSocket authorization request
This is a handshake message that needs to be validated before any other messages can be sent on the WebSocket and contains the authorization token built in a similar manner to the RESTful authorization token:
| element | description/example |
|---|---|
| RequestPath | /connect/WebSocket |
| username | Username used at login |
| Content-Type | application/json |
| Content-MD5 | The content message hashed using MD5, e.g. CryptoJS.MD5("{"type":"heartbeatReq","msg":[{"userIdentifier":"ashtakbvart"}],"id":"0a8b925b-c68c-49b9-8c63-b4af76d1d6de","date":"Tue, 01 Nov 2016 09:54:22 GMT"}") (Not required for WebSocket authorization message.) |
| Date | Date in RFC1123 format: EEE, dd, MMM yyyy HH:mm:ss zzz |
| sessionId | Session ID of the valid login |
Using the above information, for the WebSocket authorization message, the StringToSign becomes:
StringToSign = RequestPath + "\n" + username + "\n" + Content-Type + "\n"
+ Date + "\n" + sessionId;
This is then used to create a signature and then the final authorization token:
Signature = Base64( HMAC-SHA1( SessionId, UTF-8-Encoding-Of( StringToSign ) ) );
// The authorization value is the username with the last 5 characters of the
session id, colon, Signature value.
authorization = username + sessionId.substring(sessionId.length() - 5,
sessionId.length()) + ":" + Signature;
This value is then added to the ConnectRequest JSON message of type WebSocketAuthenticationReq. For example
{"msg":[{"authorization":"ashXXXXX:K05ZMwXy/dgzJxGSZCEdm/IFr7c="}],"type":
"WebSocketAuthenticationReq", "id" : "e133598e-7b9e-429a-b3e5-bda881c47024"
, "date" : "Thu, 25 Sep 2014 08:57:02 UTC" }
The response received will be a connectResponse JSON message of type WebSocketAuthenticationResp. For example:
{"msg":[{"authorized":true}],"type":"WebSocketAuthenticationResp" ,
"id" : "e133598e-7b9e-429a-b3e5-bda881c47024",
"date" : "Thu, 25 Sep 2014 08:57:02 UTC" }
WebSocket query request
Once connected securely, the API client will have a response confirming authorized (true) and can now send WebSocket-based requests.
For example:
{"content":{"group":"Taker","method":"subVwap","request":{"type":"SubVwapReq",
"msg":[{"sym":"EUR/USD","size":1.2354235}],"id":
"e133598e-7b9e-429a-b3e5-bda881c47024","date":"Tue, 11 Nov 2014 14:47:11 GMT"}},
"authHeader":{"authorization":"username:vKIWLeN193434uQIVNdojJYcJMPo="}}
The StringToSign is constructed by MD5 hashing the content value above. For example
Content-MD5 =
CryptoJS.MD5("{"group":"Taker","method":"subVwap","request":{"type":
"SubVwapReq", "msg":[{"sym":"EUR/USD","size":1.2354235}],"id":
"e133598e-7b9e-429a-b3e5-bda881c47024",
"date":"Tue, 11 Nov 2014 14:47:11 GMT"}}")

StringToSign = RequestPath + "\n" + username + "\n" +
Content-MD5 + "\n" + Content-Type + "\n" + Date + "\n" + sessionId;
The signature and authorization header construction is as detailed before.
// The Signature producing algorithm is
// Signature = Base64(HMAC-SHA1(SessionId, UTF-8-Encoding-Of(StringToSign)));
// The authorization value is the username with the last 5 characters of the
// session id, colon, Signature value.
authorization = username + sessionId.substring(sessionId.length() - 5,
sessionId.length()) + ":" + Signature;
Creating authorization client side
To create an authorization signature there are many options to use client-side. If using Java code it is possible to use javax.crypto.Mac library. In a Web app the JavaScript library CryptoJS is the one recommended. For Python, Crypto.Hash. Below is an example of creating the authorization data using a WebSocket.
<script
 src="http://cdn.sockjs.org/sockjs-0.3.min.js">
<script
 src="http://crypto-js.googlecode.com/svn/tags/3.1.2/build/rollups/hmac-md5.js">
<script
 src="http://crypto-js.googlecode.com/svn/tags/3.1.2/build/rollups/hmac-sha1.js">
<script type="text/JavaScript">
  var ws = new WebSocket("ws://host:port/WebSocket);
  ws.onopen = function () {
    var date=new Date();
    var requestPath = "/sockjs/WebSocket";
    var contentType = "application/json";
    var stringToSign = [requestPath , "username", Content-MD5, contentType,
                            Date, "sessionId"].join("\n");
    var signature = CryptoJS.HmacSHA1(stringToSign , "sessionId");
    var date = date.toUTCString();
    var signature = signature.toString(CryptoJS.enc.Base64);
    ws.send('{"msg":[{"authorization":"ashXXXXX:K05ZMwXy/dgzJxGSZCEdm/IFr7c="}],
          "type":"WebSocketAuthenticationReq", "id" :
          "e133598e-7b9e-429a-b3e5-bda881c47024", "date" :
             "Thu, 25 Sep 2014 08:57:02 UTC" }');
       }
<script>
Streaming data
Prerequisites
Must be logged in and have an authorized WebSocket as detailed in Authorized WebSocket request.
Your client should also have a Streaming Analytic in place to subscribe to. See KX Control documentation for how to do this.
Sending streaming data to a client is based upon the same principles as sending a single response; but data will continually be pushed to the client until the client unsubscribes.
The user must create an authorization as above, which is then added to the request to start the subscription.
For example:
{ "content" : { "group" : "connectAPI", "method" : "VWAP", "request" : { "type"
: "VWAPReq", "msg" : [ { "sym" : "EUR/USD", "size" : 1000 } ], "id" :
"e133598e-7b9e-429a-b3e5-bda881c47024", "date" : "Thu, 22 Feb 2018 12:12:38 GMT"
 } },
"authHeader" : {"authorization" : "usernameXXXXX:vKIWLeN193434uQIVNdojJYcJMPo="}
}
Further examples based on your API will be available the Connect endpoint within the deploy.
Upon receiving the request the KX Connect server will response with a SubResp message to indicate whether the subscription was successful.
After this the client will receive streaming updates in the format details in the Connect endpoint auto documentation in the deploy.
There are two ways to unsubscribe: cancel a single subscription
{ "content" : { "group" : "Streaming", "method" : "unsubscribe", "request" :
{"type" : "UnsubscribeReq", "msg" : [ { "subId" : "textValue" } ], "id" :
"e133598e-7b9e-429a-b3e5-bda881c47024", "date": "Thu, 22 Feb 2018 12:12:38 GMT"}
},
"authHeader" : {"authorization": "usernameXXXXX:vKIWLeN193434uQIVNdojJYcJMPo="}
}
Or cancel all subscriptions
{ "content" : { "group" : "Streaming", "method" : "unsubscribeAll", "request" :
{"type" : "UnsubscribeAllReq", "msg" : [ { } ], "id" :
"e133598e-7b9e-429a-b3e5-bda881c47024", "date": "Thu, 22 Feb 2018 12:12:38 GMT"}
},
"authHeader" : { "authorization": "usernameXXXXX:vKIWLeN193434uQIVNdojJYcJMPo=" }
}
Building your client
Connect is technology-agnostic, and a user can communicate with it from any programming language. There are small sample clients for JavaScript (this doc), Java, and Python (at the connect endpoint) examples. However clients can be built to connect to and communicate with a Connect HTTP endpoint. All that is required is the ability to build the appropriate JSON message structures and encrypted authorization values as detailed in Message formats and Security and authentication.
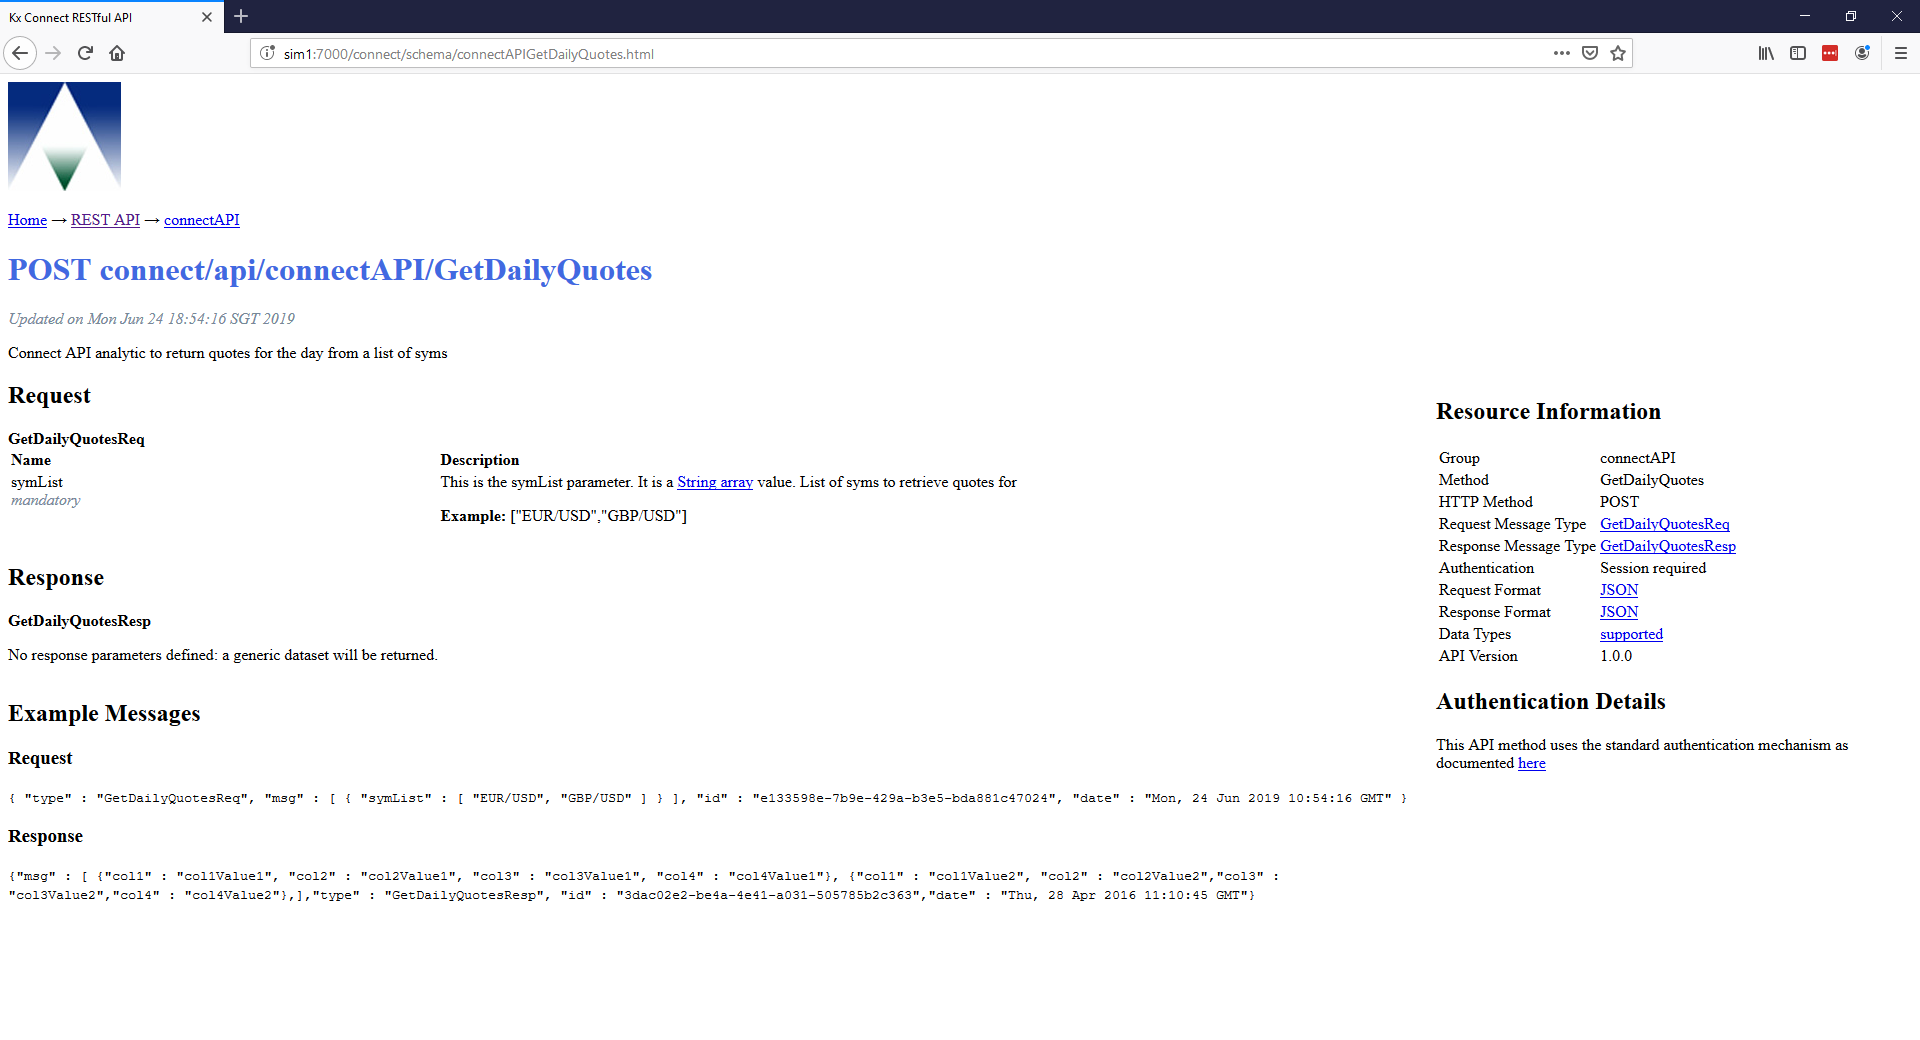
API documentation
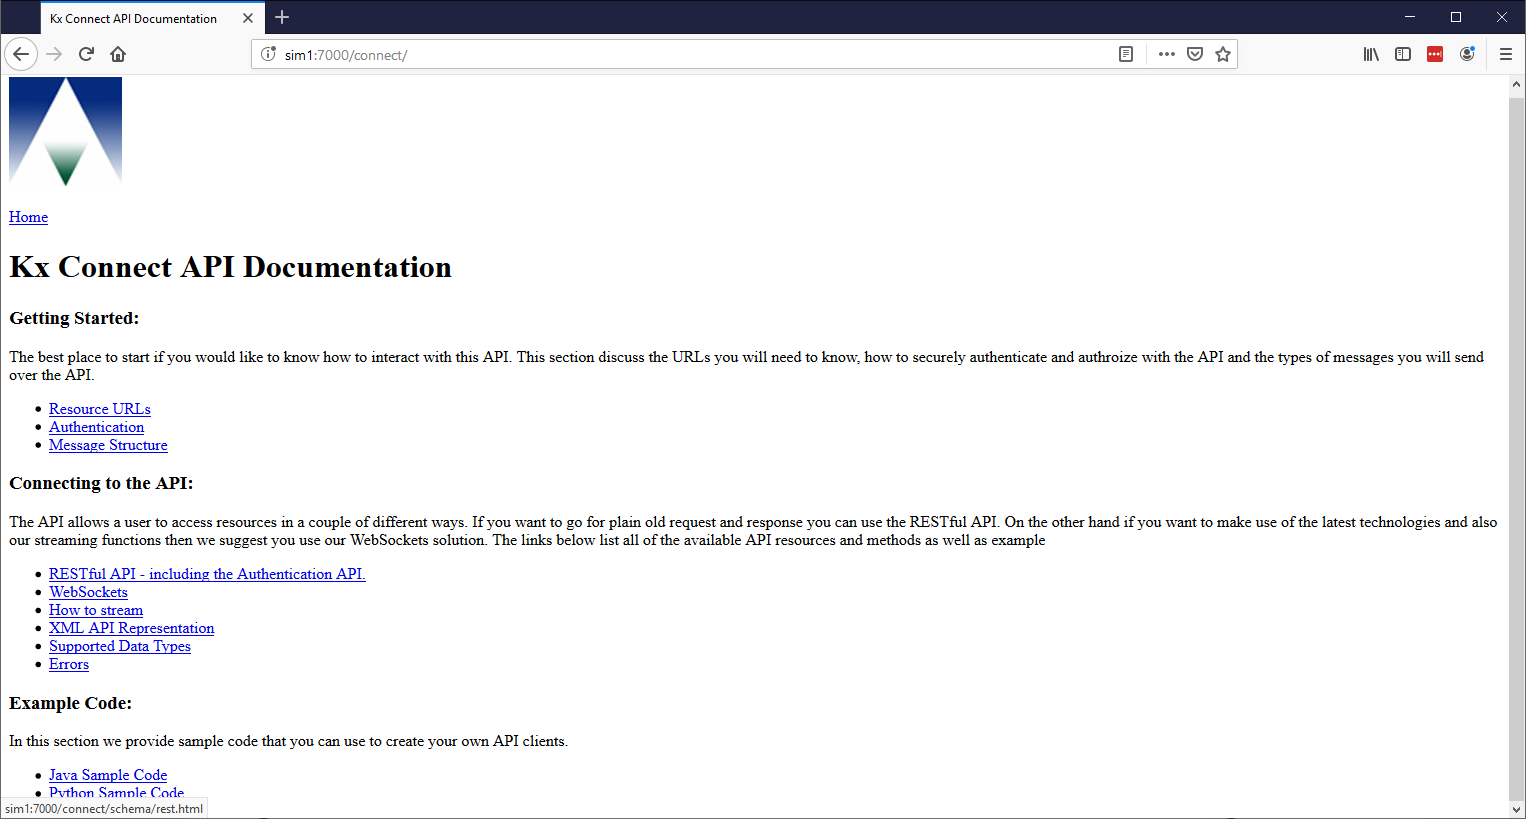
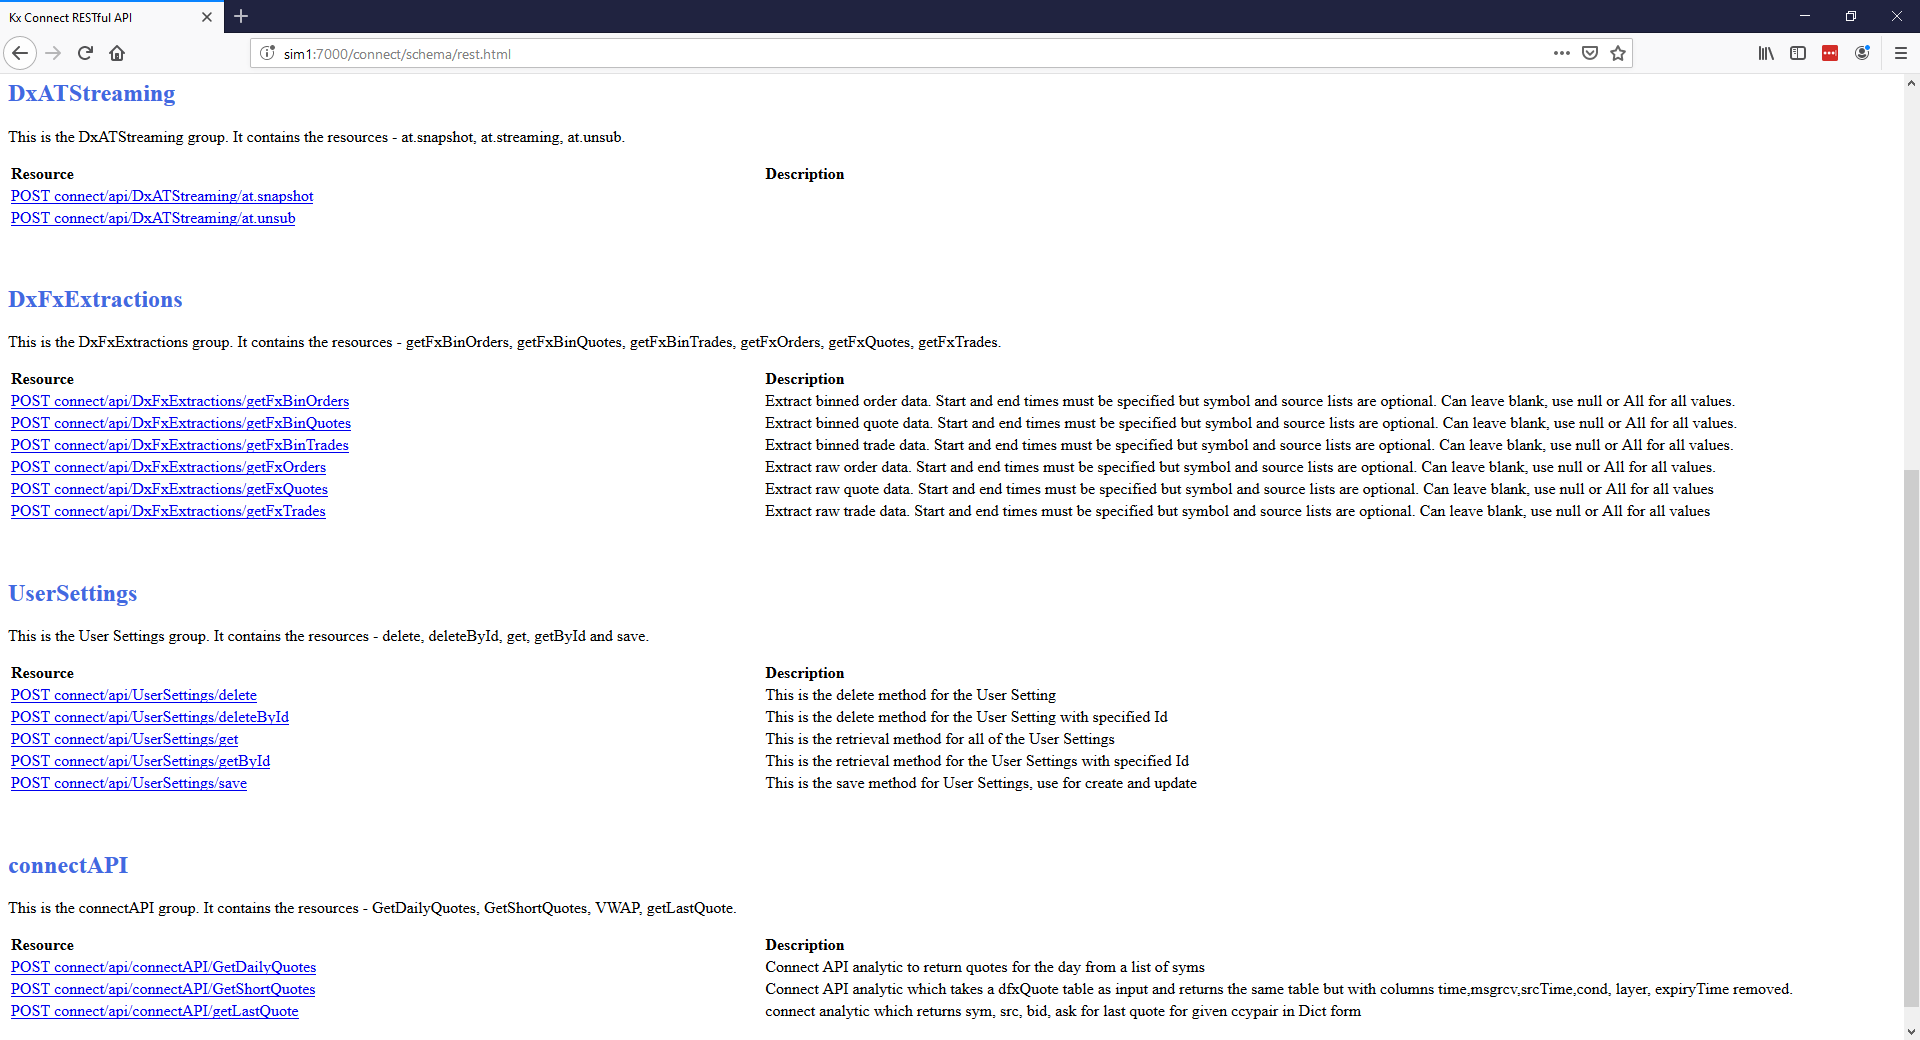
Connect is focused on the ability to generate an API dynamically based upon the solutions needs. The API is built up from Analytics appropriately configured in your solution and the documentation of the API is also dynamically generated from the same analytics and their meta data. This can be viewed on the deployed system at your KX Connect endpoint: https://host:port/connect.
Navigating through the WebSockets and RESTful links highlight the available API, descriptions, parameters and example messages. It also includes everything required to log in, authenticate and build the message authorization information for communicating from your client to your solution over HTTP.
Configuration
JSON representation of numerical data can be controlled by the environmental variable JSON_DECIMAL_FORMAT from within the delta.profile. By default this is set to
export JSON_DECIMAL_FORMAT=0.#######