Alert management dashboard
Deprecation
Modern browsers no longer support Flash applications. As of KX Delta Platform v4.6.0 alerts should be configured using ControlUI.
New Alerts can be created within the Flex Dashboards located within your deploy https://<host>:<port>/delta, DS_AlertOverview dashboard.
Use this dashboard to
- define alert criteria and alert instances
- define actions to be taken when alerts are triggered
- suspend emails generated by certain alerts
- view logs of alert activity
Advanced users only
The Alert Management dashboard is for advanced users only. A standard user, who wants only to use and configure alerts, need not access this screen.
Alerts editor
Use this tab to define alerts and the conditions that will trigger them.
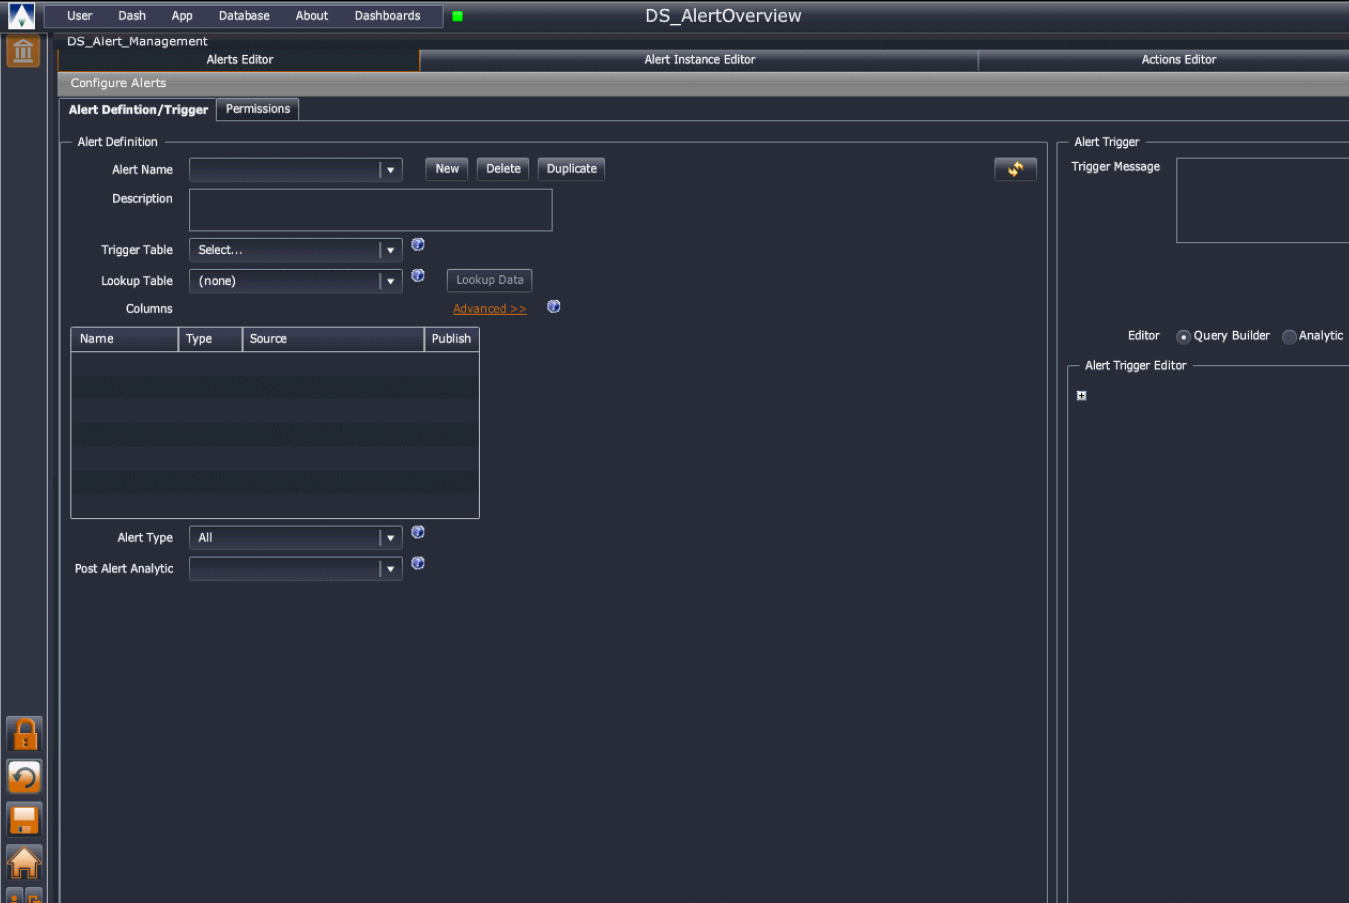
Alert definition
The Alert Definition/Trigger tab contains the details of each alert.
- Alert Name
- A drop-down list of pre-defined alerts, as described in Predefined Alerts. A new alert can be created by selecting New and entering an alert name. Required.
- Description
- A text description of the alert.
- Trigger Table
- A table which contains the data to configure alerts. Updates from this table will trigger an alert based on the trigger conditions set. For example, to monitor bid and ask prices select a quote table as the trigger table. Once the process has been set, a dropdown list of all tables available on that process will be shown. Pressing the Lookup Data button will show sample data for the trigger table. Required.
- Lookup Table
- A table specifying criteria for an alert to fire. Lookup tables can be either schema from the process or configuration parameters from KX Control. The lookup table must have at least one column in common with the trigger table. Pressing the Lookup Data button displays data in the lookup table. Optional.
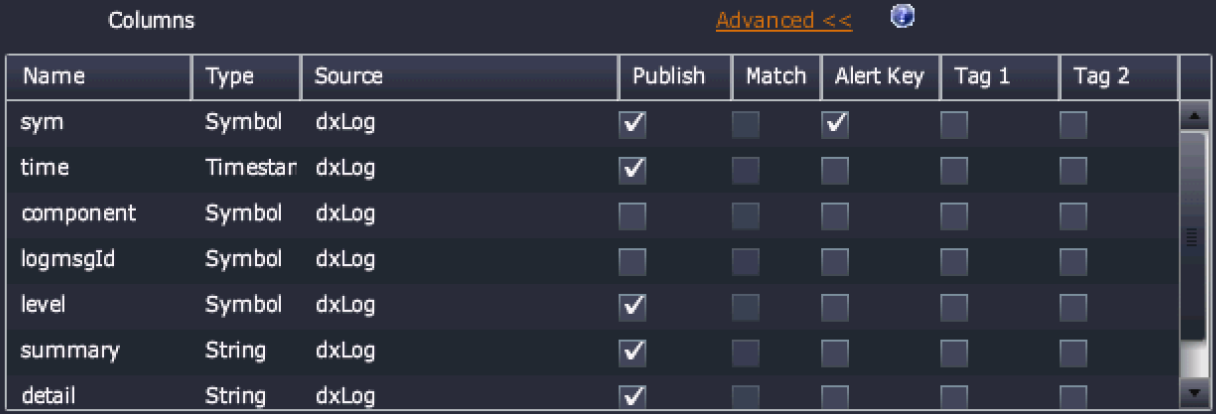
- Advanced
-
Click the Advanced button to view additional column options. Advanced options are:
Match: used for alerts when using the lookup table feature. The alert data is joined with the lookup table. The match columns are those used to perform the join and must be present in both tables.Alert Key: data from these columns is used to create a unique identifier for the alert. The default is a sym or symbol column, if it is present<Tag 1/Tag 2: tused to create more useful data in thedxAlerttable. For example CPU Usage hastag1 - logicalNameandtag2 - breachLevel. So when looking atdxAlerta clearer view of the error emerges.
- Alert Type
-
Defines how frequently the alert should be fired. The options are:
All: publish every time an alert is triggeredOn State Change: publish when an alert is triggered and only when it changes stateOn True State Change: publish when alert is triggered and when the state changes totrue
- Post Alert Analytic
- An analytic to be run after an alert has been triggered.
Predefined alerts
Selecting the Alert Name dropdown in Alert Definition displays a list of defined alerts. The list includes new alerts created, as well as alerts predefined in KX Monitoring.
The predefined alerts:
| name | description |
|---|---|
| dmxGenericFileChangeAlert | Generic file change alert. Can be set to trigger on changes to files monitored by the RDB OPS process dmxFiles table. |
| dmxGenericFileGrowthAlert | Alert to monitor expected file growth. |
| dmxGenericFileSizeThresholdAlert | Alert to trigger if files are not within their allocated size thresholds. |
| dmxGenericFileSystemUsageAlert | Alert to monitor each drive and create notifications based on percentage usage. |
| dmxGenericFileSizeAlert | Alert to trigger on excessive file sizes returned from the file monitor. |
| dmxGenericInstanceAlert | Generic instance alert, used for monitoring active process instances. |
| dmxGenericJobAlert | Alert triggered if a monitored job failed. |
| dmxGenericJobDurationAlert | Alert triggered if a monitored job took longer than average to run. |
| dmxGenericJobScheduledAlert | Alert triggered if a monitored job did not run in the scheduled time window. |
| dmxGenericLogAlert | Generic log alert used for flagging error patterns. |
| dmxGenericLogScrapeAlert | Generic alert for notification of err/warning messages in scraped logs. |
| dmxGenericPIDResidentAlert | Alert triggered if a monitored process exceeds memory usage thresholds. |
| dmxGenericProcessCPUUsageAlert | Alert to trigger on process CPU usage. |
| dmxGenericServerAlert | A generic alert to be run on the server statistics table. |
| dmxGenericServerCPUAlert | A generic alert to be run on the server statistics table. |
| dmxGenericServerMinLoadAlert | Alert to monitor min load stats of a server. |
| dmxGenericServerStateAlert | Generic alert to monitor active servers. |
Alert triggers
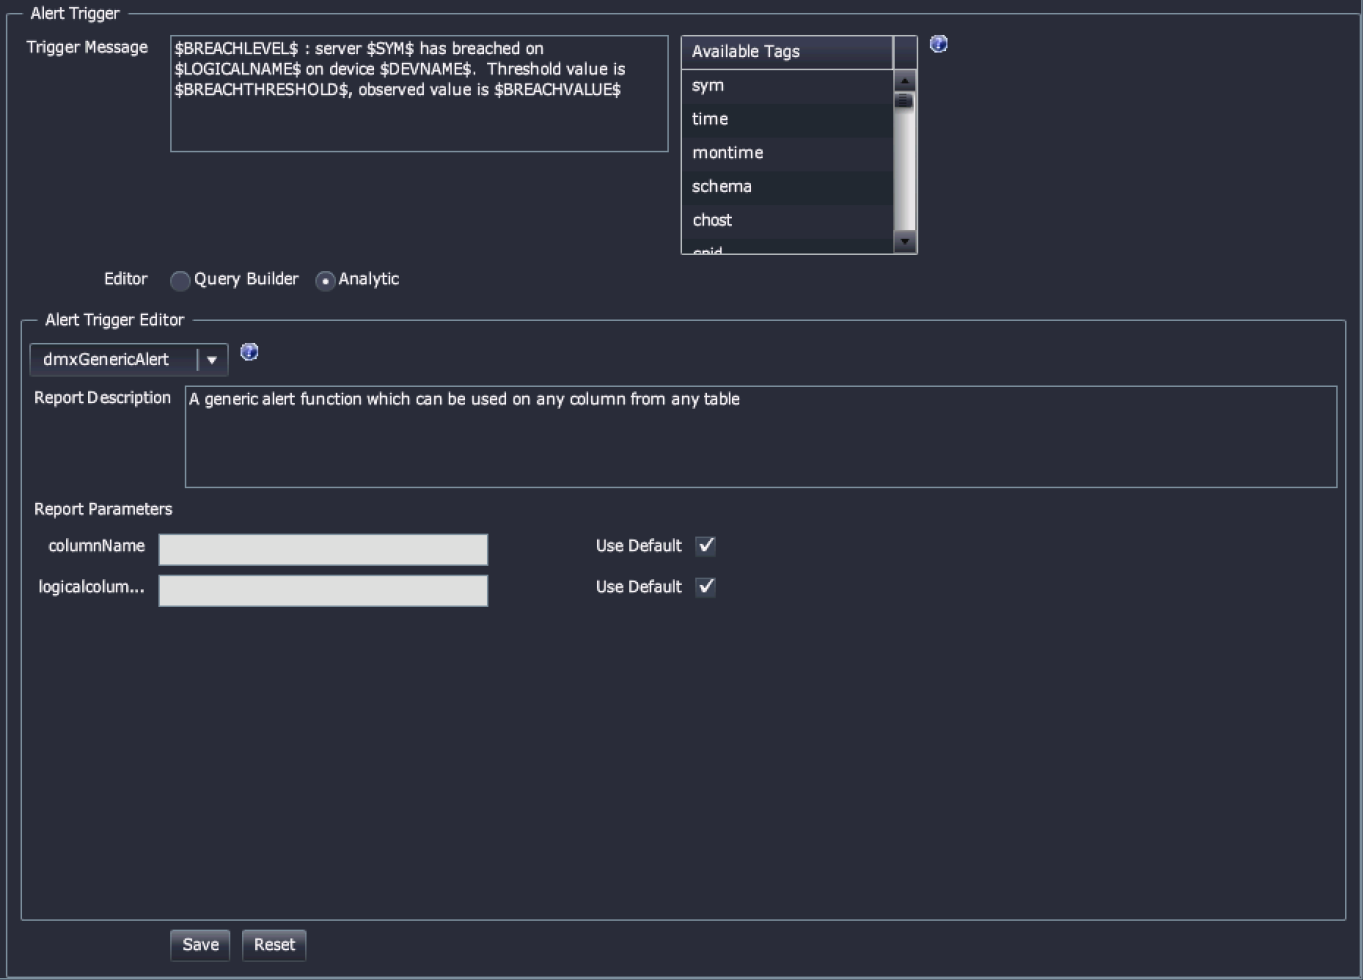
The right-hand portion of the Alert Editor tab displays the trigger conditions that determine when an alert will be triggered.
| control | effect |
|---|---|
| Trigger Message | The message to be displayed when the trigger is reached and the alert is generated. |
| Available Tags | The trigger message can include tagged data which is selected from the available tags list here. The tag value will be placed in the triggered message. |
| Editor | This will be Analytic. |
| Analytic | Analytics associated with the alert group AlertAnalytics can be used to define the trigger condition for an alert. This view is read-only, the analytic is pre-defined in _KX Control. |
| Report Description | A description of the report. This is read-only. |
| Report Parameters | The report parameters are listed here. These will change depending on the analytic selected. This is read-only and cannot be changed here. It can be changed in the Alert Instance Editor to enable the additional parameters to the alert. Use Default. |
Create a new alert
- In Alert Management, open the Alert Editor tab.
- Specify the Alert Definition values.
- Specify the trigger conditions that will cause an alert to be triggered by specifying the alert message and analytic to be used as described in Alert triggers.
- Click Save to save the new alert or Reset to return the alert to the previously saved value.
- Once the alert is saved, configure permissions for users.
Set alert permissions
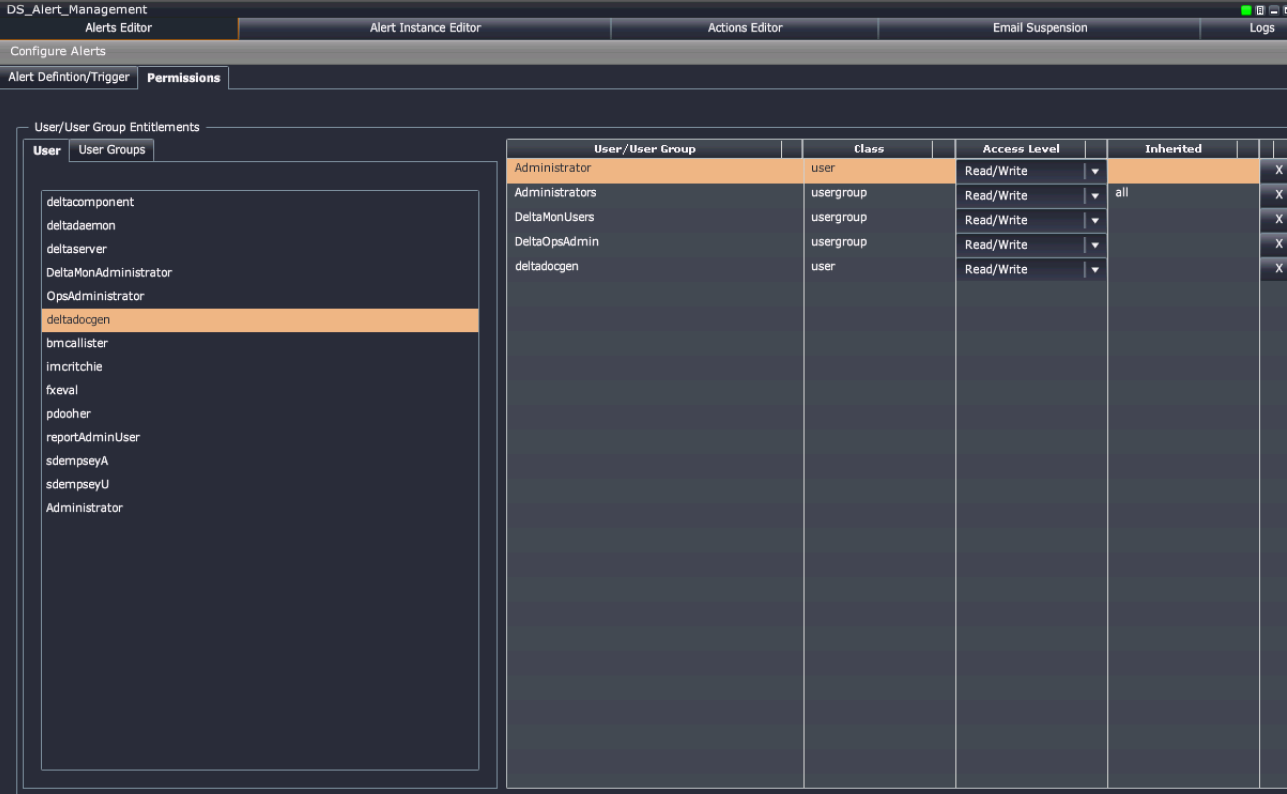
To specify unique permissions for each created alert:
- In Alert Management, select the Alert Editor tab and the appropriate alert.
- Select the Permissions tab
- On the left side of the screen, select either a user or a user group. Click and drag the user or user group to the right side of the screen.
-
Select a user or user group and set the Access Level:
Deny All: deny all access;Read/Deny Write: Ensures read access, but overrides any inherited write access;Read: gives read permissions, these can be overridden by inheritedDenypermission;Read/Write: Read & Write Permissions, can be overridden by inheritedDenypermission.
-
Tick Inherited to indicate that a user has inherited their permissions from the user group.
- Click X to remove a permission from any user/user group.
Delete or duplicate an alert
To delete an alert:
- In Alert Management, select the Alert Editor tab.
- Click Delete.
- Confirm you want to permanently delete the alert. Click Yes or No.
- The alert will be removed from the system.
To duplicate an alert:
- In Alert Management, open the Alert Editor tab
- Click Duplicate.
Alert instance editor
The Alert Instance Editor enables creation of individual instances for each alert. Each instance can be configured differently.
The screen is divided into two portions.
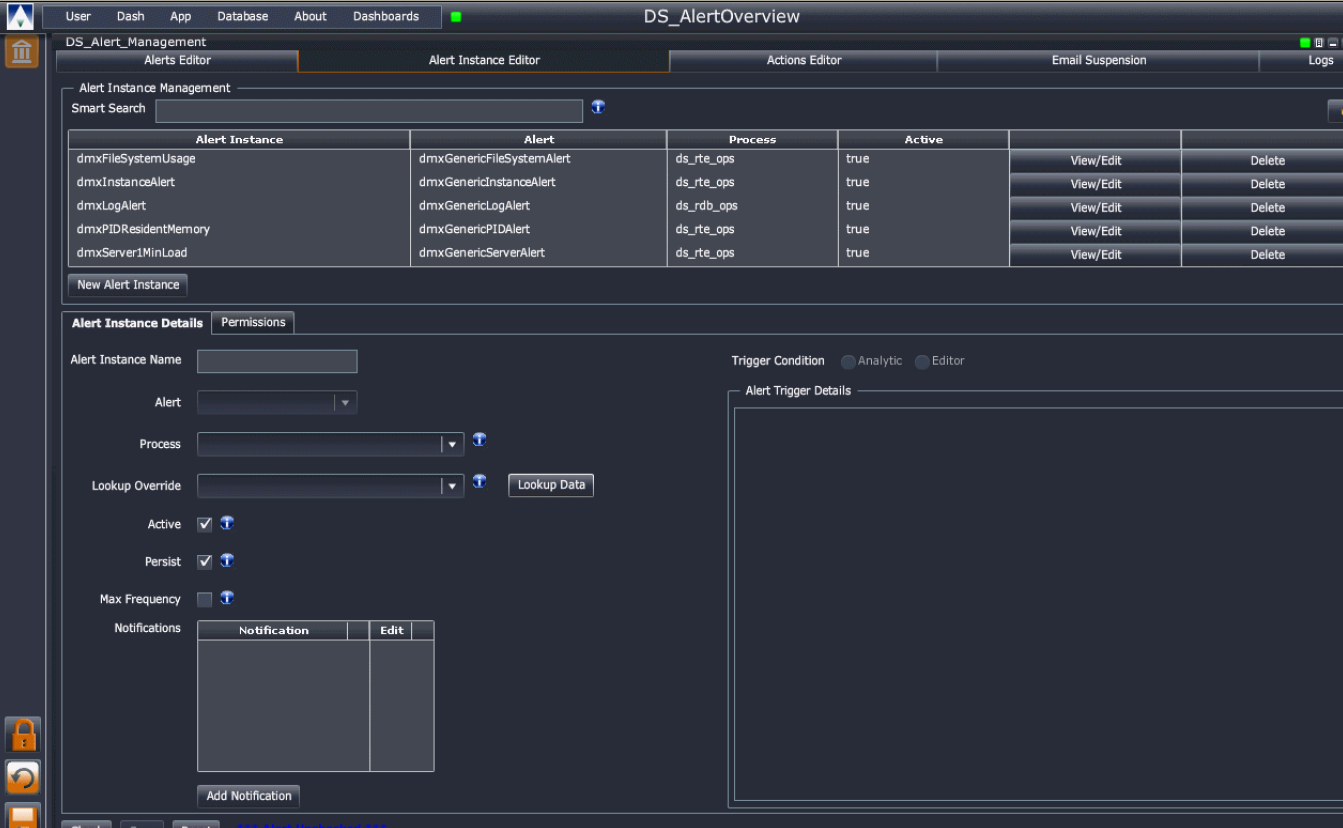
Alert instance management
In the Alert Instance Management portion of the Alert Instance Editor you can:
- View a list of alert instances – a table lists each alert instance with details including the alert instance name, the alert name, the process being monitored, and whether or not the alert is active.
- Select an alert instance to view or edit – select it in the table and click View/Edit.
- Delete an alert instance – select it in the table and then click Delete.
- Create a new alert instance by clicking the New Alert Instance button.
Once a new alert instance has been created, its user permissions can be specified.
Alert instance details
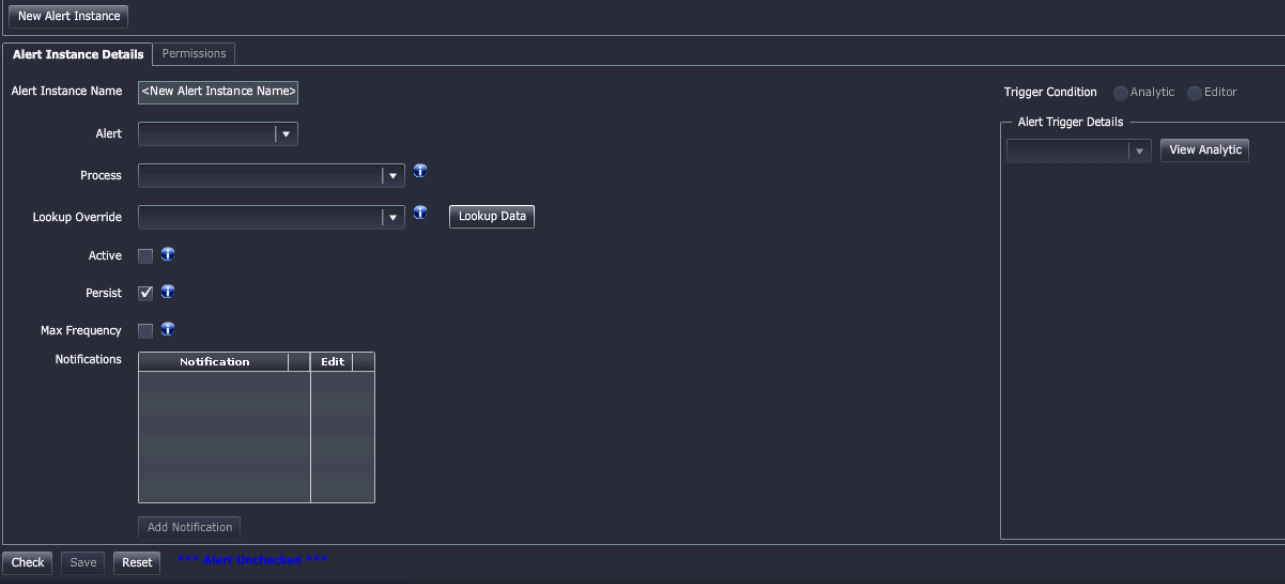
- Alert Instance Name
- A unique name for the alert instance.
- Alert
-
Select the alert this instance will be based on.
dmxFile System Usage: file system usagedxmInstanceAlert: instance downdmxLogAlert: incoming log messagedmxPIDResidentMemory: process resident memory: when memory increases beyond a configured leveldmxServer1MinLoad: 1-min load leveldmsServerCPU: max CPU on serverdmxServerMemory: maximum memory usage on serverdmxServerStateAlert: server down
- Process
- The process in which the alert is registered: must be running and must support alerts.
- Lookup Override
- A table or configurable parameter used for comparing data: must have at least one column in common with the trigger table so that they can be joined in the alert. The value specified here overrides the lookup table selected in the alert this instance is based on. Use the Lookup Data button to view details of the table/configurable parameter.
- Active
- Check for the alert to be active.
- Persist
- Determines whether or not the alert is persisted to KX Control so that it can be loaded into the process each time it is started. If this is not checked the alert will exist only until the process is terminated.
- Max Frequency
- The maximum frequency that an alert can be fired. Once this is checked, specify the frequency in terms of 1/x seconds.

- Persist
- Determines whether or not the alert is persisted to KX Control so that it can be loaded into the process each time it is started. If this is not ticked the alert will exist only until the process is terminated.
Lookup data
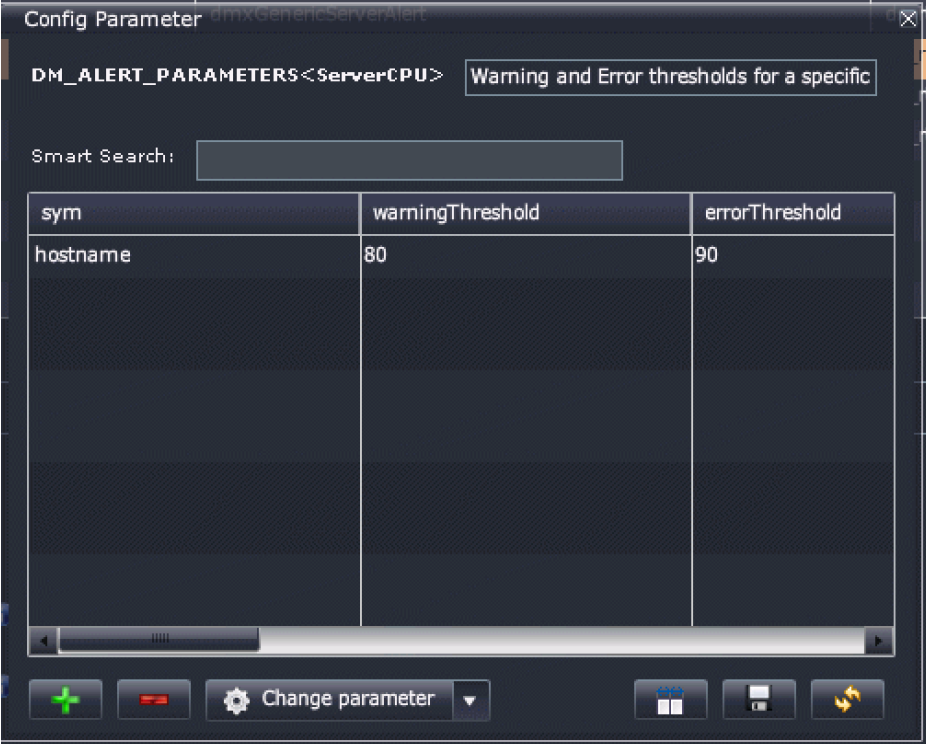
When viewing or editing an alert instance definition, click the Lookup Data button to see details of the selected Lookup Override (table or parameter).
Actions editor
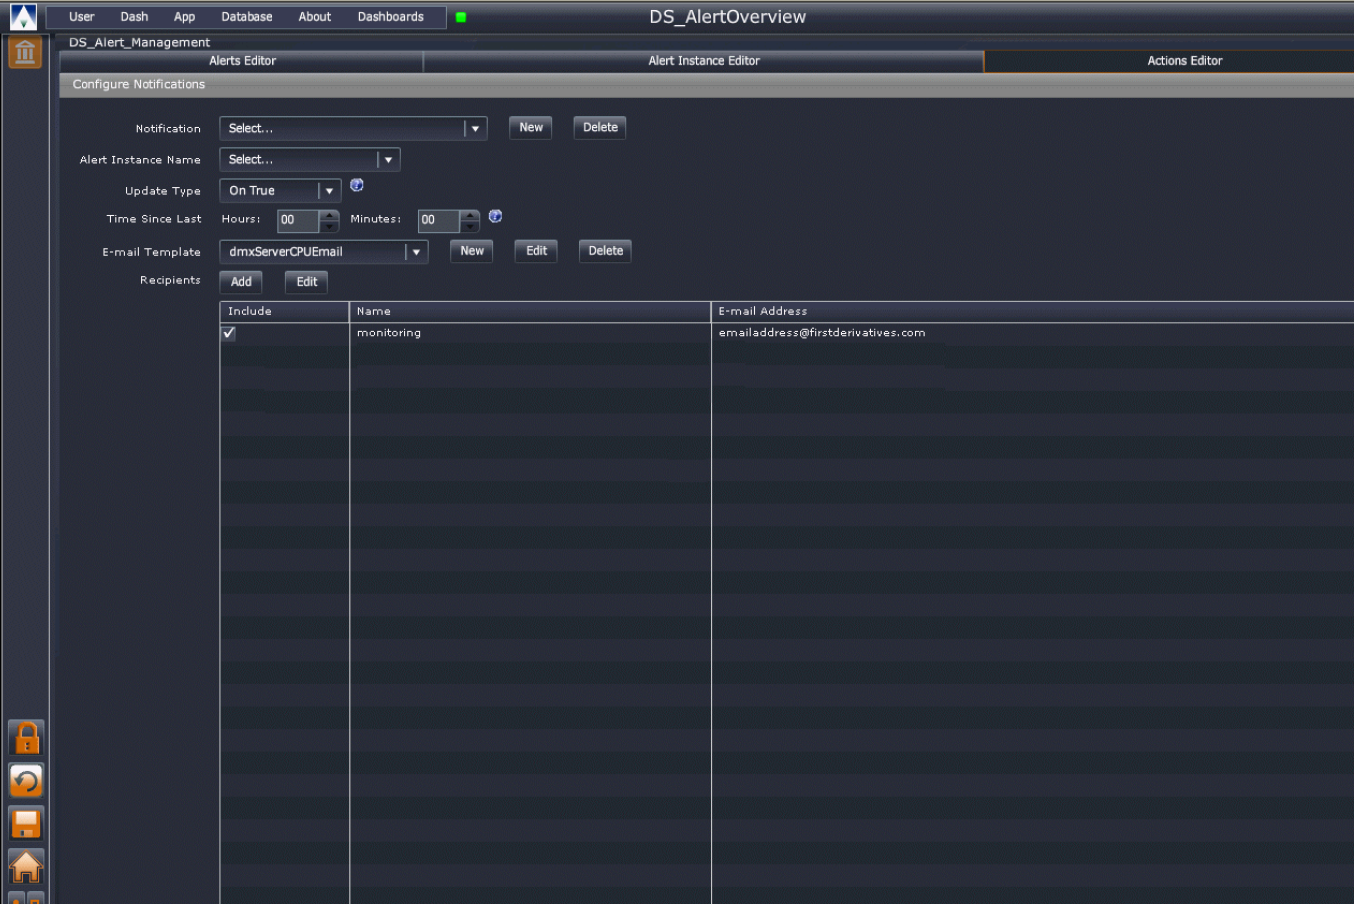
In the Actions Editor set up email notifications to be sent when alerts are triggered. Associate the notification with alert instances and specify their frequency and recipients.
- Notification
- Select a notification from the drop-down list of existing notifications. Or click New and create a new notification. Or remove a notification from the list by selecting it and clicking Delete.
- Update Type
-
Options are:
On True: send notification on alerttriggered=trueOn False: send notification on alerttriggered=false- O
n First True: send notification when the alert first setstriggered=true On First False: send notification when the alert first setstriggered=falseOn Change: send notification when the alerttriggeredvalue differs the previous valueOn All: send notification regardless of the alerttriggeredstate
- Time Since Last
- The delay from when an email notification is sent until the next notification is sent.
- Email Template
- Select or create an email template; subject and content.
- Recipients
- Edit the list of email contacts. Check the Include box for the notifications to be sent to a recipient.
Email editor
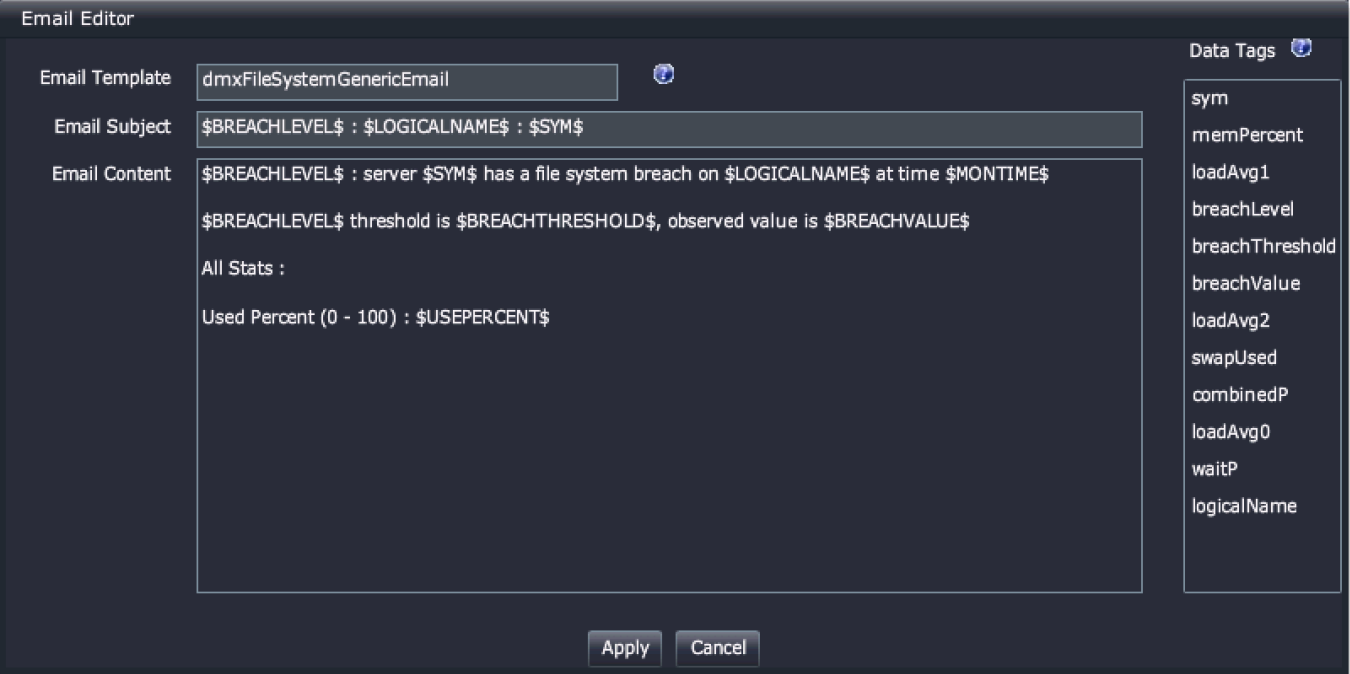
When creating or editing notifications, create an email template for the notification. Select an Email Template on the Configure Notification screen, and click Edit to open the Email Editor.
Email suspension
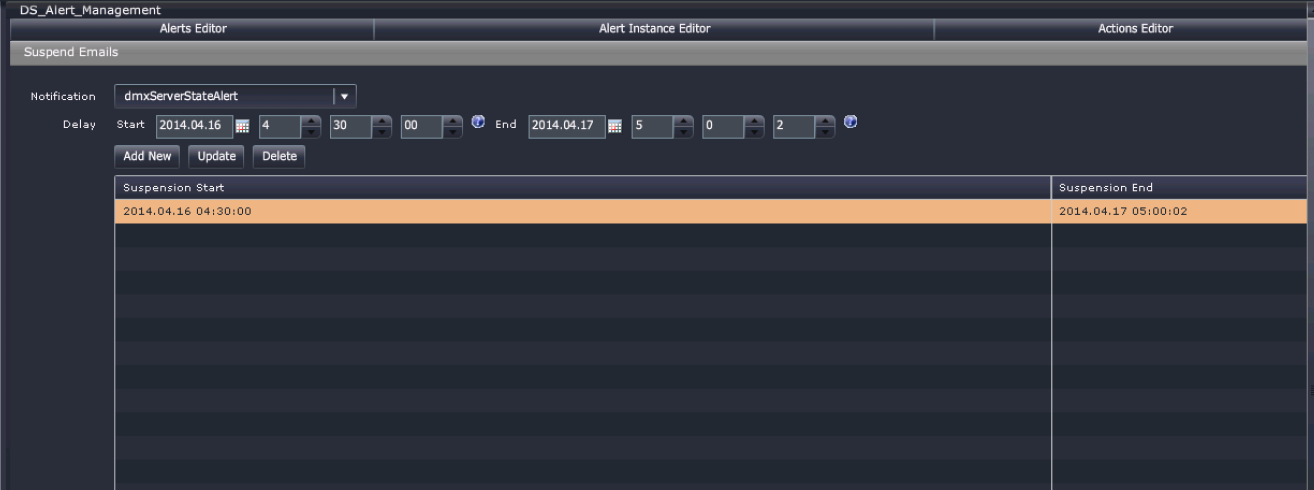
Use the Suspend Emails tab to set up periods when email notifications are temporarily suspended.
Select the notification to suspend and enter start and end dates and times (hh ss) for the suspension and click Add New.
Multiple suspension periods can be set for each notification.
Click on any suspension and click Delete to remove it.
Logs
Use the Logs tab to view the events that triggered an alert.
Filter the logs to select
- Notifications
- Alerts
- Range of dates