Create the walkthrough database
Some deployments of kdb Insights Enterprise already have the insights-demo Assembly included.
If insights-demo is listed in Overview -> Assemblies, skip the rest of this page and move on to deploying the assembly. Otherwise, follow along with the instructions below.
Free Trial Users
The Free Trial version of kdb Insights Enterprise comes with insights-demo ready-made.
Configure Database
Select Build a database from the home screen Getting Started page.

From here, you can enter the name and select the size of your database. Let's give this database a name and select Next.

Configure Schema
The next step requires the user to know information about the incoming data ahead of time:
- column header names
- kdb+ datatypes
The name of the tables, column headers and the kdb+ datatypes can be entered in the Configure Schema page.
| column | type char | type |
|---|---|---|
| timestamp | p | timestamp |
| sensor | s | symbol |
| airtemp | f | float |
| name | s | symbol |
| borough | s | symbol |
| longitude | f | float |
| latitude | f | float |
| color | s | symbol |
| column | type char | type |
|---|---|---|
| trip_id | s | symbol |
| arrival_time | p | timestamp |
| stop_id | s | symbol |
| stop_sequence | h | short |
| stop_name | s | symbol |
| stop_lat | f | float |
| stop_lon | f | float |
| route_id | h | short |
| trip_headsign | s | symbol |
| direction_id | s | symbol |
| route_short_name | s | symbol |
| route_long_name | s | symbol |
| route_desc | C | string |
| route_type | h | short |
| route_url | s | symbol |
| route_color | s | symbol |
| column | type char | type |
|---|---|---|
| name | C | string |
| lat | f | float |
| long | f | float |
| neighborhood | C | string |
| airquality | f | float |
| trafficcongestion | f | float |
| bikeacccnt | i | integer |
| caracccnt | i | integer |
| timestamp | p | timestamp |
| column | type char | type |
|---|---|---|
| event_id | s | symbol |
| incident_time | t | time |
| nypd_precinct | s | symbol |
| borough | s | symbol |
| patrol_borough | s | symbol |
| call_x_geo | j | long |
| call_y_geo | j | long |
| radio_code | s | symbol |
| description | C | string |
| crime_in_progress | C | string |
| call_timestamp | p | timestamp |
| dispatch_timestamp | p | timestamp |
| arrival_timestamp | p | timestamp |
| closing_timestamp | p | timestamp |
| latitude | f | float |
| longitude | f | float |
For all the tables we must ensure the following Advanced Options are configured, located at the bottom of the Configure Schema page.
| setting | value |
|---|---|
| Type | partitioned |
| Partition Column | timestamp |
| Timestamp Column | timestamp |
| Real-time Sort | timestamp |
| Interval Sort | timestamp |
| Historical Sort | timestamp |
| setting | value |
|---|---|
| Type | partitioned |
| Partition Column | arrival_time |
| Timestamp Column | arrival_time |
| Real-time Sort | arrival_time |
| Interval Sort | arrival_time |
| Historical Sort | arrival_time |
| setting | value |
|---|---|
| Type | partitioned |
| Partition Column | timestamp |
| Timestamp Column | timestamp |
| setting | value |
|---|---|
| Type | partitioned |
| Partition Column | arrival_timestamp |
| Timestamp Column | arrival_timestamp |
See the screenshot below of Configure Schema page with the Advanced Options visible.
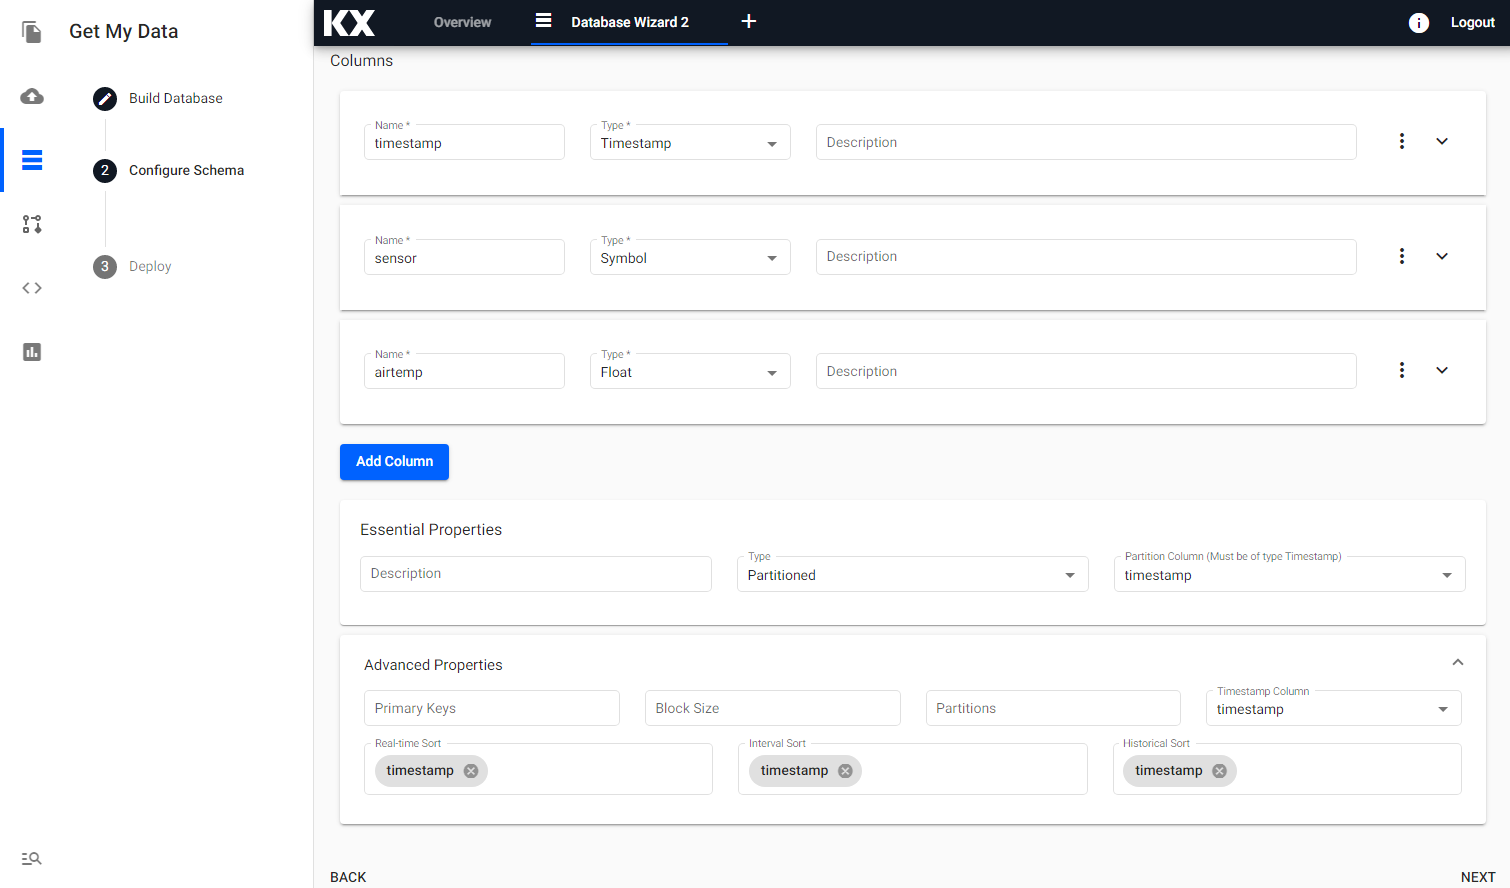
Once all the tables have been added and the advanced options are defined, select Next.
I want to build a manual schema for my data table
From the next screen you can simply select Save.
That's it, you now have the insights-demo saved and are ready to follow along with the walkthrough.