Assembly
The easiest way to build an assembly is to use the assembly wizard. The following describes how a custom Assembly can be built manually using schemas, databases, pipelines and streams.

Overview of Assembly view with options to name, add schema, add database, add pipelines, add streams and set labels for an Assembly.
Video Tutorial
1. Create an assembly
Click [+] next to Assemblies from the left-hand entity-tree menu.

Start the manual assembly build by clicking + next to Assembly in the left-hand entity-tree menu.
2. Name the assembly
For example, expassembly.
Assembly name
The assembly name must consist of lower case alphanumeric characters, '-' or '.', and must start and end with an alphanumeric character.
3. Define a schema
The schema converts data to a format compatible with the kdb Insights Enterprise database.
-
Click the
 to open a new schema document.
 -
Set the table name to
exptableand the schema name toexpschema. -
The table has two columns with the following properties;
*are required properties:
| Name* | Type* |
|---|---|
| date | Timestamp |
| cnt | Integer |
Timestamp data column required for each table in a Schema.
This simple table has only two columns, but all tables in a schema must have a timestamp column for data to be partitioned inside kdb Insights Enterprise.
- For
Table Propertiesremove the primary key and set the following properties;*are required properties:
| item | variable |
|---|---|
| Primary Keys | |
| Description | |
| Type* | partitioned |
| Partiton column* | date |
| Block size | |
| Partitions | |
| Timestamp column | date |
| Real-time Sort | date |
| Interval Sort | date |
| Historical Sort | date |
Advanced properties
Type, Block size, and Partitions are Advanced properties.
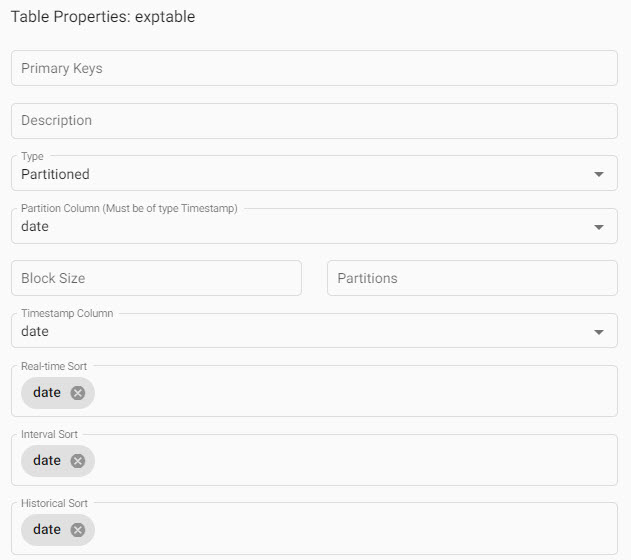
Schema properties required to define partitioning of your data; focus on defining Partition Type, Partition Column, Timestamp Column, Real-time Sort, Interval Sort and Historical Sort. Typically, partitioning is defined by the required timestamp column in your data.
- Click Submit.
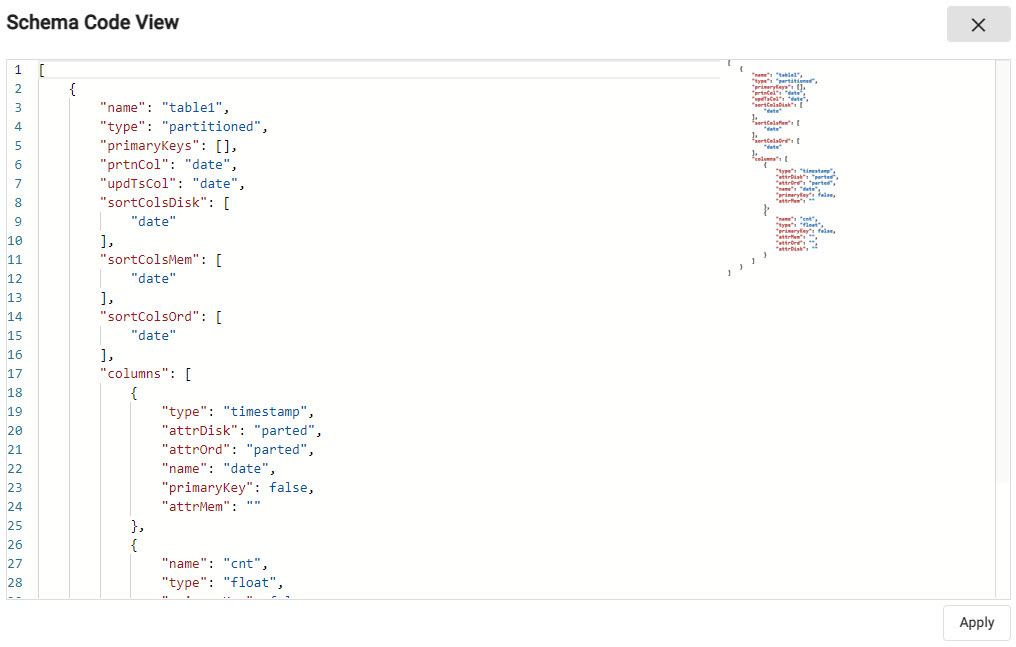
Code View
Code view allows schemas to be defined using a code editor; click 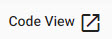 to access.
I want to learn more about schemas
4. Build a database
We will build a Time Series database, consisting of tiers, to access and store real-time, interval and historic data.
-
Click the
next to the database definition to create a new database. -
Select
Time Series. -
Name the database; for example,
expdatabase, then Submit; this makes additional configuration options available. -
In
Advancedmode, update the following sections; tab between each section for details:
No change required.
The only required change is to the rdb mount database source.
| item | variable |
|---|---|
| Mount name | rdb |
| Streams log value | |
| Replicas | 1 |
| Source | Name of database from step 2; expdatabase |
| Minimum CPU | 0.1 |
| Maximum CPU | 1.0 |
| Minimum Memory | 128 |
| Maximum Memory | 512 |
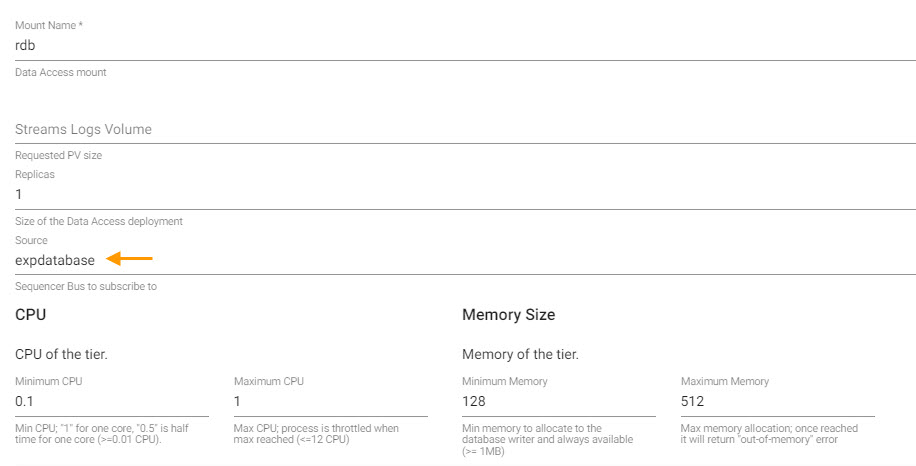
Update Database with the Advanced option enabled; the majority of properties can be left unchanged, but do define the rdb source as expdatabase.
Only update the Tiers database source (you may need to scroll down).
| item | variable |
|---|---|
| Source | expdatabase |
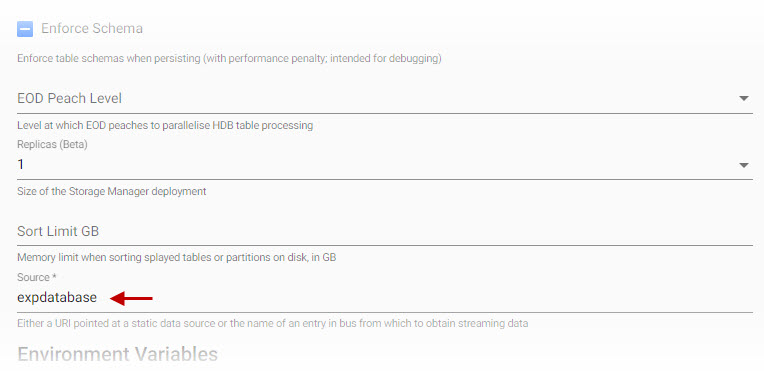
Update Storage scrolled near the end of the property definitions; set source to expdatabase and leave other options unchanged.
-
Other database parameters, for example, Mount, use pre-configured values.
-
Submit the
expdatabasedatabase.
I want to learn more about databases
5. Add a stream
Click the next to stream definition to create a new stream to push data for our database.
| item | variable |
|---|---|
| Stream name | expdatabase |
| Sub Topic | |
| CPU Min | 0.1 |
| CPU Max | 0.5 |
| Min Memory | 256 |
| Max Memory | 512 |
| Size | 20Gi |
| Externally Facing | disabled |
I want to learn more about streams
6. Assign a label
Assign label name(s) and associated value(s). Labels allow you t query data stored on multiple assemblies with a shared label name. By default, a database label name matching the name given to the assembly name is assigned. An assembly must have at least one label before it can be saved and deployed.
| label | value |
|---|---|
| databasename | expdatabase |
7 Optional: add a pipeline
While not required, an assembly can also feature pipelines. Pipelines associated with an assembly are deployed as part of the assembly deployment. However, an active assembly is required to receive data from a pipeline.
-
Click the
next to the pipeline's definition to create a new pipeline to ingest data. -
Click-and-drag into the workspace an Reader Expression node from the left-hand entity-tree menu. Select the node and into the property panel on the right, add the following
qto the editor:([] date:200?(reverse .z.p-1+til 10); cnt:200?10)Click
 to apply the code to the node.
 -
Click-and-drag into the workspace the Transform Apply Schema node. Hover over the dot in the Reader node border and with a click-and-drag, connect this node to the Transform node (and its dot).
-
Click
 to select a schema and table. Load the table to the pipeline transform node:
item description Data format Any Schema expschemaTable exptable -
the schema to the transform pipeline node.
-
Click-and-drag into the pipeline workspace Writer KX Insights Database. Connect the Writer node to the Transform node.
-
Define the database table to store the results:
item description Database Name of database from step 2; expdatabaseTable exptableWrite Direct to HDB Disabled Deduplicate stream Enabled -
the database table to the writer node.
-
Save the pipeline as
exppipeline.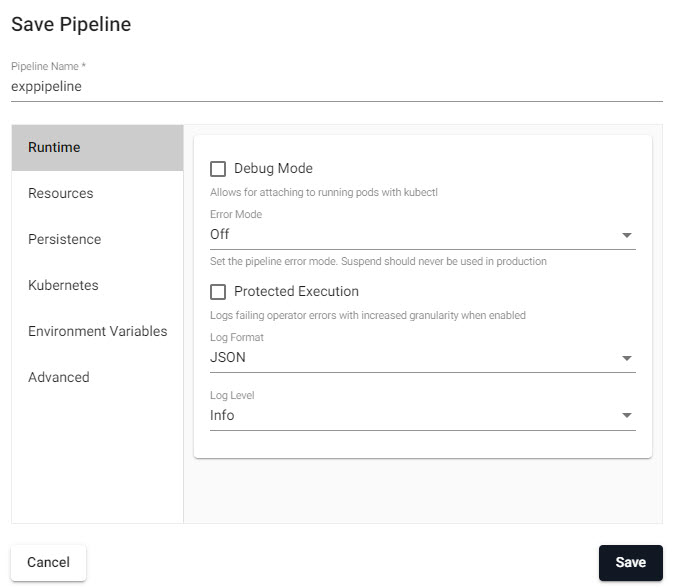
Saving a pipeline requires defining the Pipeline name. -
Review the pipeline:

A finished pipeline with a sequence of nodes, here including a writer data ingest node, a transformation node to define the table schema, and a writer node to send data to our database. -
Open the new assembly (
expassembly) from the left-hand entity-tree, and for the Pipelines property of the assembly, add the newly created pipeline (exppipeline) from the dropdown to associate it with the assembly.
8. Save the assembly
Click 
Using a Database
Only saved assemblies with their associated database and schema tables are available to receive data from pipelines. An assembly must be deployed and active to receive data.
9. Assembly summary
With all components created, the assembly should look like this if using suggested names:
Name: expassembly
Schema Configuration: expschema
Database Configuration: expdatabase
Pipelines: exppipeline
Streams: expdatabase
10. Deploy the assembly
Deploying an assembly activates it for use, making it available to receive data.
During deployment, an assembly changes from an INACTIVE state (grey circle) to an ACTIVE state (green circle with a tick).
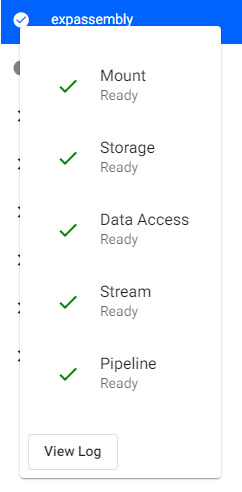
A completed assembly can be saved, then deployed; a successfully deployed and active assembly will show a green circle with a tick inside it.
Query Data
When an assembly is active (a green solid circle with a tick), open a Query document; click [+] next to Queries in the left-hand entity-tree or from the Document bar along the top.
-
Open the Q tab of Query.
-
From the Assembly dropdown menu, select
expassembly, and choosehdb. -
Query your data with:
SELECT * FROM exptable
exptable
-
Define the
Output variable; this can be exptable. -
Click

-
Results are listed in the Console.
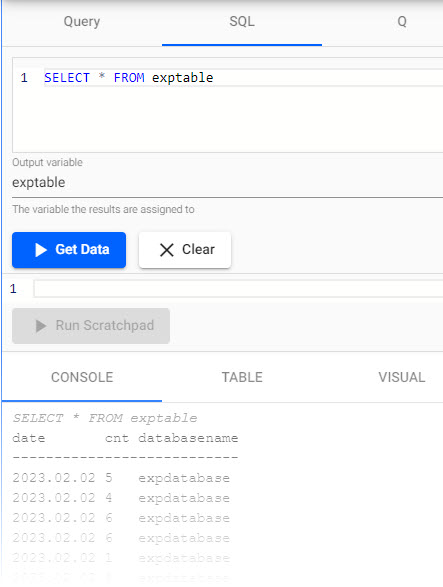
Querying the deployedexppipelineand its data stored underexptable, in theexpdatabase- collectively under theexpassembly.
Teardown
A deployed assembly consumes memory and CPU resources. Likewise, any data written to an assembly database consumes memory and CPU resources. If an Assembly is using too many resources; for example, CPU and/or memory, you can tear it down to free up those resources.
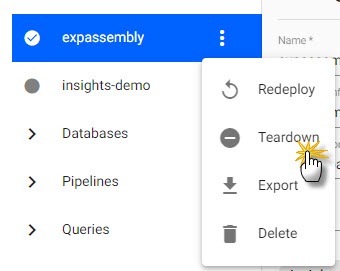
Teardown a deployed assembly to return used memory and CPU resources.
Assemblies deployed via the command line
You can also deploy assemblies using the command line. These are listed under Assemblies in the entity-tree. You cannot interact with them in the UI. They can only be managed (torndown) using the command line.
Before starting the teardown process, there is an option to Clean up resources after tearing down. If checked, this process permanently removes any data stored in the assembly. If left unchecked, any data written to the assembly database remains available.
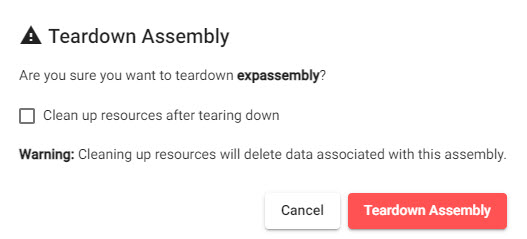
When selecting Teardown Assembly, an option to Clean up resources after tearing down is available. When checked, any data associated with the assembly will be permanently deleted.
Troubleshooting
Should an assembly fail to deploy, check diagnostics for reported errors. Ensure your assembly has at least a database, schema and one or more streams. An assembly does not require a pipeline to be deployed.