SQL Database (Health)
No kdb+ knowledge required
This example assumes no prior experience with q/kdb+ and you can replace the details provided with any other PostgreSQL connection details to gain similar results.
SQL database is a relational database, managed using SQL programming language. In this example, the health data set has information relating to air quality, traffic congestion, car and bike accidents in New York. If you are interested in viewing the data using a PostgreSQL client, instructions are given in the note below.
Creating the Pipeline
First select the import wizard; the import wizard can be accessed from the [+] menu of the Document bar or by clicking ![]() from the left-hand icon menu or Overview page. All created pipelines, irrespective of source, are listed under Pipelines in the left-hand entity tree menu.
from the left-hand icon menu or Overview page. All created pipelines, irrespective of source, are listed under Pipelines in the left-hand entity tree menu.
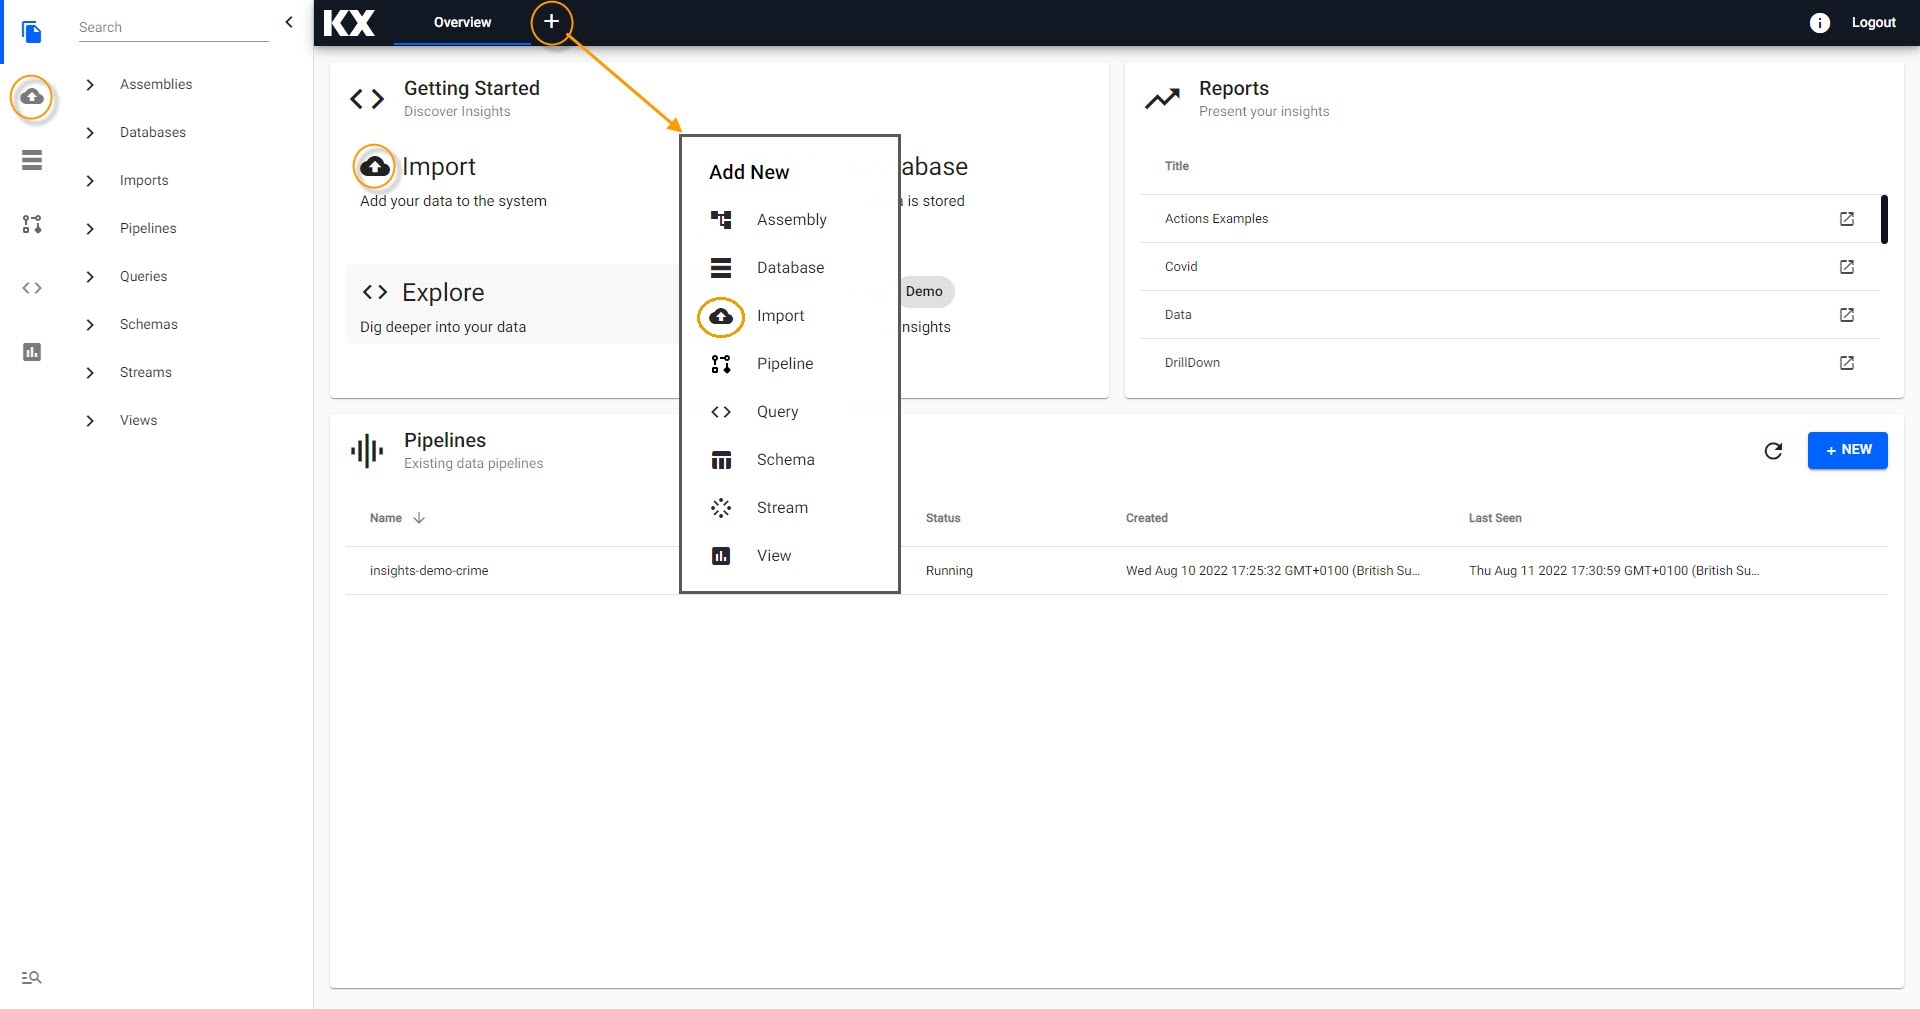
Access Import from the Overview page.
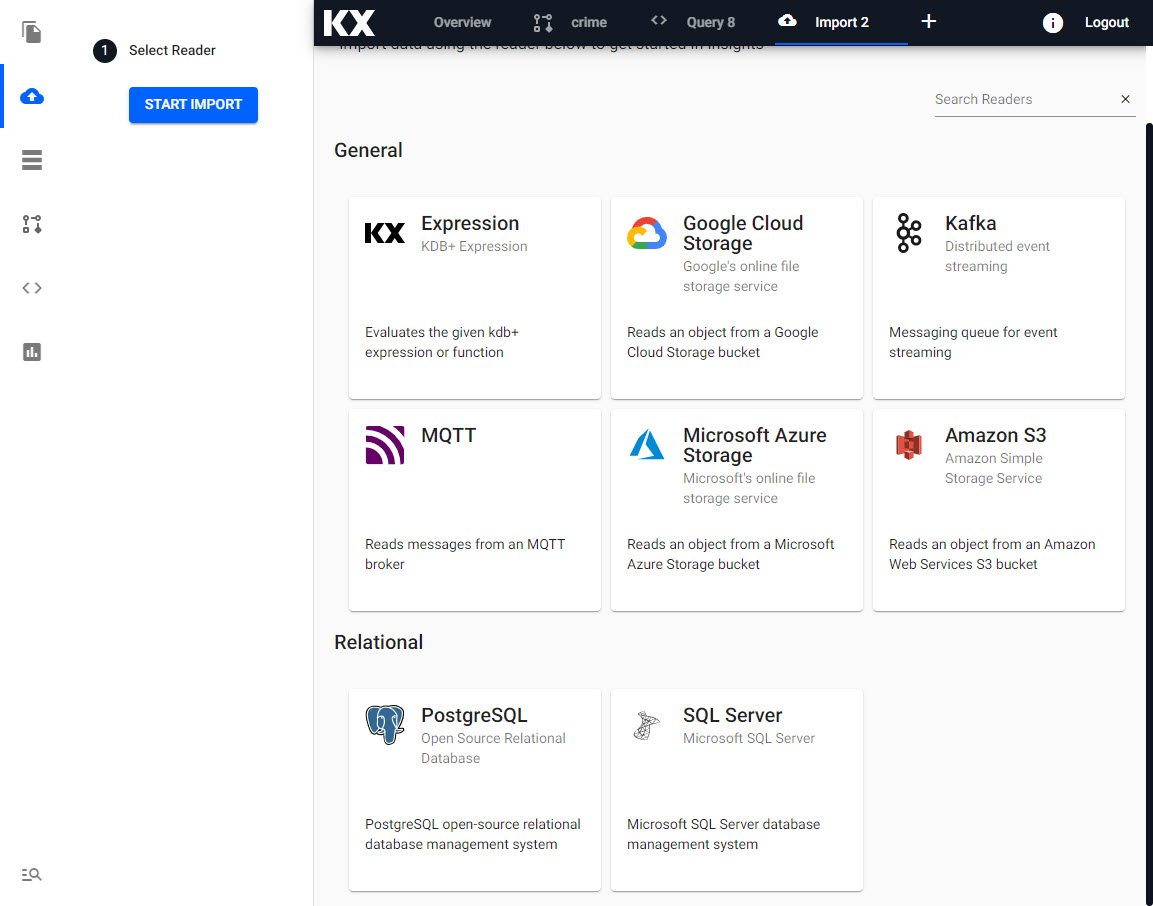
Select PostgresSQL Relational Database from available Import options.
Optional: Accessing health data using a local PostgreSQL client install
$ psql "sslmode=disable dbname=postgres user=postgres hostaddr=34.132.151.134"
Password for user postgres: dxrHvgtjHHvsOH7B
psql (14.1, server 13.4)
Type "help" for help.

postgres=> \connect health
psql (14.1, server 13.4)
You are now connected to database "health" as user "postgres".
health=> \dt

                List of relations
schema |         name         | type  |  owner
-------+----------------------+-------+----------
public | health               | table | postgres
(5 rows)
Select a Reader
We start by selecting PostgreSQL from the Relational database import options.
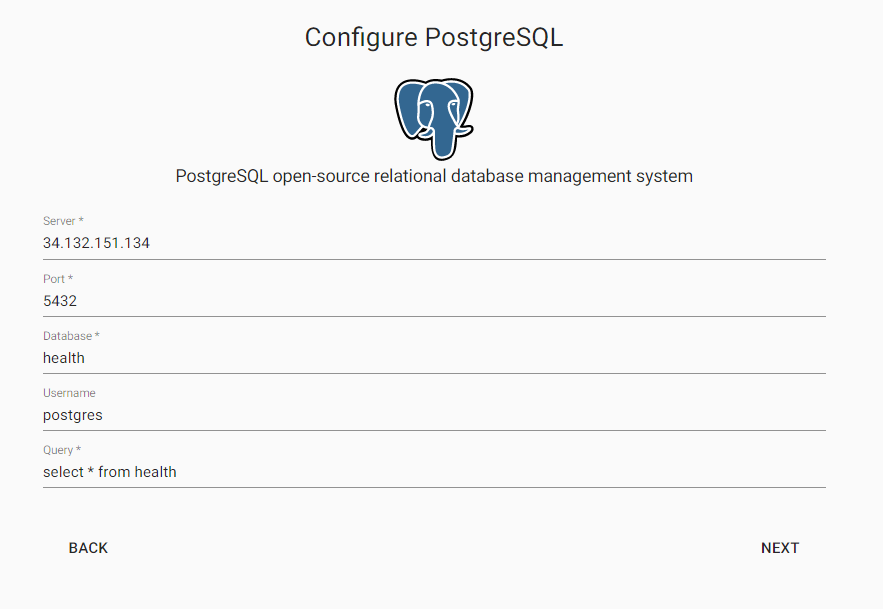
Define PostgresSQL import properties for server, port, database, username and query.
Configure PostgreSQL
Complete the form with the server details:
| setting | value |
|---|---|
| Server | 34.132.151.134 |
| Port | 5432 |
| Database | health |
| Username | postgres |
| Query | select * from health |
Click Next when done.
Configure Schema
Imported data requires a schema compatible with kdb Insights Enterprise. The insights-demo has a schema table for each of the data sets available. The configure schema step applies the kdb+ datatypes used by the destination database and required for querying the data in kdb Insights Enterprise, to the data we are importing.
The next step applies a schema to the imported data.
| setting | value |
|---|---|
| Apply a Schema | Checked |
| Data Format | Table |
To attach the schema to the data set:
-
Leave the Data Format as the default value of
Any -
Click

-
Select the
insights-demoSchema from the dropdown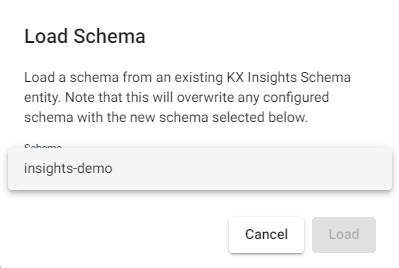
Load the schema frominsights-demo. -
Choose the Table
health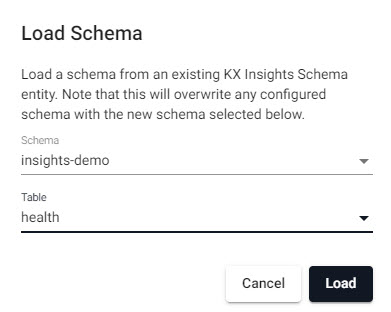
Select thehealthschema table frominsights-demoschema. -
Leave Parse Strings set to
Autofor all fields.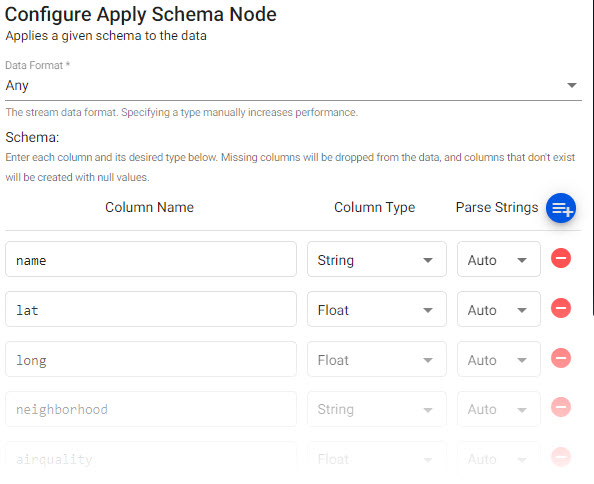
Ensure Parse Strings is set toAutofor all columns.
Click Next when done.
Configure Writer
The final step in pipeline creation is to write the imported data to a table in the database. We will use the insights-demo database and assign the imported data to the health table.
| setting | value |
|---|---|
| Database | insights-demo |
| Table | health |
| Deduplicate Stream | Yes |
Click  when done. This will complete the import and open the pipeline in the pipeline viewer
Writer - KX Insights Database
The Writer - KX Insights Database node is essential for querying data in a pipeline. This node defines which assembly and table to write the data too. As part of this, the assembly must also be deployed; deployments of an assembly or pipeline can de done individually, or a pipeline can be associated with an assembly and all pipelines associated with that assembly will be deployed when the latter is deployed.
Pipeline view
The pipeline view allows you to review and edit your pipeline by selecting any of the nodes.

Nodes used for Health pipeline.
Click Save and give the pipeline a name. This name should be unique to the pipeline; for Free Trial, there is a pipeline already named health, so give this new pipeline a name like health-1.

Naming a pipeline prior to saving.
The newly created pipeline will now feature in the list of pipelines in the left-hand-entity tree.
Deploying
The next step is to deploy the pipeline that you created in the above Importing stage.
-
Select Deploy.
-
On the Deploy screen that appears select Deploy.
-
You will be asked for the password for the PostgreSQL database:
setting value password dxrHvgtjHHvsOH7B 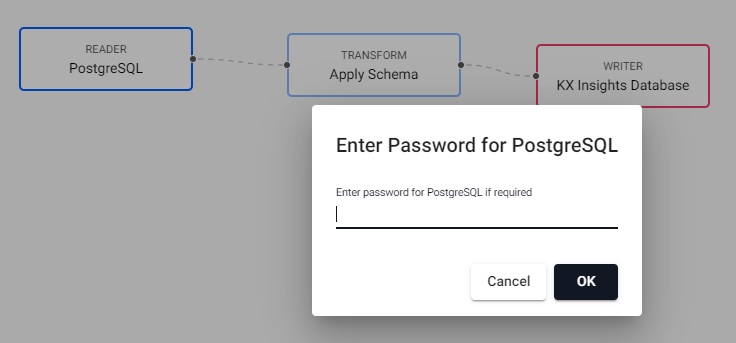
Defining the PostgresSQL password -
Once deployed you can check on the progress of your pipeline back in the Overview pane where you started.
-
When it reaches
Status=Runningthen it is done and your data is loaded.
I want to learn more about Pipelines
Querying
Select Query from the Overview panel to start the process of querying your loaded data. See here for an overview of the Query Window.
In the Query tab there are a few different options available to you, Query, SQL and q. Let's look at SQL.
You can run the following SQL to retrieve from the health table.
SELECT * FROM health
Note that you will need to define an Output Variable, which can also be named health, and then select Get Data to execute the query. You should see the output below.
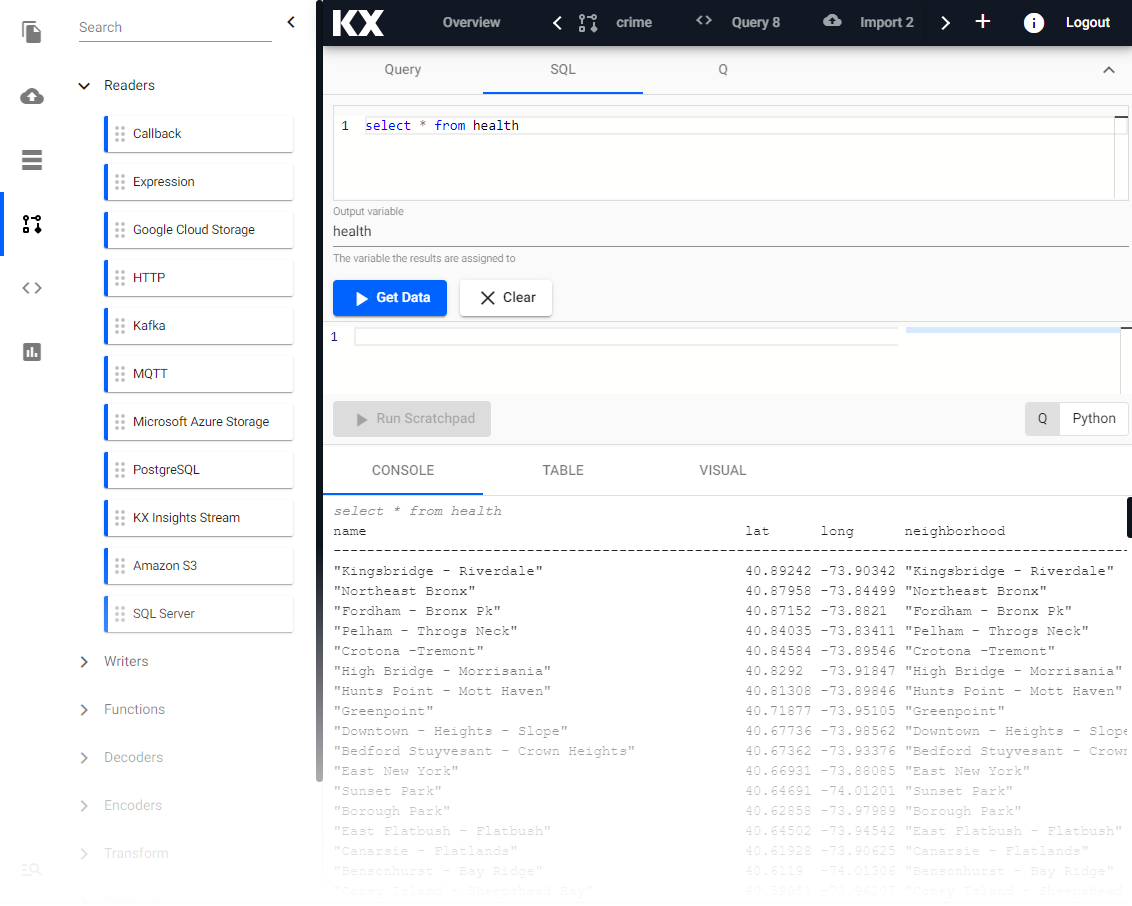
A SQL query of the health table of data from insights-demo.
Refresh Browser
If the tables are not appearing in the Query tab as expected - it is a good idea to refresh your browser and retry.
Troubleshooting
If the tables are still not outputting after refreshing your browser, try our Troubleshooting page.
Let's ingest some more data! Try next with Protocol Buffers on Crime Data.