User Guide for installing kdb Insights Enterprise on Azure Marketplace
This section details the steps to install kdb Insights Enterprise on Azure. It will walkthrough the following:
Prerequisites
Azure Namespaces
Cluster resources created using the Azure Marketplace are preconfigured to use various namespaces. In most cases, when running kubectl commands referenced in the documentation, remember to include the -n insights argument as well.
Before installing kdb Insights Enterprise on Azure you need the following:
-
Pilot customers in Private Preview stage must share the ID of the subscription where they want to deploy the solution to. The subscription ID needs to be configured in the offer in order to make it available to the customer. Adding a new subscription to the offer can take a few hours, therefore, it is important to configure this in advance.
-
The customer must state which subscription offer they have (i.e. Pay-As-You-Go, Enterprise, ...).
-
For the Customer Managed Plan, the individual performing the deployment must have Owner permissions on an empty resource group in the aforementioned subscription, or otherwise Owner permissions on the entire subscription. For the KX Managed Application, please refer to the Permissions Guidelines.
-
The Resource Providers listed below must be registered in the subscription. Your deployment can fail if you are missing Resource Providers. Consider the Microsoft Guidance to learn how to register resource providers:
- Microsoft.Compute
- Microsoft.ContainerService
- Microsoft.Network
- Microsoft.OperationsManagement
- Microsoft.OperationalInsights
- Microsoft.Insights
- Microsoft.Resources
- Microsoft.ManagedIdentity
- Microsoft.Authorization
-
The customer must share which Azure Region they will be interested in deploying the solution to.
-
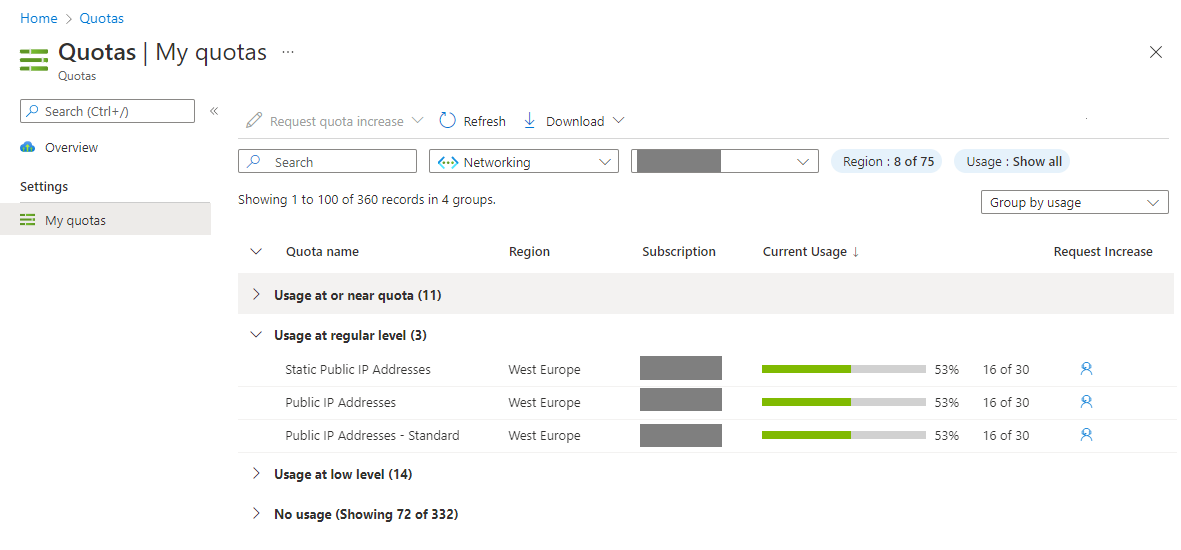
Sufficient quotas for the planned deployment. The customer subscription must have a quota capacity equal or greater than the following numbers for each quota category in the selected Azure region from the previous pre-requisite. Check this link to learn how to raise resource quotas.
Basic Minimum Requirement
The default sizings for the user node pool and system node pool populated during a marketplace deployment are the minimum recommended sizes and enough for a basic instance of the product. Decreasing them is not recommended.
The quota numbers below represent a minimum requirement for a successful deployment, however, they might be insufficient depending on the resources created within kdb Insights Enterprise on Azure after the deployment, therefore, it is recommended to have extra capacity in the resources below.
  -   Compute
      -   Total Regional vCPUs >= 18
      -   Standard DDSv4 Family vCPUs >= 48
      -   Standard DDv4 Family vCPUs >= 6
      -   Virtual Machine Scale Sets >= 2
      -   Virtual Machines >= 2
      -   Standard Storage Managed Disks >= 6
      -   StandardSSDStorageDisks >= 6
  -   Networking
      -   Static Public IP Addresses >= 2
      -   Public IP Addresses >= 2
      -   Public IP Addresses - Standard >= 2
      -   Virtual Networks >= 1
      -   Load Balancers >= 1
      -   Standard Sku Load Balancers >= 1
      -   Network Security Groups >= 1
-
An Azure Region with availability zones.
-
A VM choice that has temp storage available when selecting rook ceph.
Private AKS Cluster
Please be aware that kdb Insights Enterprise on Azure Marketplace does not support Private AKS Clusters or air-gapped environments at this time.
Quotas
It is important to ensure that the chosen subscription and intended deployment region have sufficient available resources for a successful deployment.
It is possible to check for available resources prior to commencing the install workflow to ensure that a deployment does not fail, due to a lack of IP or CPU resources as an example.
A kdb Insights Enterprise deployment requires 3 public IP addresses for each external stream (API Gateway, Service Gateway and Ingress Controller). Each stream that accepts data from a kdb Insights SDK, requires an additional 3 public IPs.
Please check your quotas and current usage on the portal before the deployment as shown below:
You can request a quota increase for Azure by clicking on the Request Increase icon or by using the Azure CLI to list your public IPs in a given region as shown below:
$ az network public-ip list --query "sort_by([? location == 'westeurope'].{Location: location, ResourceGroup: resourceGroup, Sku: sku.name, PublicIpAllocationMethod: publicIpAllocationMethod, IpAddress: ipAddress, Location: location}, &join('', [ResourceGroup,Sku,PublicIpAllocationMethod,IpAddress]))" -o table
Location    ResourceGroup    Sku       PublicIpAllocationMethod    IpAddress
----------  ---------------  --------  --------------------------  --------------
westeurope  akos-test3-aks   Standard  Static                      20.101.192.207
westeurope  akos-test3-aks   Standard  Static                      20.101.193.204
westeurope  akos-test3-aks   Standard  Static                      20.101.254.46
westeurope  akos-test3-aks   Standard  Static                      20.101.255.246
westeurope  akos-test3-aks   Standard  Static                      20.23.152.31
westeurope  akos-test3-aks   Standard  Static                      20.23.152.71
westeurope  akos-test3-aks   Standard  Static                      20.23.156.48
westeurope  akos-test3-aks   Standard  Static                      20.31.78.16
westeurope  akos-test3-aks   Standard  Static                      20.86.223.174
The kdb Insights Enterprise requires a minimum of 3 nodes to deploy the system successfully. Using a particular node pool as an example; the deployment includes a 3 node system Node pool of Standard_D4ds_v4 VMs; this consumes 12 cores of your Standard DDSv4 Family vCPUs quota. By default the user Node pool is of the same size as the system Node pool so you would need at least 24 available vCPUs in the region of your choice.
Note
For more resource intensive deployments you might want to select a VM size that has 16 vCores and that would increase the total required vCPUs to 60.
Virtual machine cores have a regional total limits as well.
You can also use Azure CLI to check usage and limits in a given region as follows:
$ az vm list-usage --location "West Europe" --query "sort_by([? (contains(name.value, 'Family') || name.value == 'cores') && to_number(limit) > \`0\`].{LocalName:localName, CurrentValue:currentValue, Limit:limit}, &LocalName)" -o
 table
LocalName                         CurrentValue    Limit
--------------------------------  --------------  -------
Basic A Family vCPUs              0               10
Standard A0-A7 Family vCPUs       0               10
Standard A8-A11 Family vCPUs      0               10
Standard Av2 Family vCPUs         0               10
Standard BS Family vCPUs          0               10
Standard D Family vCPUs           0               10
Standard DASv4 Family vCPUs       0               10
Standard DCS Family vCPUs         0               8
Standard DCSv2 Family vCPUs       0               8
Standard DDSv4 Family vCPUs       144             320
Standard DDv4 Family vCPUs        6               80
Standard DS Family vCPUs          0               10
Standard DSv2 Family vCPUs        0               10
Standard DSv2 Promo Family vCPUs  0               10
Standard DSv3 Family vCPUs        0               10
Standard DSv4 Family vCPUs        0               10
Standard Dv2 Family vCPUs         0               10
Standard Dv2 Promo Family vCPUs   0               10
Standard Dv3 Family vCPUs         0               320
Standard Dv4 Family vCPUs         0               10
Standard EASv4 Family vCPUs       0               10
Standard EBDSv5 Family vCPUs      0               10
Standard EBSv5 Family vCPUs       0               10
Standard EDSv4 Family vCPUs       0               10
Standard EISv3 Family vCPUs       0               10
Standard EIv3 Family vCPUs        0               10
Standard ESv3 Family vCPUs        0               10
Standard Ev3 Family vCPUs         0               10
Standard Ev4 Family vCPUs         0               10
Standard F Family vCPUs           0               10
Standard FS Family vCPUs          0               10
Standard FSv2 Family vCPUs        0               10
Standard G Family vCPUs           0               10
Standard GS Family vCPUs          0               10
Standard H Family vCPUs           0               8
Standard H Promo Family vCPUs     0               8
Standard LS Family vCPUs          0               10
Standard LSv2 Family vCPUs        0               10
Standard LSv3 Family vCPUs        0               100
Standard NC Family vCPUs          0               12
Standard NC Promo Family vCPUs    0               12
Standard NV Family vCPUs          0               12
Standard NV Promo Family vCPUs    0               12
Standard NVSv4 Family vCPUs       0               8
Standard PBS Family vCPUs         0               6
Total Regional vCPUs              150             1360
To obtain a successful deployment, please select an available region with sufficient resources.
Configuring and Deploying kdb Insights Enterprise on Azure
Getting Started
-
Ensure your approved subscription is selected in the global subscription filter in the Azure Portal.
-
Open the left-hand Portal menu and click
Create a resource.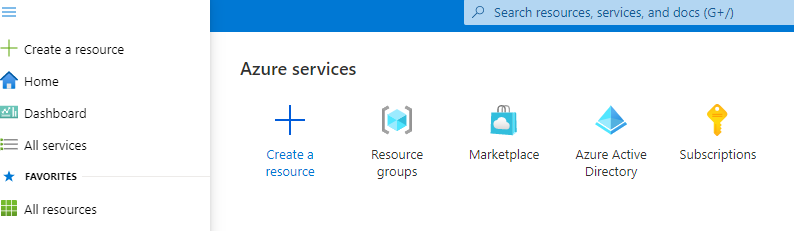
-
You should see a light purple band with a link to 'View private products' once your subscription has been whitelisted.

-
Search for kdb Insights Enterprise under Private Products.
Other Offers
The KX Insights Offer is also publicly available on the Azure Marketplace. This User Guide is specific to kdb Insights Enterprise (private) Offer.
-
Select
kdb Insights Enterprise. Can also be found here.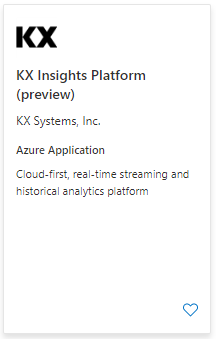
-
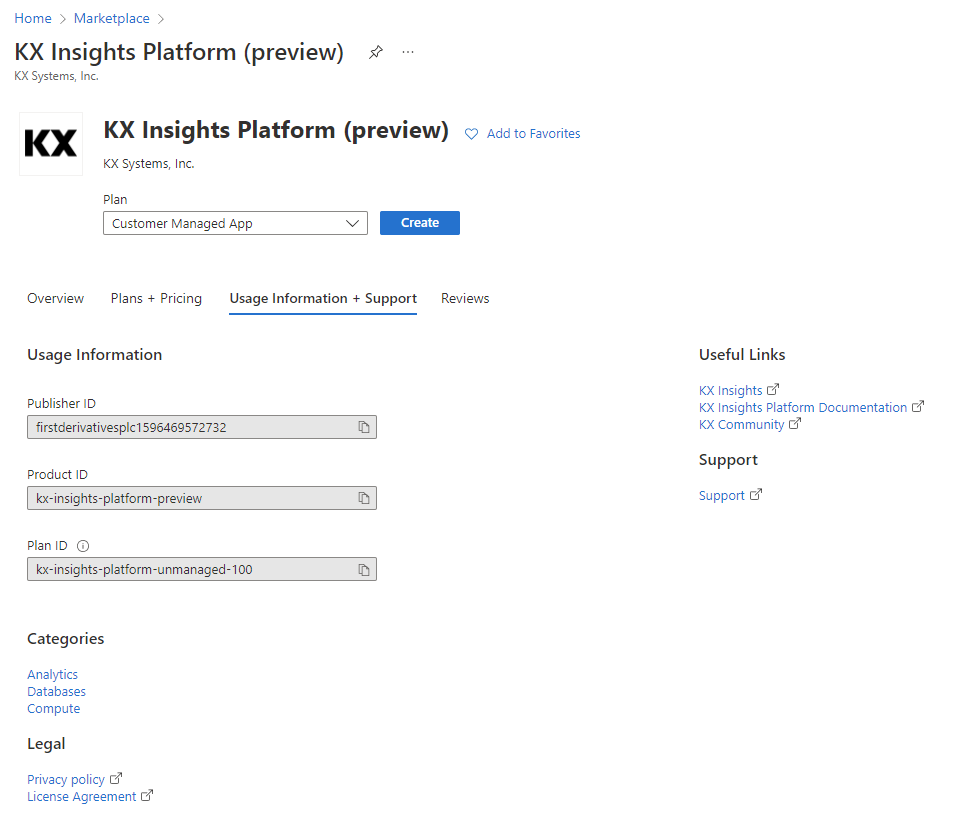
Review the Offer Details,
- The Overview section includes a summary description about kdb Insights Enterprise,
- The Plans + Pricing tab outlines each Plan which is available under the Offer, with a summary description for each Plan and the Price,
- The Usage Information + Support tab includes useful links for getting started, a link to our Support site where you can raise support tickets as well as links to the License Agreement and Privacy Policy.

KX License Agreement
By clicking through the Marketplace and deploying the Software, you have Accepted the Terms & Conditions in the KX License Agreement.
-
Select a Plan from the dropdown and click
Createand you will be taken to the 'Basics' section:-
Customer Managed App - coming soon
-
Customer Managed Plan
Basics
Customer Managed Plan
The Customer Managed Plan is not available yet but is coming soon. Please reach out to KX if you are interested in the Customer Managed Plan.
-
Select the Subscription in which to install the infrastructure and application.
-
Create a new resource group, or select an existing empty resource group from the dropdown. Do not select an existing resource group which is not empty.

Deploying multiple instances
If you plan to deploy multiple instances of kdb Insights Enterprise, then each deployment from the Azure Marketplace must have a unique resource group name.
-
Select the Region in which to deploy kdb Insights Enterprise.
Availability Zones
Remember to select an Azure region that has availability zones.
-
Click
Nextand you will be taken to the the 'General Configuration' section.
General configuration
-
Add a valid email address for license and certificate registration.
-
Create a Keycloak admin password and make note of it.

Password
This will be required later to access the Keycloak Url Output from the deployment. Some special characters are not supported. Please pay attention to the information box image above.
-
Tick
Show Advanced Settings. -
For security purposes, you can choose to set authorized IP ranges, this is not mandatory at the time of deployment. Any IP ranges defined at time of deployment can be updated and edited post deployment.
-
Select
Deploy Rook Cephif desired. Otherwise, the Storage Class default options can be used.
Warning
Rook Ceph uses local SSD storage. This type of storage provides higher throughput and lower latency for optimum performance, but it is ephemeral. Your data is stored across 3 nodes for resiliency however if 2 nodes go offline, data stored on the SSDs will be lost.
-
The default VM sizes for the System node pool and the User node pool are suitable for deployment purposes. Please refer to the Prerequisites section if changing the node pool VM size.
Note
You may select an alternative VM size if you have specific workload requirements.
-
In the Storage Class selector, if you have chosen to Deploy Rook Ceph please select Rook Ceph Block for Read Write Once volumes and Rook CephFS for ReadWriteMany volumes.


-
There is an option to enable email notifications to your desired email address by selecting
Turn on client alert notifications. KX have pre-packaged some useful Alert logic to assist you with monitoring the health of the application. Please refer to the following documentation.
-
Click
Next. -
At this stage you should have a Validation Passed message which brings you to 'Review + Create' final page.
Warning
Do not select 'Download a template for automation'. There is no 'Back' button available if you select this option and you will need to start the workflow again. It is possible to download a template post deployment but KX do not recommend this because we only support the Marketplace deployment method on Azure in this scenario.
-
Click
Createto deploy. -
When your deployment is complete, follow these steps to access keycloak.
Deployment Failures
Please see Potential Deployment Issues for resolutions to errors that may arise if a deployment were to fail.
Output
The output of the deployment can be found under "Resource groups" from the "Home" page in Azure. Please select the relevant resource group, navigate to the Settings section on the left-hand side, and select Deployments.
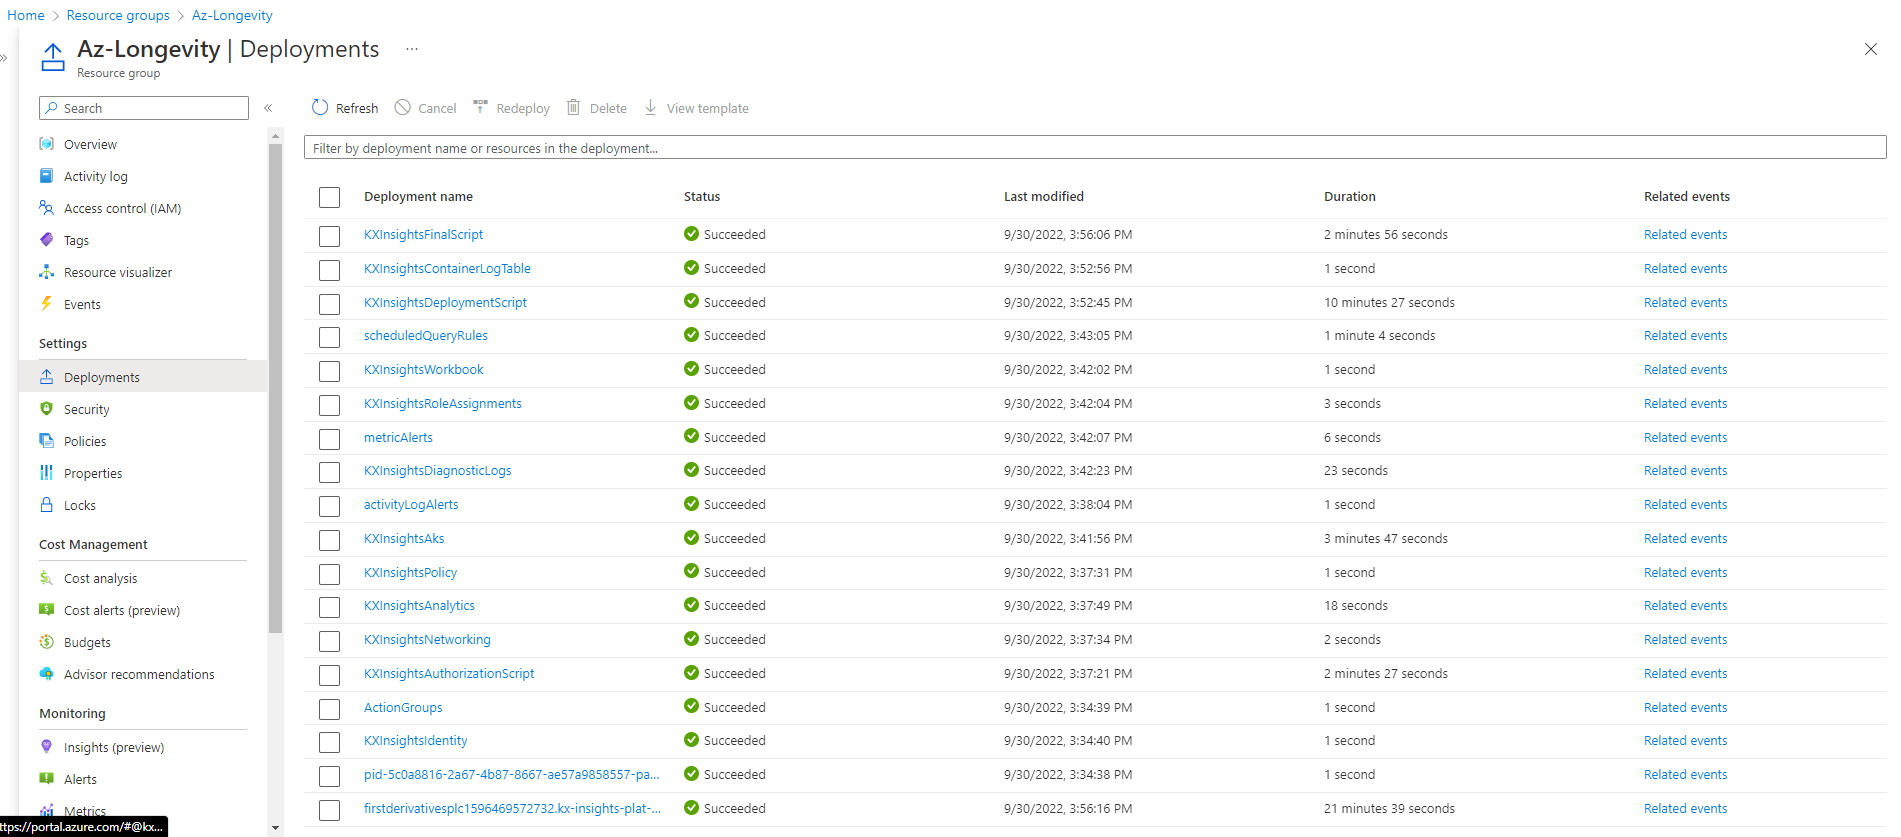 Please be aware that if your Deployment failed for any reason, the Deployments section should help clarify what step of the process failed and you can include this information when you raise a ticket for KX Support team.
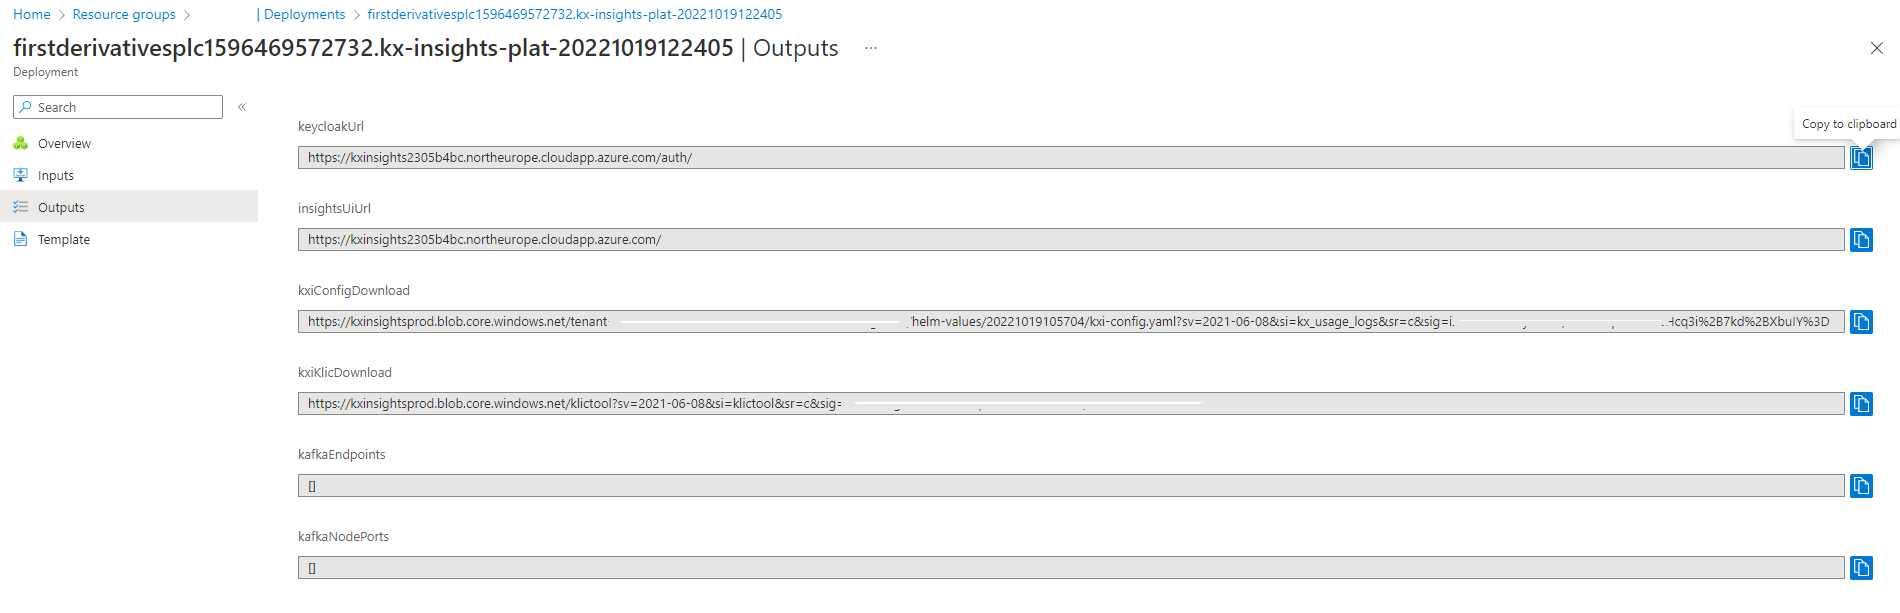
From the list select the final script, and select "Outputs" tab. (Please be aware that if the Deployment failed, you may not have any Outputs available.)
KX Managed App Plan
Basics
-
Select the Subscription in which to install the infrastructure and application.
-
Create a new resource group, or select an existing empty resource group from the dropdown. Do not select an existing resource group which is not empty.
Deploying multiple instances
If you plan to deploy multiple instances of kdb Insights Enterprise, then each deployment from the Azure Marketplace must have a unique resource group name.
-
Select the Region in which to deploy kdb Insights Enterprise. Remember to select an Azure region that has availability zones.
-
Under the Managed Application Details, provide a name for your managed application and its managed resource group.
-
Click
Nextand you will be taken to the the 'General Configuration' section.
General configuration
-
Add a valid email address for license and certificate registration.
-
Create a Keycloak admin password and make note of it.
Password
This will be required later to access the Keycloak Url Output from the deployment. Some special characters are not supported. Please pay attention to the information box image above.
-
Tick
Show Advanced Settings. -
For security purposes, you can choose to set authorized IP ranges, this is not mandatory at the time of deployment. Any IP ranges defined at time of deployment can be updated and edited post deployment.
-
Select
Deploy Rook Cephif desired. Otherwise, the Storage Class default options can be used.Warning
Rook Ceph uses local SSD storage. This type of storage provides higher throughput and lower latency for optimum performance, but it is ephemeral. Your data is stored across 3 nodes for resiliency however if 2 nodes go offline, data stored on the SSDs will be lost.
-
The default VM sizes for the System node pool and the User node pool are suitable for deployment purposes. Please refer to the Prerequisites section if changing the node pool VM size.
Note
You may select an alternative VM size if you have specific workload requirements.
-
In the Storage Class selector, if you have chosen to Deploy Rook Ceph please select Rook Ceph Block for Read Write Once volumes and Rook CephFS for ReadWriteMany volumes.
-
There is an option to enable email notifications to your desired email address by selecting
Turn on client alert notifications. KX have pre-packaged some useful Alert logic which will trigger email notifications to the Insights Managed Service operational team to assist with monitoring the health of the application. This field is to add a distribution list of email address in addition to the KX IMS Support team. Please refer to the following documentation. -
Click
Next. -
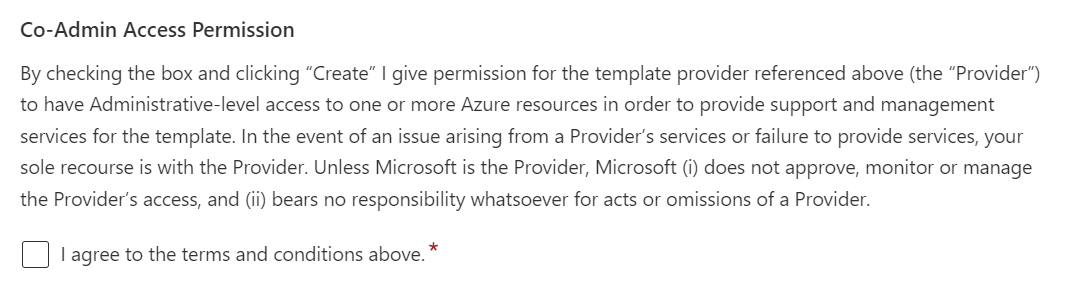
At this stage you should have a Validation Passed message which brings you to 'Review + Create' final page. You must agree to the terms and conditions in order to proceed as KX require this access in order to provide the Managed App Service.
Warning
Do not select 'Download a template for automation'. There is no 'Back' button available if you select this option and you will need to start the workflow again. It is possible to download a template post deployment but KX do not recommend this because we only support the Marketplace deployment method on Azure in this scenario.
-
Click
Createto deploy. -
When your deployment is complete, follow these steps to access keycloak.
Deployment Failures
Please see Potential Deployment Issues for resolutions to errors that may arise if a deployment were to fail.
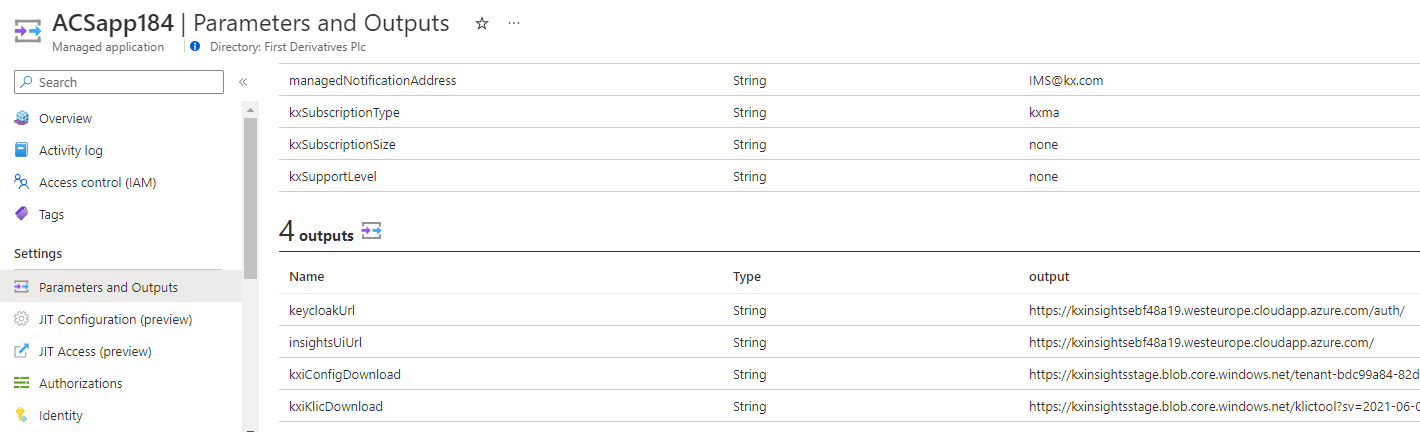
Output
The output of the deployment can be found in Azure Portal under "Managed applications". Once the deployment is selected, output of the deployment script is available in the "Parameters and Outputs" tab.
Create kdb Insights Enterprise roles
When the deployment is successful, locate the deployment outputs by clicking on Outputs in the left-hand navigation menu to obtain the keycloak URL.
First, you need to add the administrator and any other required roles into kdb Insights Enterprise. Follow the steps below to log in to Keycloak, which kdb Insights Enterprise uses as its Identity and Access Management component.
-
Login to the Keycloak Web UI by navigating to the
keycloakUrlavailable in the 'Outputs' of the deployment, or theinsightsUiUrlappended with/auth/, in a web browser.
-
Click on
Administration Consoleand log in with the Keycloak admin user giving the password you created in the General Configuration step of the installation process.
-
Create the administrator role:
-
Click on
Rolesin the left-hand menu then click on theAdd Rolebutton. -
Enter the Role Name:
insights.admin, make sure you add some description and clickSave. -
Turn Composite Roles
ON. -
Associate it with the following roles:
insights.role.maintainer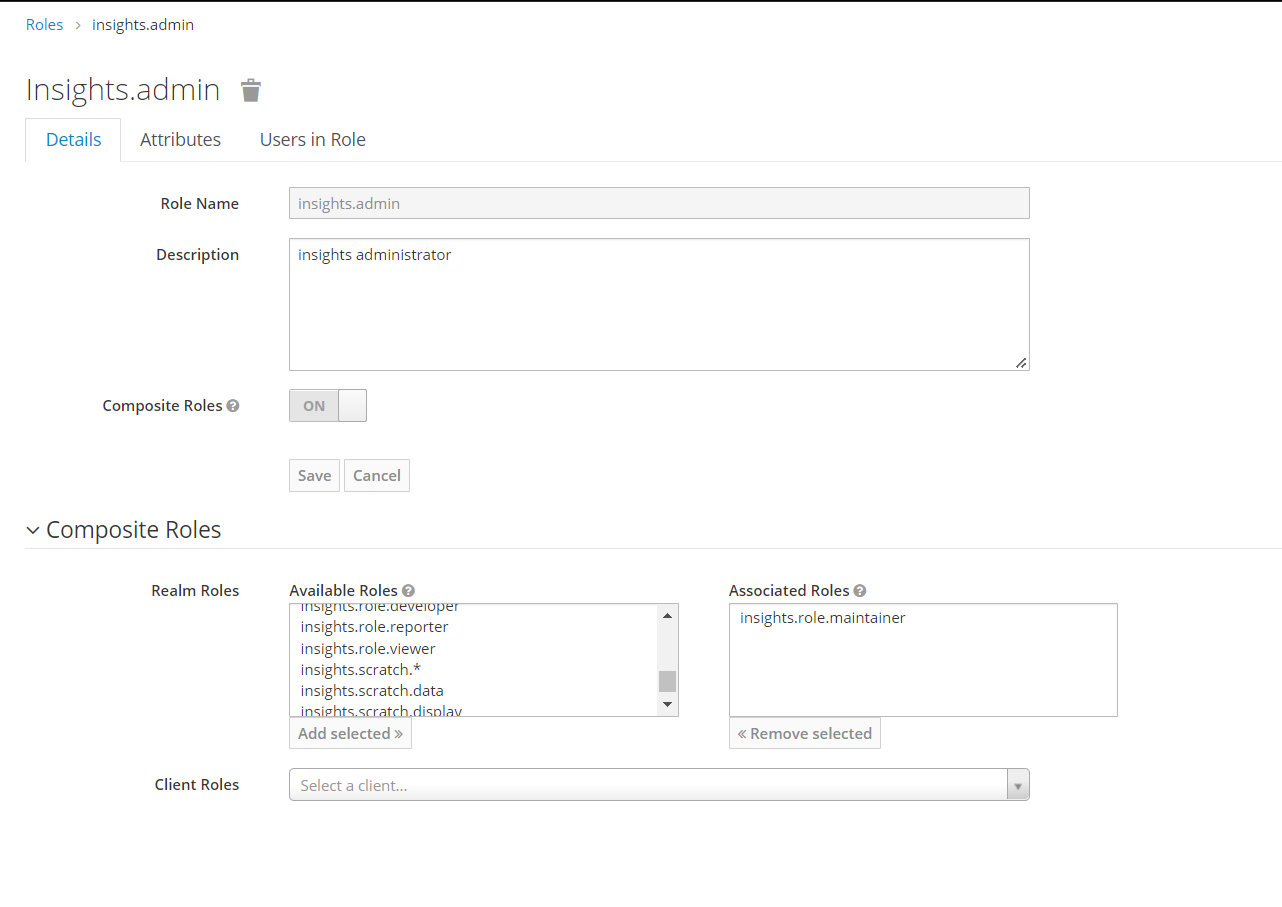
-
Please refer to the documentation on Keycloak and the role based permissions.
Log in to kdb Insights Enterprise
Once the deployment is complete and you have used Keycloak to create a standard user role and an admin role, follow the steps below to log in to kdb Insights Enterprise application:
-
Click on
Outputsin the left-hand navigation menu. -
Copy the
insightsUiUrlvalue and navigate to this URL in a new browser tab. -
Log in with the below username and password:
- name:
demoinsights - auth:
Asdfg12345!!!!
- name:
-
You will immediately be asked to update your password and log in again with the new credentials.
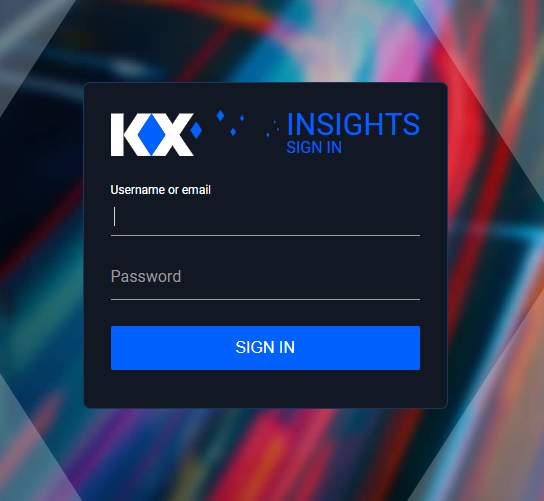
-
You will then be directed to kdb Insights Enterprise User Interface.
-
See kdb Insights Enterprise Overview for an introduction to the User Interface.
There are additional tools and services available on Nexus such as the kdb Insights SDKs and KXI CLI.
Azure Namespaces
Remember! Cluster resources created using the Azure Marketplace are preconfigured to use various namespaces. In most cases, when running kubectl commands referenced in the documentation, remember to include the -n insights argument as well.
Please follow the documentation to Install the SDKs or to Install the KXI CLI.
Azure Active Directory integration
Follow the instructions provided here to integrate Insights with Azure Active Directory and allow your users to log in to kdb Insights Enterprise with their existing credentials.
Potential deployment issues
Failed Deployments
If a deployment fails for any reason, once the root cause analysis is complete, we recommend that you delete the whole resource group to free up any resources that may be left in the deployment, before starting a fresh install. If you keep the resources and start a fresh install, please remember to create a new resource group name. The deployment will fail if you try to select an existing resource group name.
Missing Resource Providers
The required Resource Providers are listed below in the image in the final step and within the pre-requisites section.
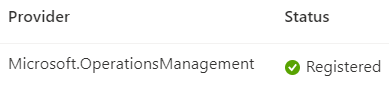
If your deployment fails with an error message 'Missing Subscription Registration error'; this is an indication that you need to register the Microsoft.OperationsManagement resource provider in your Azure Subscription:
{
    "status": "Failed",
    "error": {
        "code": "AddContainerInsightsSolutionError",
        "message": "Code=\"MissingSubscriptionRegistration\" Message=\"The subscription is not registered to use namespace 'Microsoft.OperationsManagement'. See https://aka.ms/rps-not-found for how to register subscriptions.\" Details=[{\"code\":\"MissingSubscriptionRegistration\",\"message\":\"The subscription is not registered to use namespace 'Microsoft.OperationsManagement'. See https://aka.ms/rps-not-found for how to register subscriptions.\",\"target\":\"Microsoft.OperationsManagement\"}]"
    }
}
To resolve this issue:
-
Go to the subscription.
-
Select
Resource Providerson the left menu. -
Search for the
Microsoft.OperationsManagementprovider.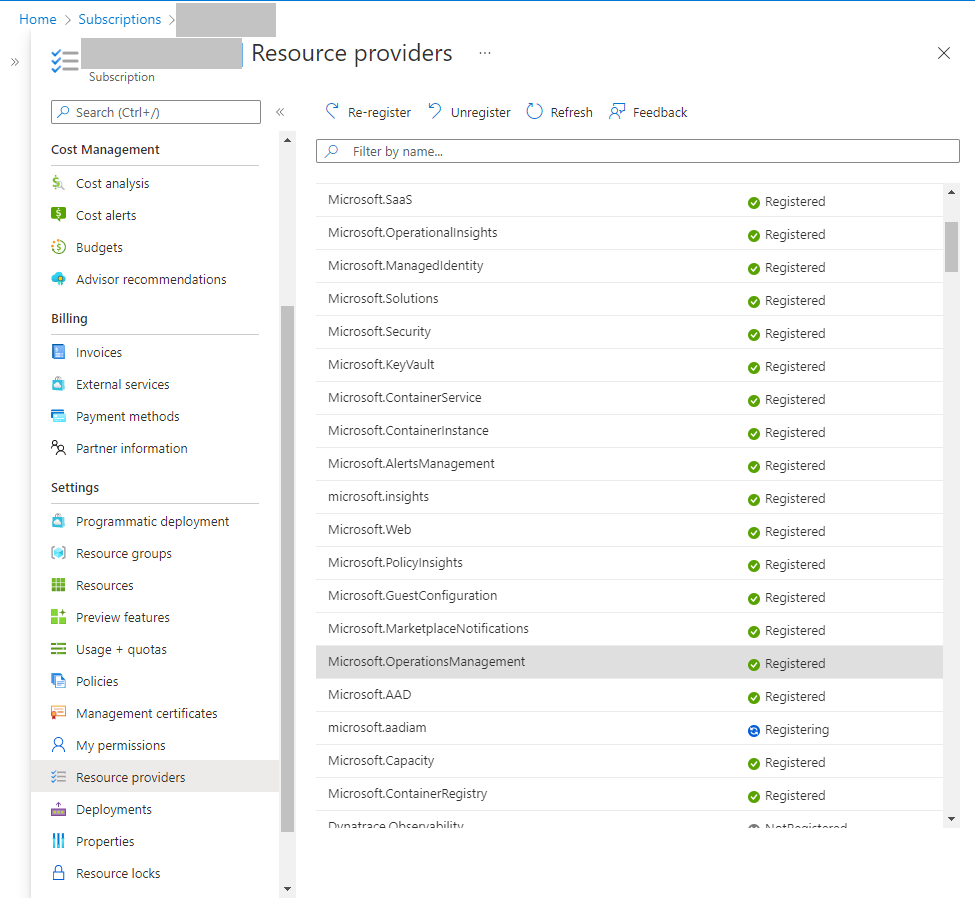
-
Register it.
Please refer to the Prerequisites section for the full list of required resource providers.
Quota issues
Please refer to the Prerequisites section. The deployment can fail if the subscription does not have sufficient quota for the selected configuration. Error messages can highlight a need for more IP addresses, CPU etc which you can increase with Azure in order to deploy successfully.
Azure Regions
There may be resource limitations in certain Regions which are due to Azure specific resource availability. For example, if you select 'Australia' as the Region, kdb Insights Enterprise deployment will not be possible due to the lack of required resources in that Region.
Azure Redeploy Button
Please do not try using the 'Redeploy' button if there are any failures in the initial deployment. This does not function as expected and cannot be removed from the Marketplace. Please always reach out to KX Support for assistance by following the Support section of the documentation.
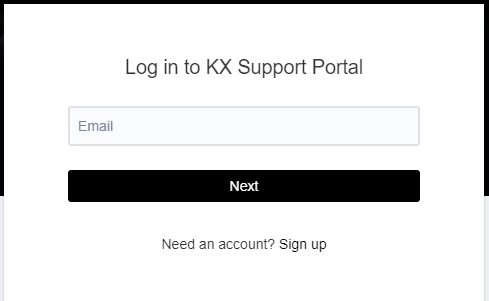
Support
Please be aware that there is a link to the KX Support Portal on the Azure Marketplace Offer.
For first time deployments, please select the Sign Up button. If you deploy multiple instances of kdb Insights Enterprise thereafter, please use the same account to login when raising any Support tickets.