Build Database
Database Creation
When using KX Insights Platform, the first step is to build and deploy an empty database to store the data you want to ingest.
Free Trial User
No database creation required for free trial user
A database that matches the examples in this walkthrough has already been created ahead of time as part of your Free Trial Insights instance.
All you need to do is deploy it!
Deploy Database
The database required for this walkthrough is called insights-demo and can be launched by selecting Overview -> Data -> insights-demo.
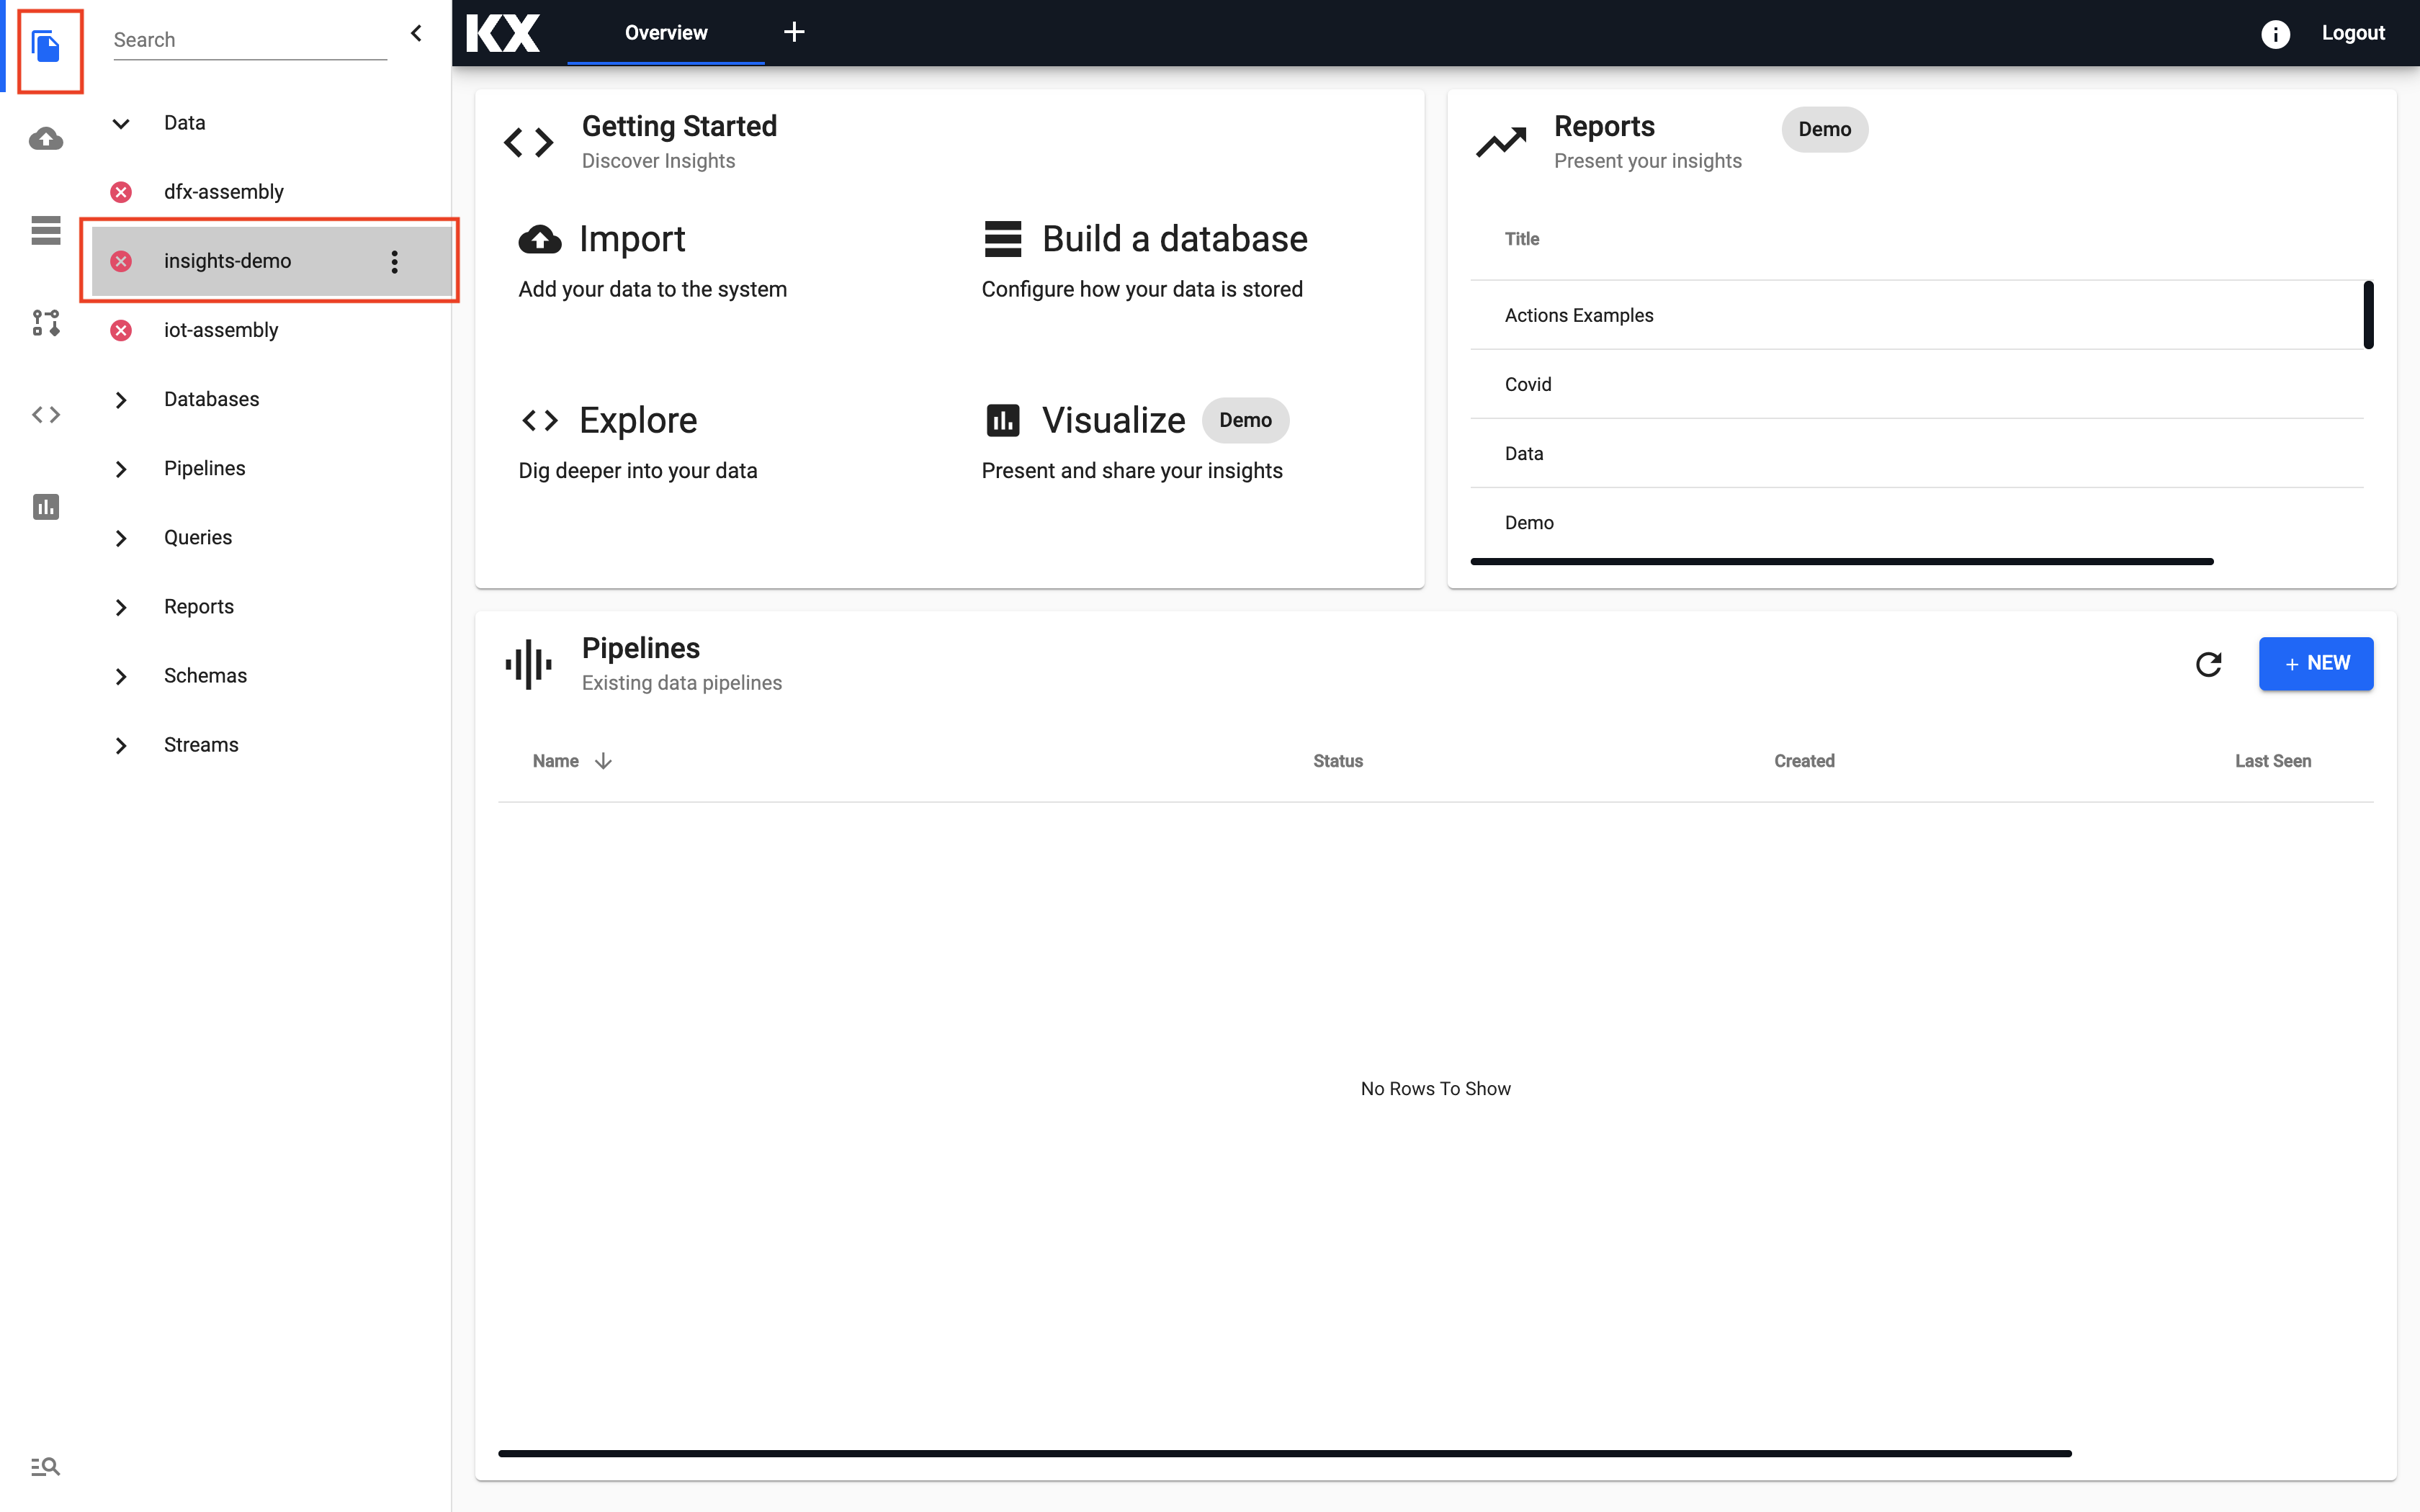
Once launched you can hit Deploy.
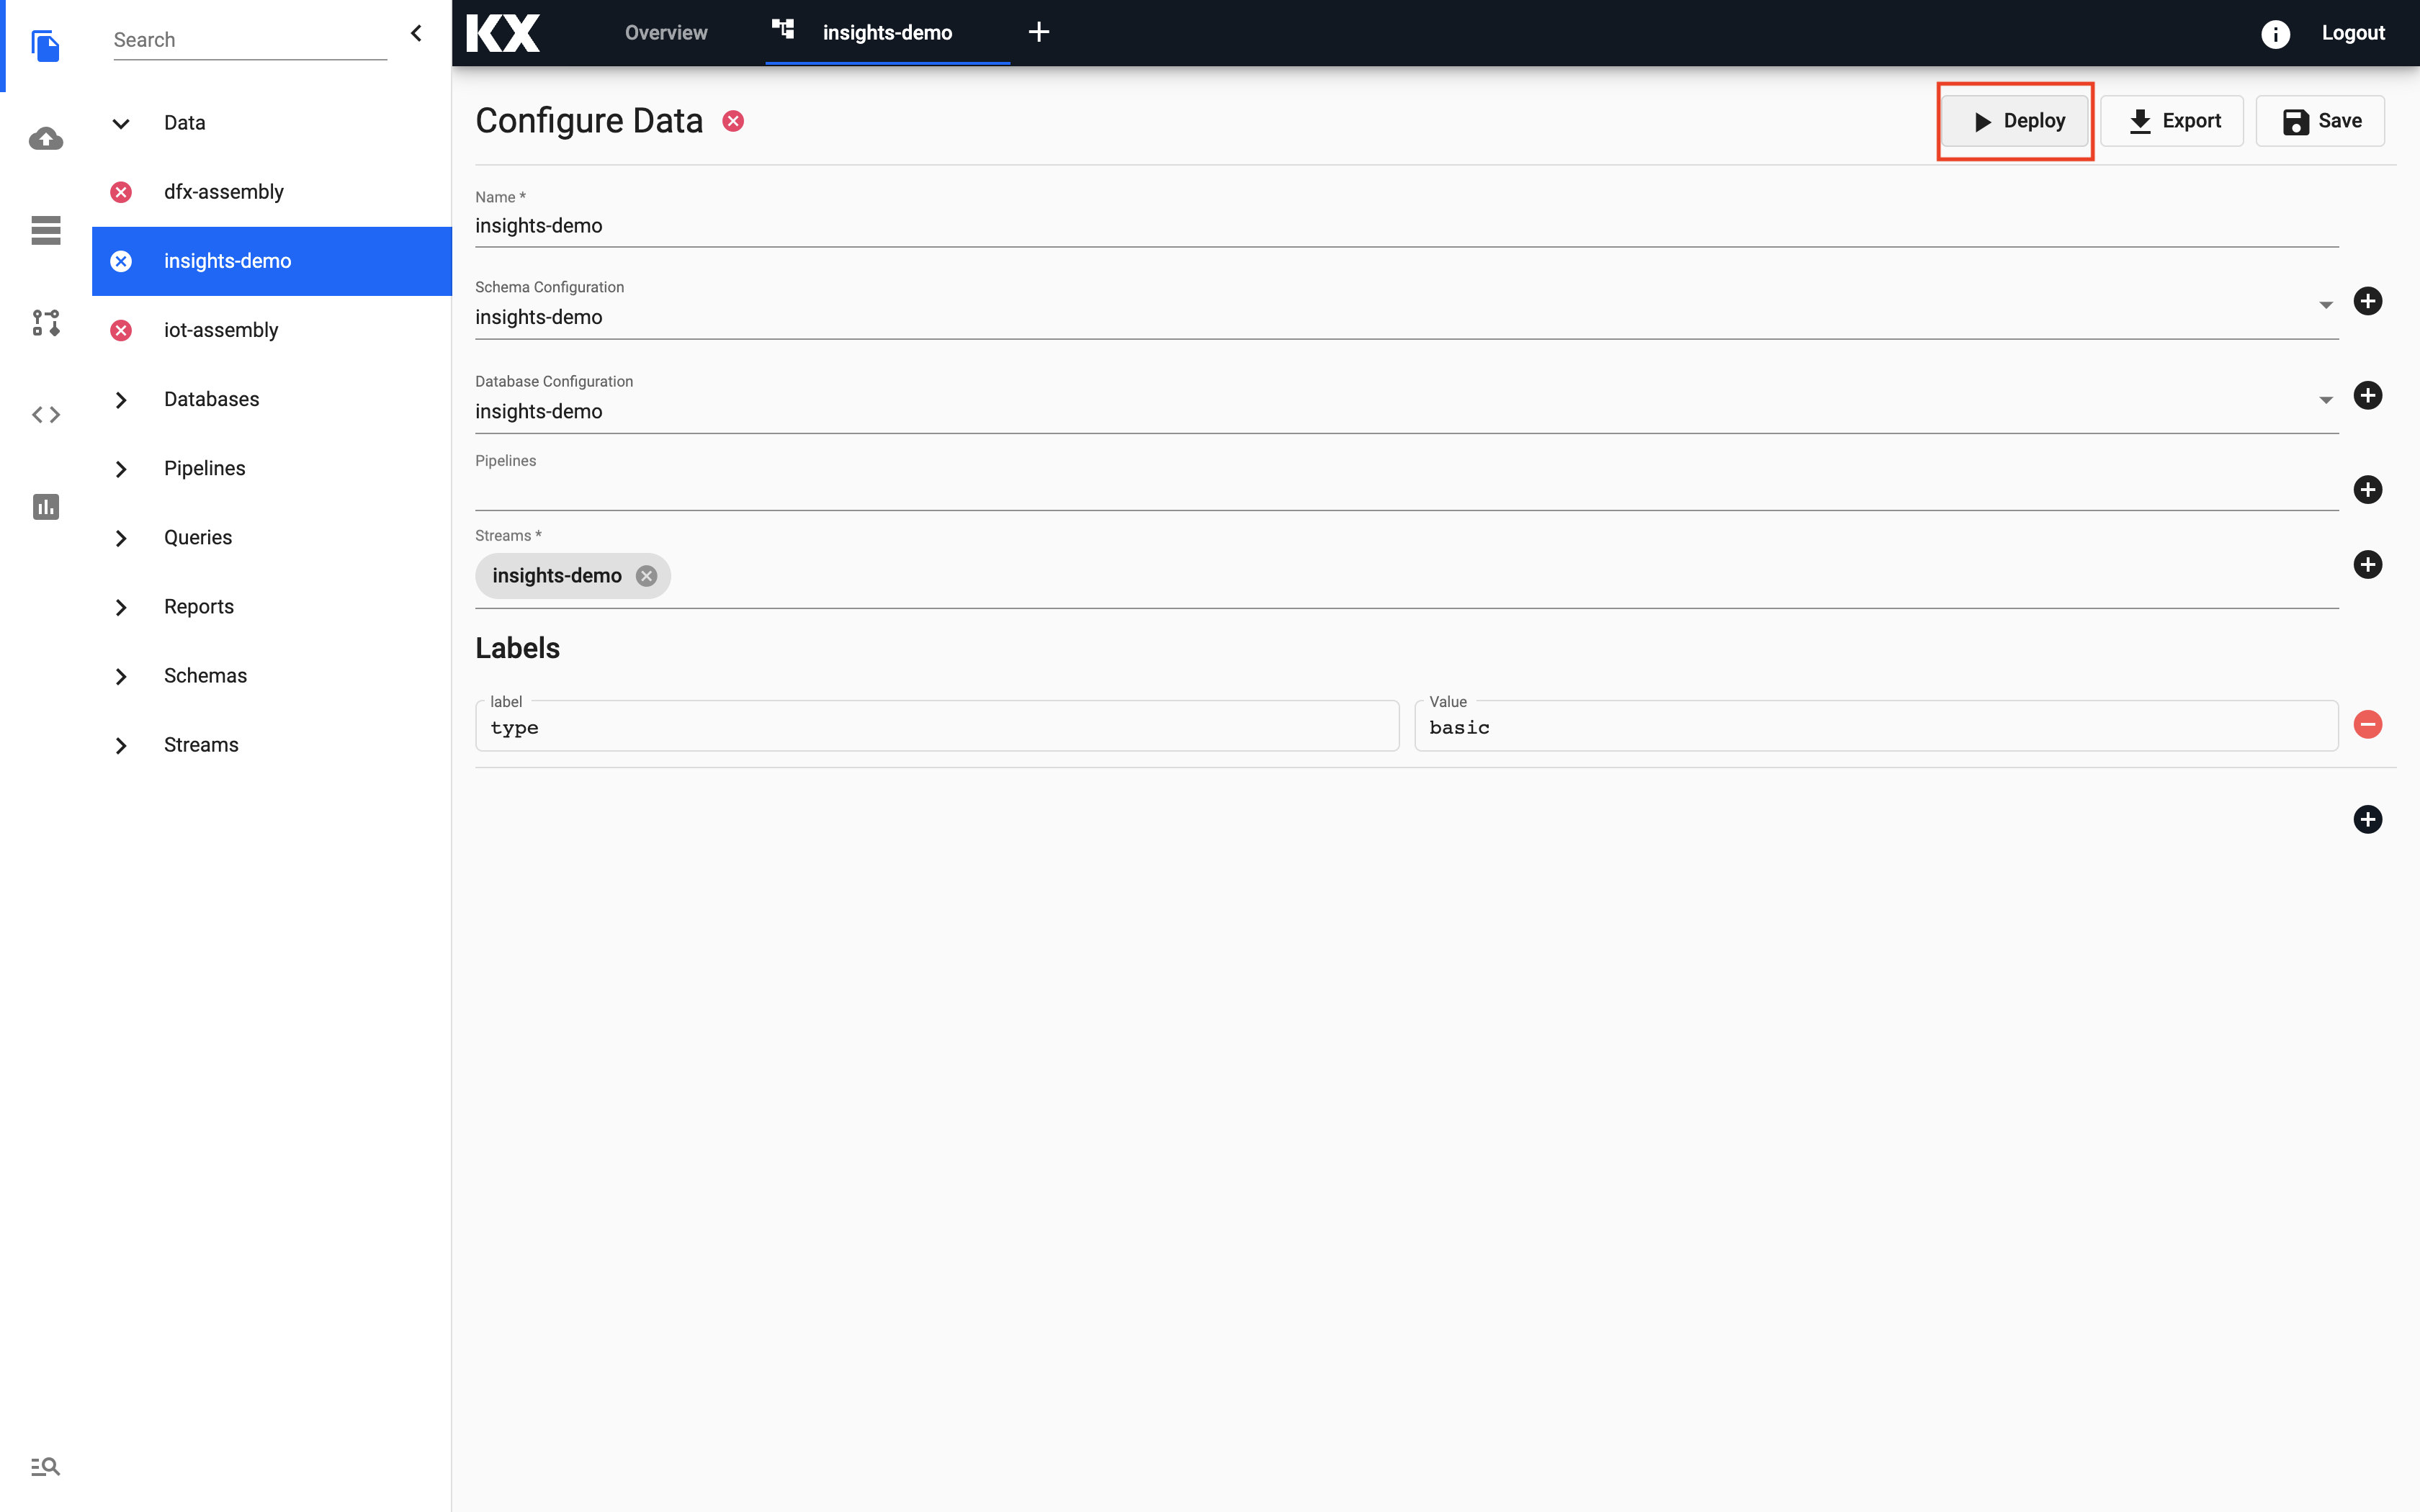
This will take a few seconds and the red "X" will go Green once Ready.
Explore Database
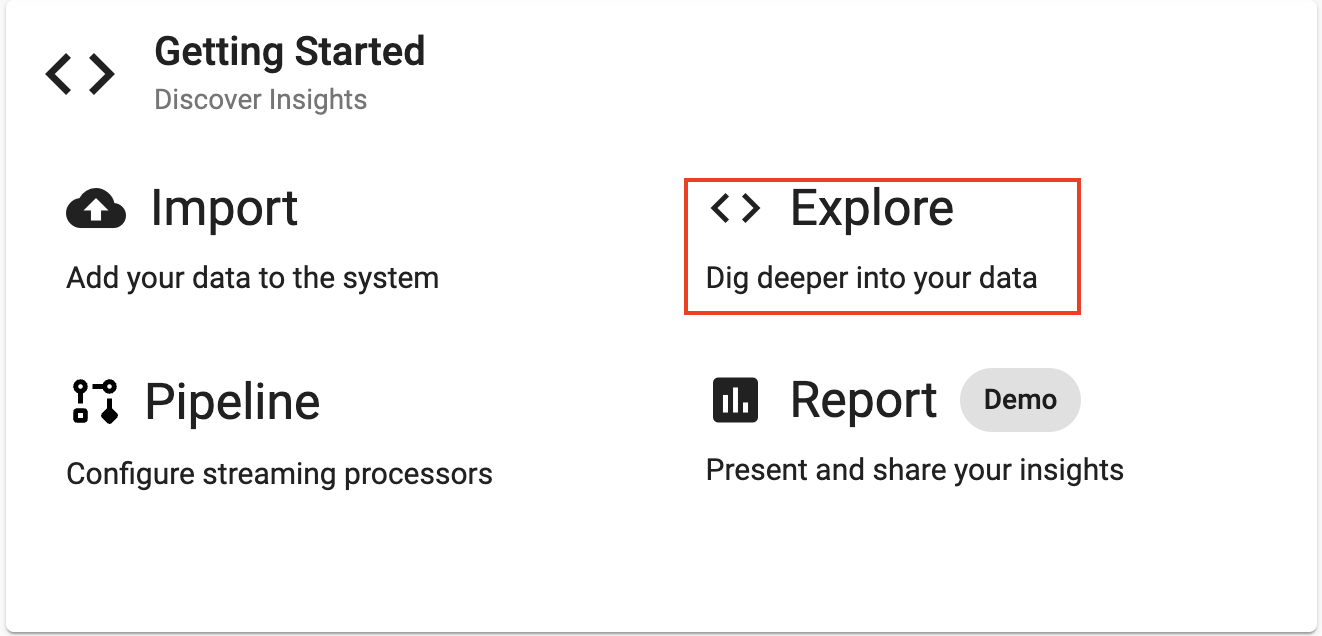
We can explore our database by Selecting Explore from the Overview panel to start the process of exploring your loaded data.
Select insights-demo from the assembly dropdown on the top left hand side. You can demo this on any table but for this example we will use weather
In the Explore tab there are a few different options available to you, Query, SQL and q. Run the following SQL to retrieve from the weather table.
SELECT * FROM weatherDefine an Output Variable and then select Get Data to execute the query.
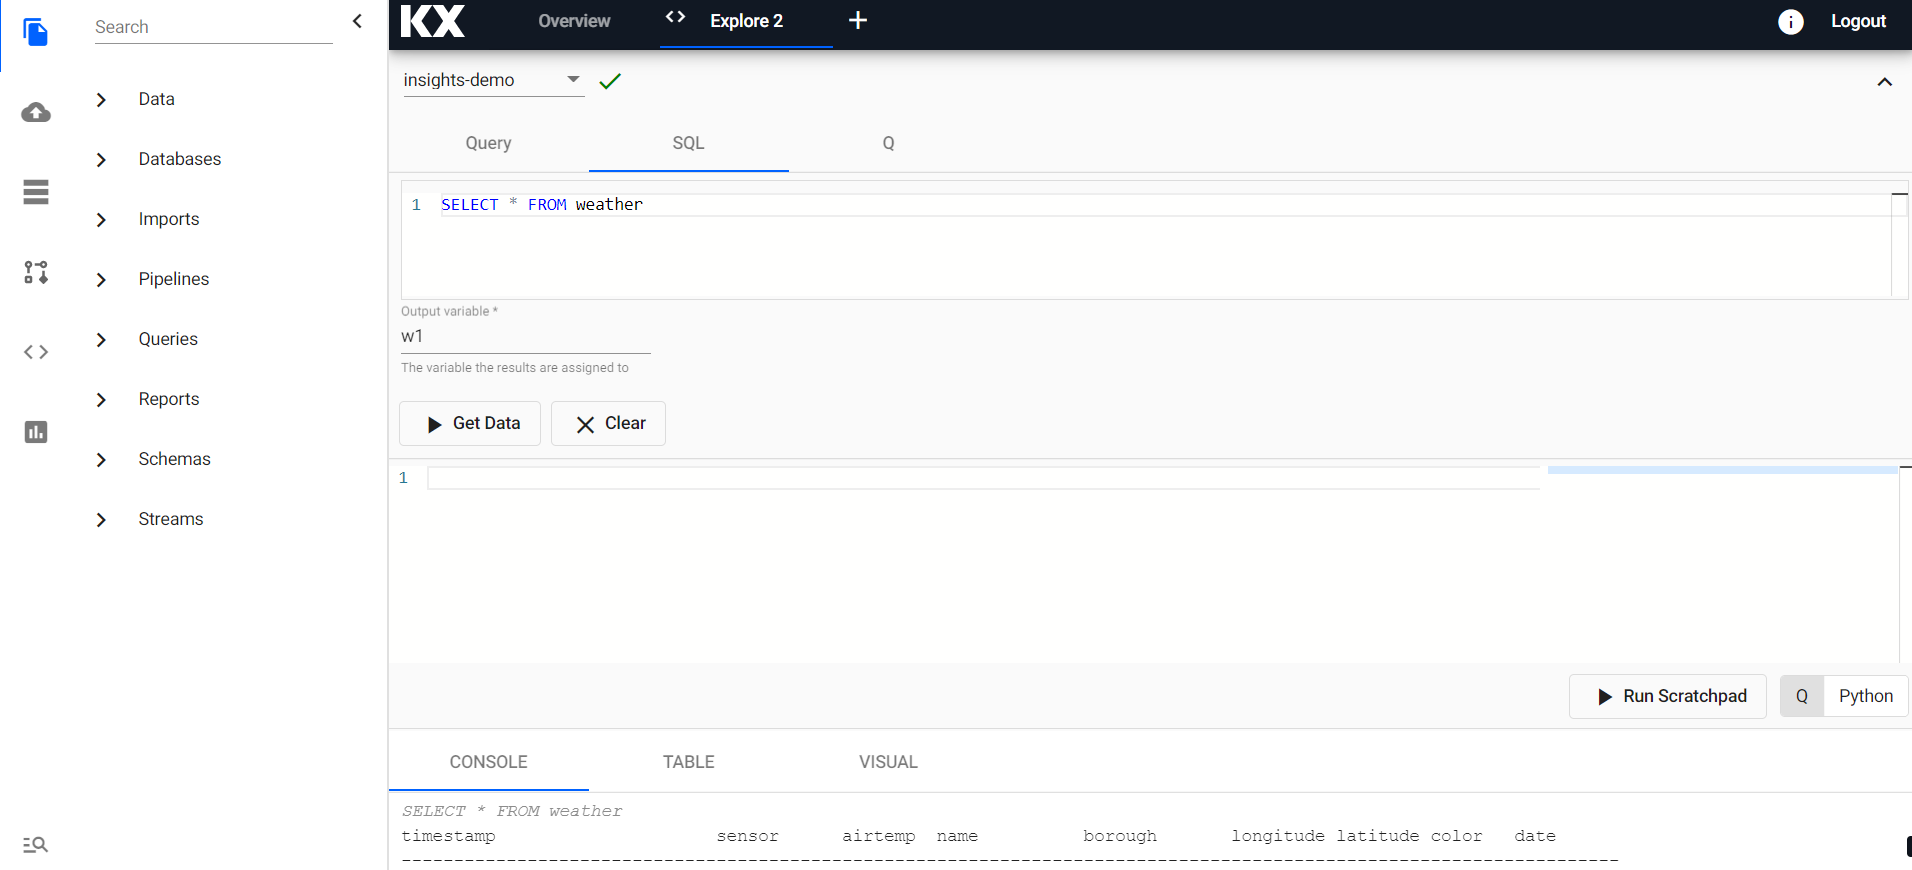
This query will show you all of the headers from the weather table but nothing will output with these headers.
We can dive deeper into this data and output each of the headers datatypes by running the following code in the Scratchpad:
meta w1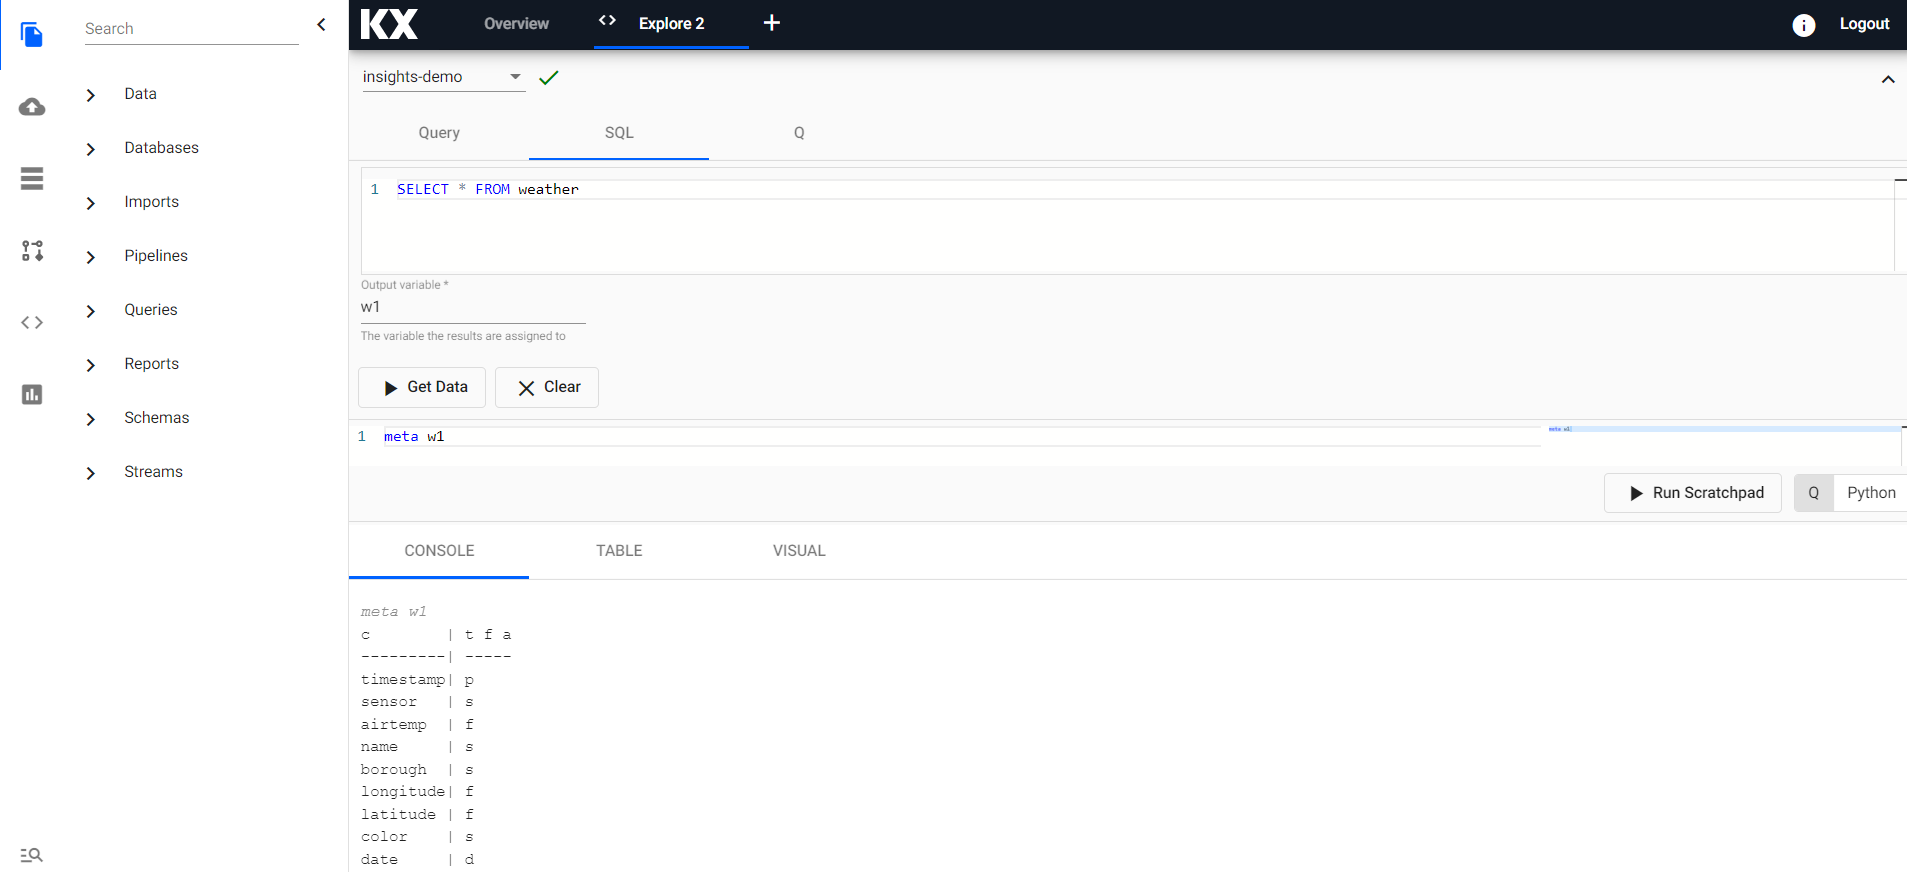
That's it you are now ready to Ingest Data! Let's start with the Weather Data
Non Free Trial User
For those of you that are interested in how the database is created or for users outside of the Free Trial the steps needed are documented below. As mentioned above, this is not required for users of the Free Trial following the walkthrough but will still be useful information for those of you wishing to create your own database later on.
Build Database
Build Database
Databases provided in Free Trial
A database that matches the examples in this walk-through has already been created ahead of time as part of your Free Trial KX Insights Platform Experience. You will however need to deploy it.
Deploy Database
The database required for this walk-through is called insights-demo and can be launched by selecting Overview -> Data -> insights-demo.
Once launched, you can select Deploy.
This will take a few seconds and the X will become green once in a ready state.
That's it you are now ready to Ingest Data! Let's start with the Weather Data
For users who are interested in KX Insights Platform manual database creation or for users outside of the Free Trial, we have detailed the steps needed to create this database below. This is not required for users of the Free Trial, following the walk-through.
Build Database
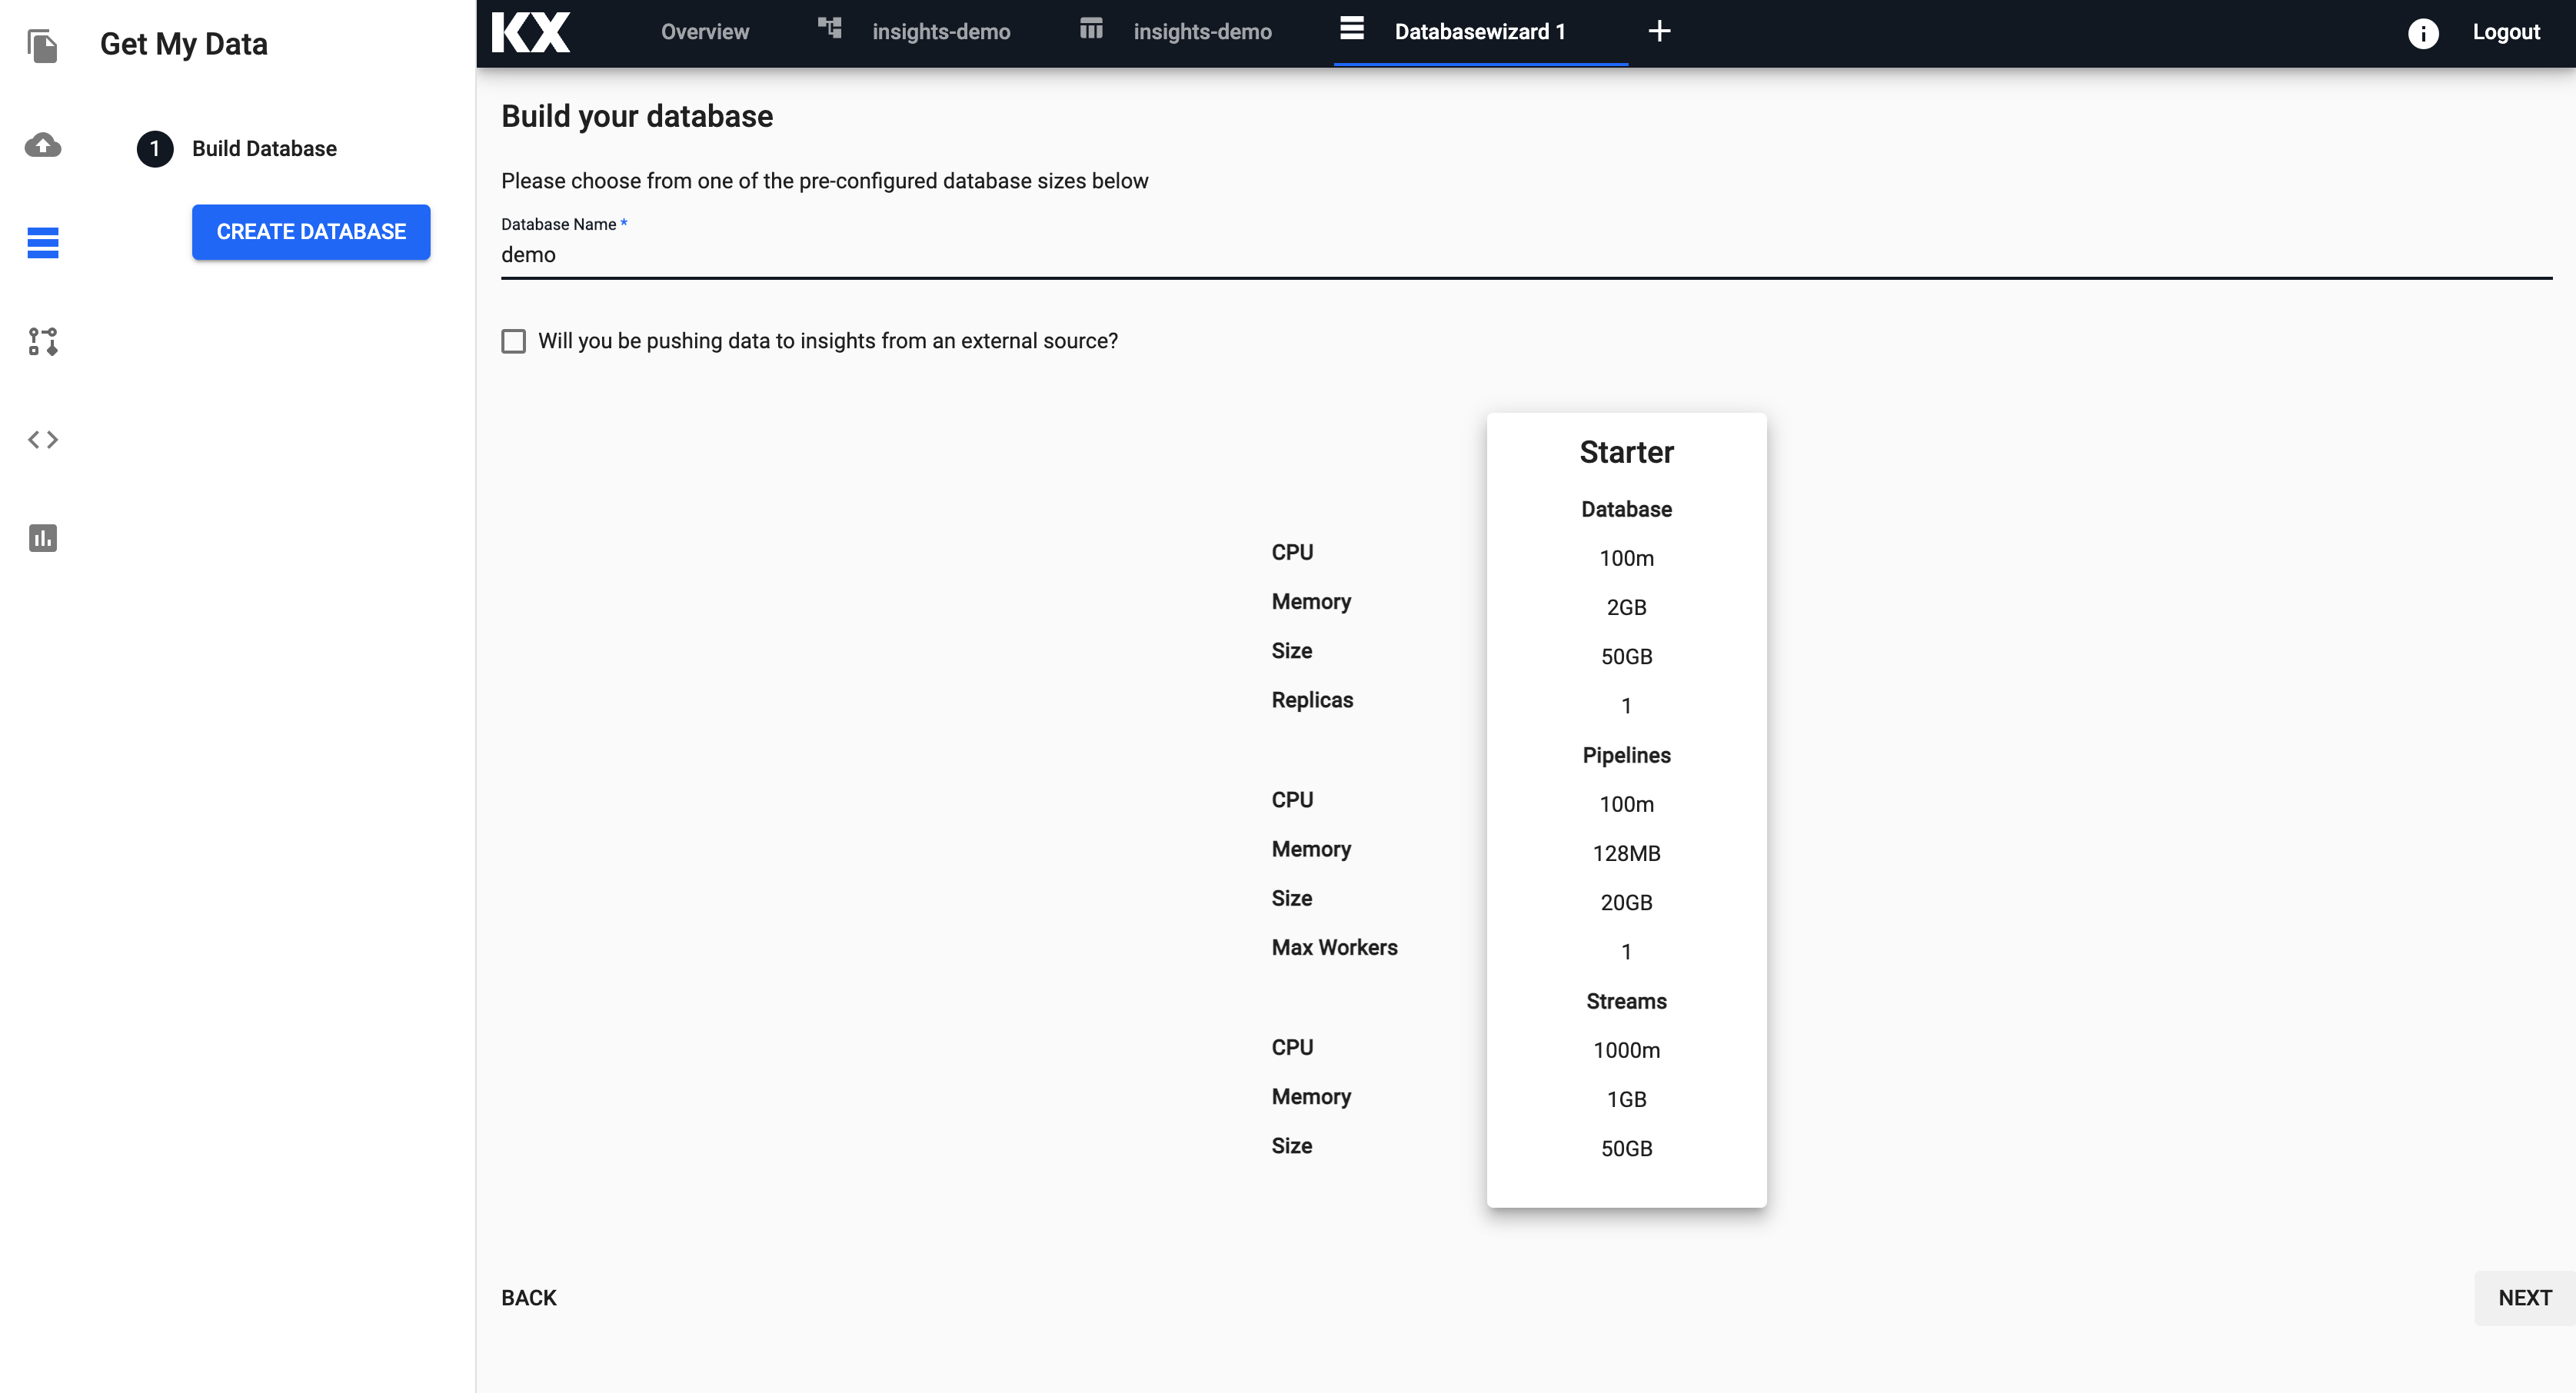
The first step is to build a database to store the data you will need to ingest. Select Build a database from the home screen Getting Started page.

From here, you can enter the name and select the size of your database. For Free Trial Starter will be the only option available. Let's give this database a name and select Next.
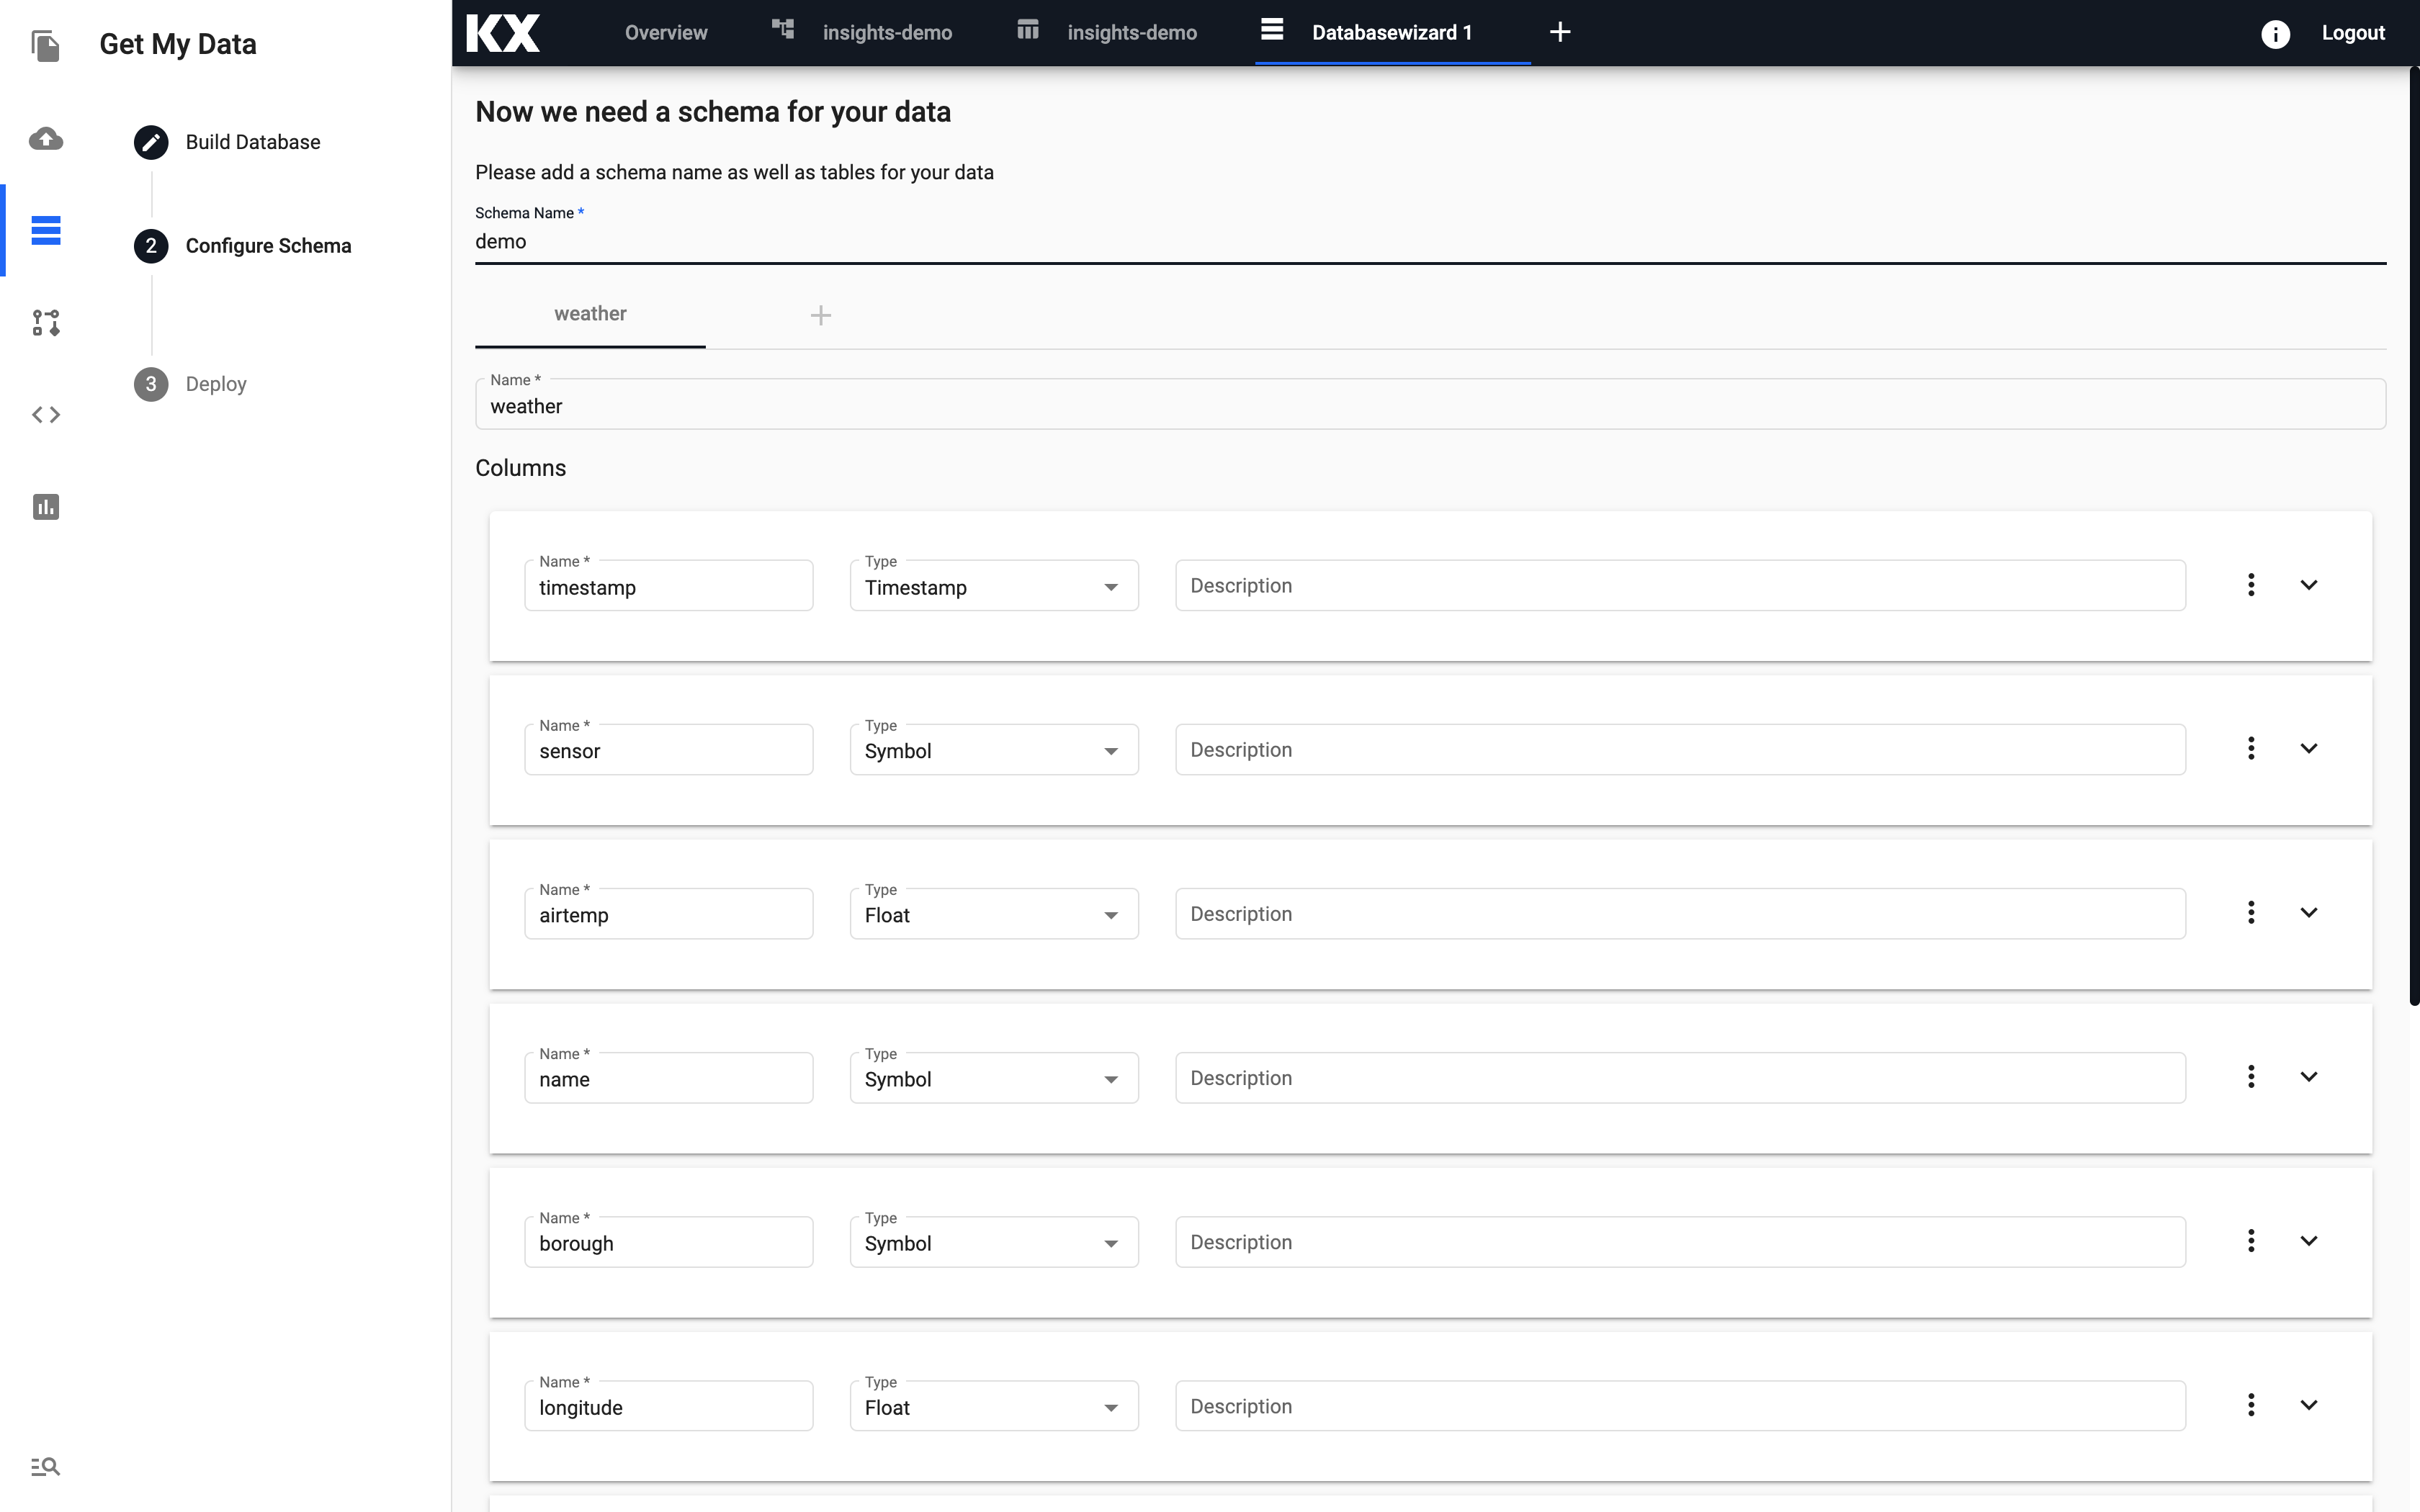
Configure Schema
The next step requires the user to know information about the incoming data ahead of time:
- column header names
- kdb+ datatypes
Below are the recommended schemas of the data for the walkthrough:
| column | type char | type |
|---|---|---|
| timestamp | p | timestamp |
| sensor | s | symbol |
| airtemp | f | float |
| name | s | symbol |
| borough | s | symbol |
| longitude | f | float |
| latitude | f | float |
| color | s | symbol |
| column | type char | type |
|---|---|---|
| trip_id | s | symbol |
| arrival_time | p | timestamp |
| stop_id | s | symbol |
| stop_sequence | h | short |
| stop_name | s | symbol |
| stop_lon | f | float |
| stop_lat | f | float |
| route_id | h | short |
| trip_headsign | s | symbol |
| direction_id | s | symbol |
| route_short_name | s | symbol |
| route_long_name | s | symbol |
| route_desc | C | string |
| route_type | h | short |
| route_url | s | symbol |
| route_color | s | symbol |
| column | type char | type |
|---|---|---|
| name | C | string |
| lat | f | float |
| long | f | float |
| neighborhood | C | string |
| airquality | f | float |
| trafficcongestion | f | float |
| bikeacccnt | i | integer |
| caracccnt | i | integer |
| timestamp | p | timestamp |
| column | type char | type |
|---|---|---|
| event_id | s | symbol |
| incident_time | t | time |
| nypd_precinct | s | symbol |
| borough | s | symbol |
| patrol_borough | s | symbol |
| call_x_geo | j | long |
| call_y_geo | j | long |
| radio_code | s | symbol |
| description | C | string |
| crime_in_progress | C | string |
| call_timestamp | p | timestamp |
| dispatch_timestamp | p | timestamp |
| arrival_timestamp | p | timestamp |
| closing_timestamp | p | timestamp |
| latitude | f | float |
| longitude | f | float |
For more information on kdb+ data types see here
The name of the tables, column headers and the kdb+ datatypes can be entered in the Configure Schema page.
Advanced Options
Important to note the Advanced Options at the bottom of the schema configuration page. Scroll down to access these and ensure they are defined correctly.
For this example table weather we are going to ensure the following settings are configured. If you are configuring a different dataset you can adjust as appropriate.
| setting | value |
|---|---|
| Type | partitioned |
| Partition Column | timestamp |
| Timestamp Column | timestamp |
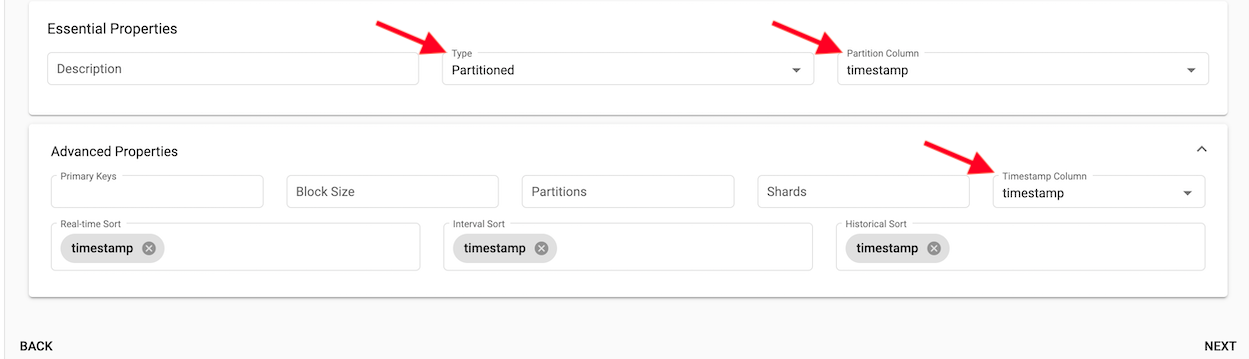
Once all tables have been added, select Next.
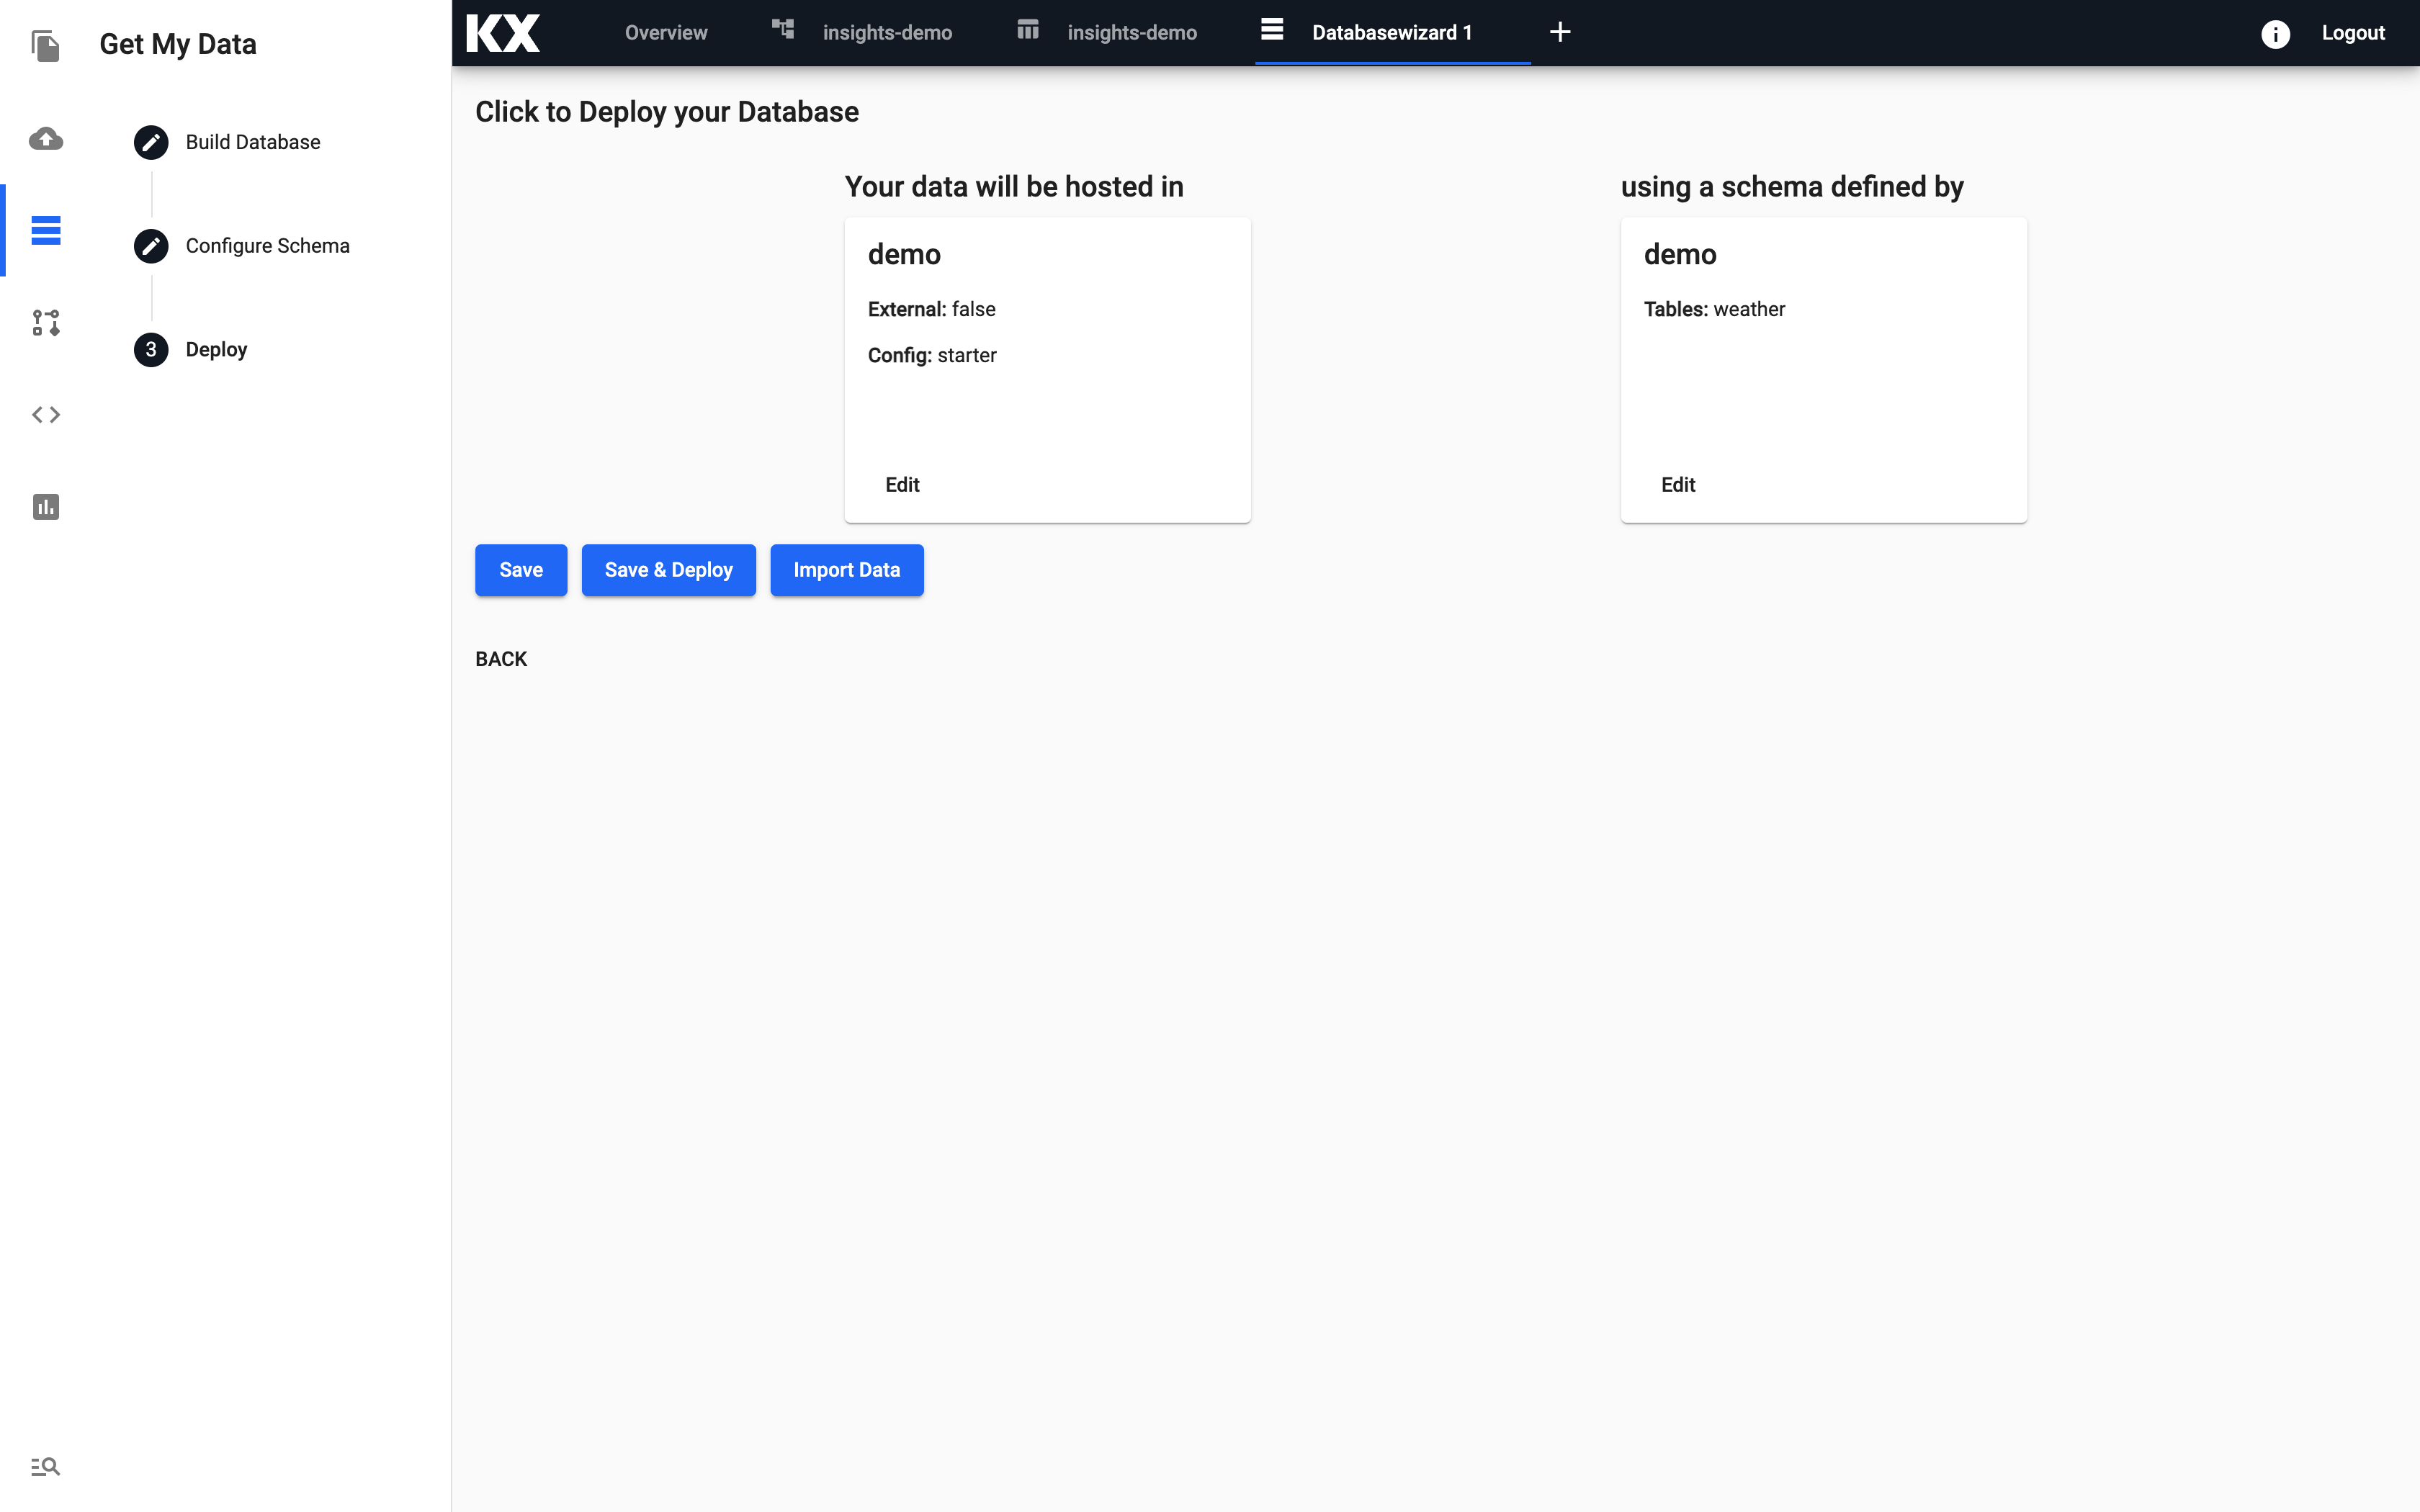
Deploy Database
From the next screen you can simply select Save & Deploy.
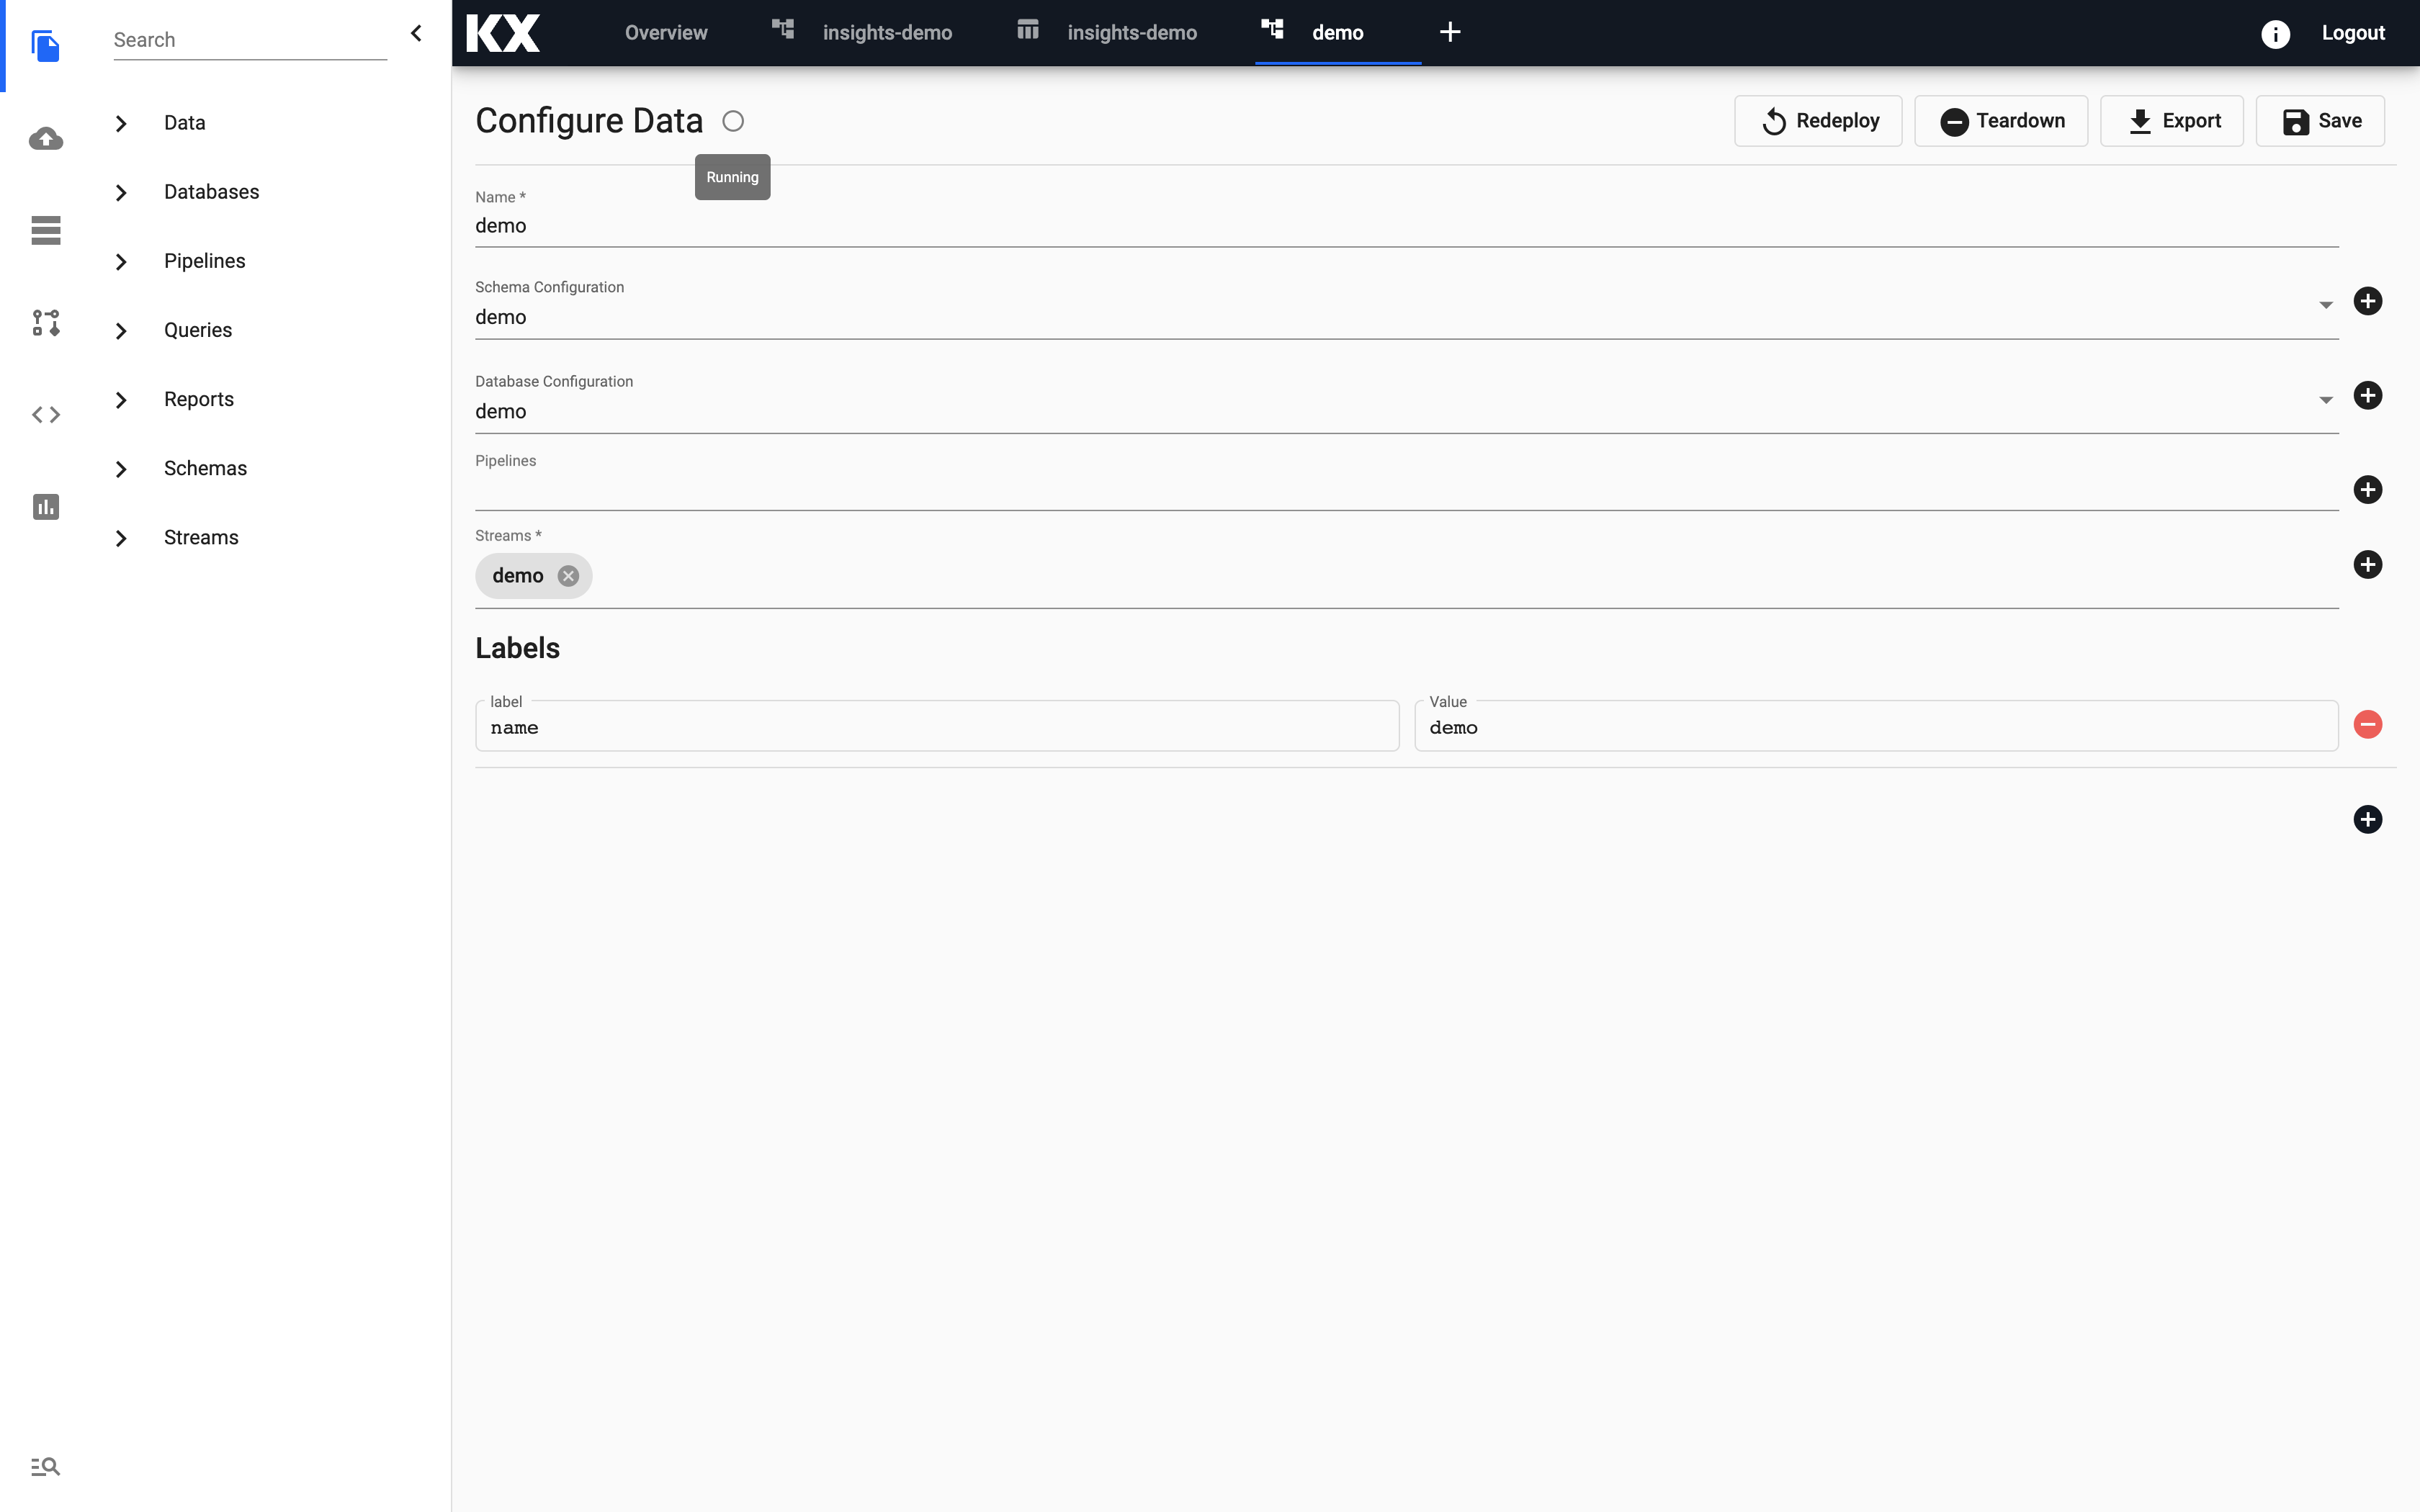
This will take a few seconds and the grey circle will become green and change from Running -> Ready state when finished.
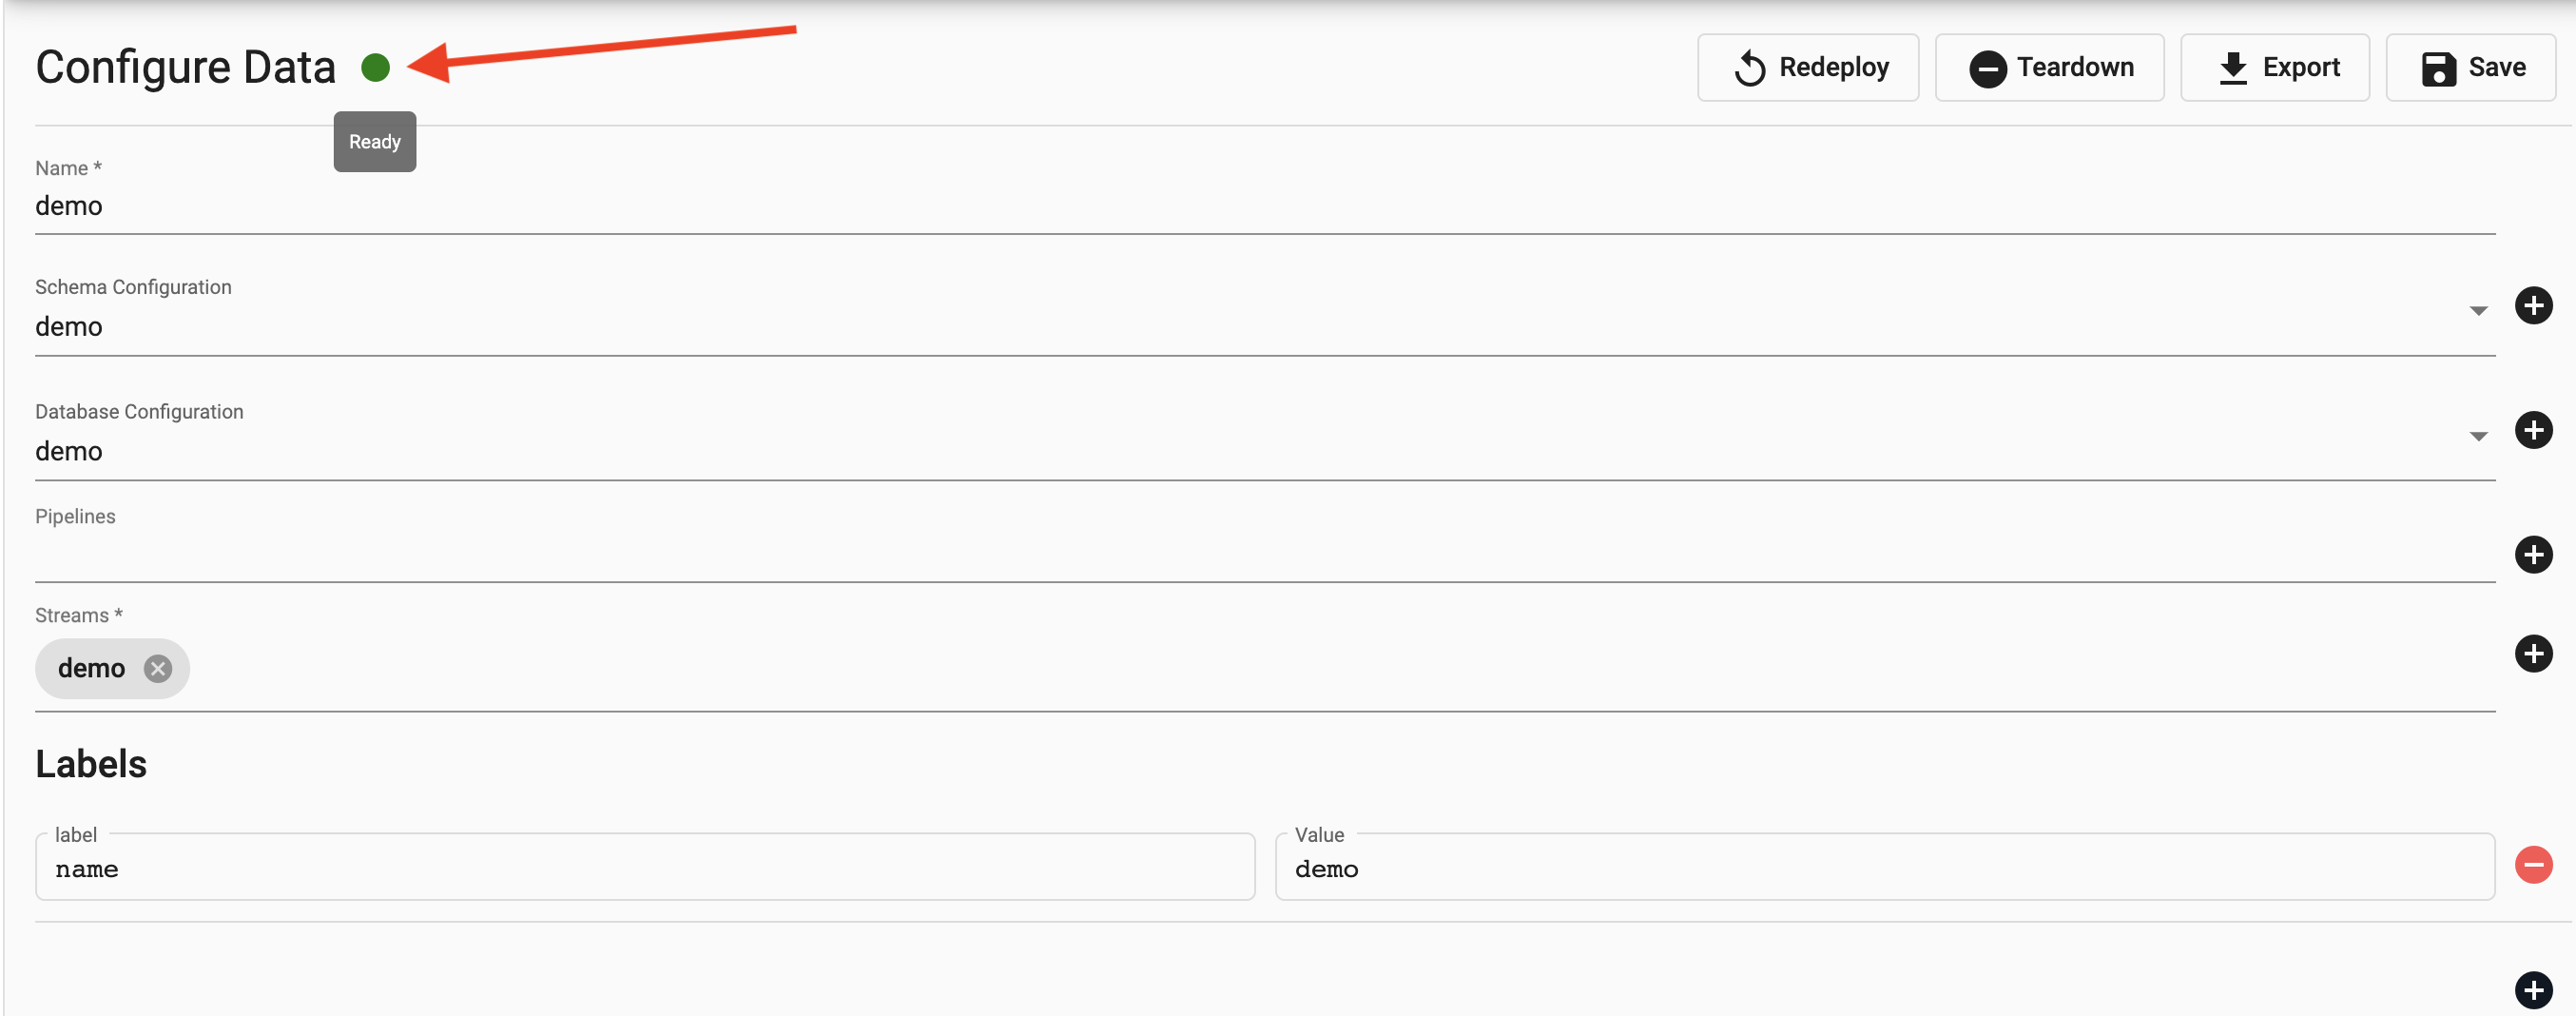
That's it, you are now ready to Ingest Data! Let's start with the Weather Data