Deploy the FIX Feed Handler Standalone
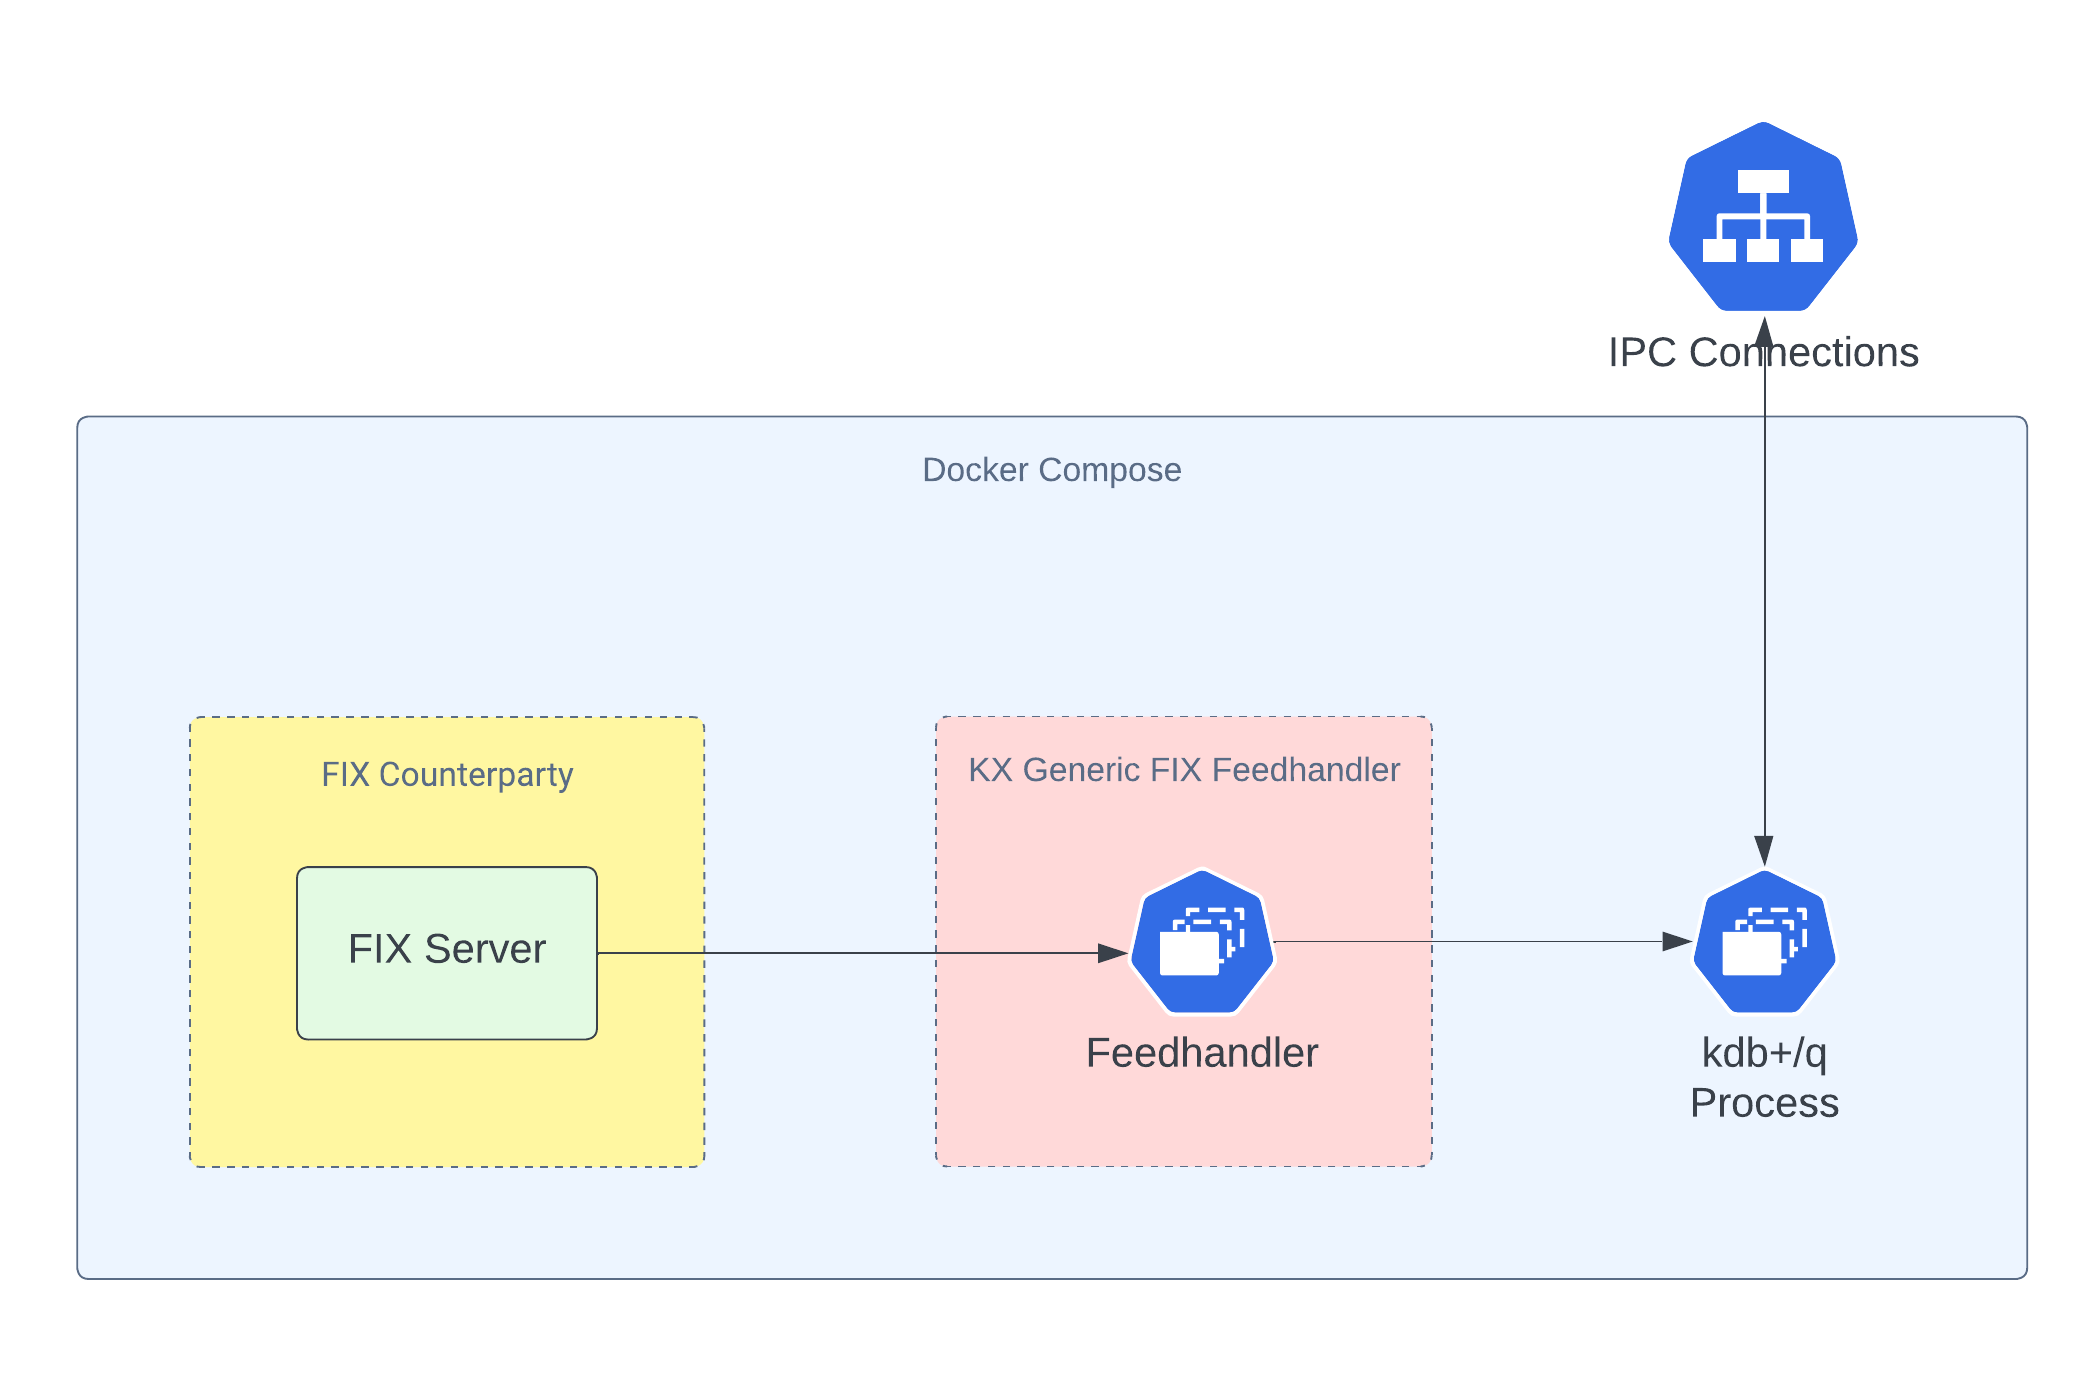
This page details how to install and run the KX FIX Feed Handler standalone, publishing to a singular vanilla kdb+/q process.
Architecture
Prerequisites
Ensure the following prerequisites are met before running the standalone version of the KX FIX Feed Handler:
- Docker is installed.
- Docker-Compose is installed.
- You have login credentials for docker registry portal.dl.kx.com.
- You have a kdb+/q license file (
kc.licork4.lic). - You have a local installation of pykx or kdb+/q, depending on your preferred method of accessing the data.
Login to Docker registry
To access the images needed for this walkthrough, you must login to the KX Docker registry:
docker login portal.dl.kx.com -u <insert registry username> -p <insert registry password>
Download the FIX Standalone example
Download the FIX standalone example:
version=1.0.1;\
curl -L  https://portal.dl.kx.com/assets/raw/kxi-fix-fh/${version}/fix-standalone-q-example-${version}.tar.gz -o fix-standalone-q-example.tgz
Extract the contents and navigate to the resultant directory:
tar -xvzf fix-standalone-q-example.tgz;\
cd fix-standalone-q-example
Configure the FIX Standalone example
Within the fix-standalone-q-example directory, find the docker-compose-q-proc.yaml file and the env file. Update the env file with the following:
- Set
q_install_dirto the path of your kdb+/q license directory.
Next, locate the Session.cfg file that can be found in the cfg directory. Update the following in this file:
- Update the connection settings to that of the counterparty that publishes to KX FIX Feed Handler. In our example, the counterparty being connected to is an internal FIX data simulator.
Info
To enable direct publishing to a kdb+/q process, ensure "isDirectConnect":1 is set in the dbConfigFile. This setting should be present in this example configuration.
The FIX standalone example is setup to ingest 1 message type AE and has a singular Trade table defined for storing these messages on the kdb+/q process. If you wish to changes this, edit the following settings in the fix-standalone-q-example directory:
- cfg/schema.xml: The KX FIX Feed Handler uses this config to parse messages. You can add new tables or edit the existing
Tradetable. See Schema Config for more details. - cfg/eventToTable.json: The KX FIX Feed Handler uses this config to map tables defined in the
schema.xmlto message types. Read more about theeventToTableFilesetting here.
File Permissions
To avoid permission issues with containers mounting directories, run the following command in the fix-standalone-q-example directory (you may need sudo access):
chmod -R 777 */
or with sudo:
sudo chmod -R 777 */
Deploy the FIX Standalone example
Once the configuration has been updated, the FIX standalone example can be deployed:
docker-compose --env-file env -f docker-compose-q-proc.yaml up
Querying the data with kdb+/q
To access data published by the KX FIX Feed Handler, start a kdb+/q session locally and connect to the q process that captures the data:
q)h: hopen 2345
You can then query the data by running
q)h"select from Trade"
for the Trade table.
Query the data with pykx
To query the data using pykx, launch the Python interpreter and import pykx:
import pykx as kx
Open a connection to the q process that captures the data:
q = kx.SyncQConnection('localhost', 2345)
Then, query the data by running:
For the Trade table:
q('select from Trade')
View the logs
To validate that everything started successfully, check the logs using the following command in the fix-standalone-q-example directory:
docker-compose --env-file env -f docker-compose-q-proc.yaml logs | less
Note
Logs are also visible during the docker-compose up command, but they may scroll quickly. Using docker-compose logs makes it easier to read and search through the logs.
Tear Down the FIX Standalone example
To tear down and delete the containers of the FIX standalone example, run this command within the fix-standalone-q-example directory:
docker-compose --env-file env -f docker-compose-q-proc.yaml down
To remove the data written to disk by the example, remove all data written to mounted paths (requires sudo access):
sudo bash -c 'rm -rf log/*; rm -rf store/*'