Install
Configuring and deploying kdb Insights Enterprise on Azure
Before starting
Please check the Install prerequisites before starting, to ensure a successful deployment.
Getting started
-
Sign into your Azure account.

-
Search for Managed kdb Insights Enterprise Deployment in Azure Marketplace and Select Get it now
It can also be found here.
-
Review the Offer Details.
- Overview: product summary.
- Plans + Pricing: details each Plan type, description, and its Pricing structure.
- Usage Information + Support: useful links to get started, License Agreements, Privacy Policy, and links to our Support site, where you can raise support tickets.
-
Select the Plan from the dropdown and click
Create.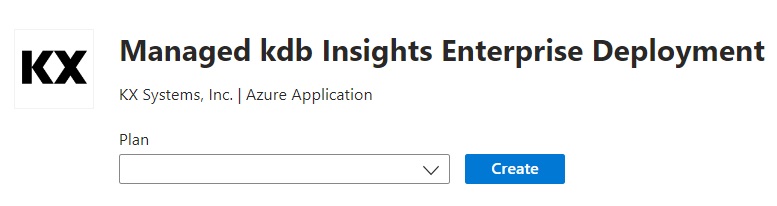
You will be taken to the 'Basics' section
KX License Agreement
By clicking through the Marketplace and deploying the Software, you have Accepted the Terms & Conditions in the KX License Agreement.
Basics
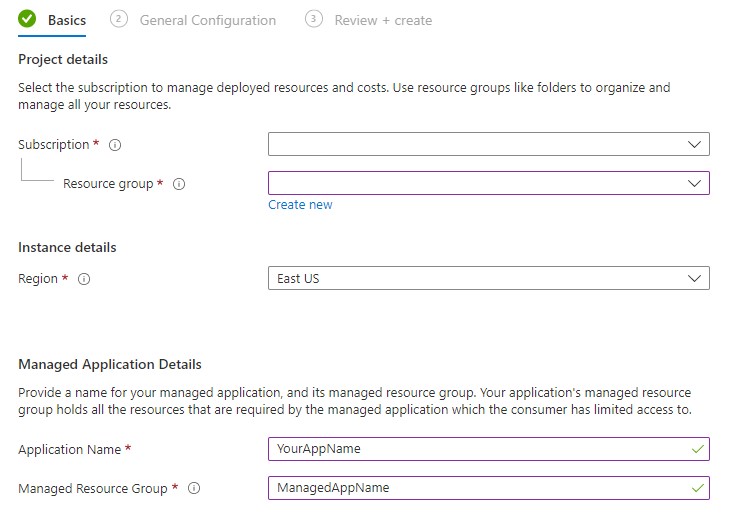
-
Select the Subscription in which to install the infrastructure and application.
-
Create a new resource group, or select an existing empty resource group from the dropdown.
Existing resource group must be empty
Do not select an existing resource group which is not empty.

Deploying multiple instances
If you plan to deploy multiple instances of kdb Insights Enterprise, then each deployment from the Azure Marketplace must have a unique resource group name.
-
Select the Region where to deploy kdb Insights Enterprise. Remember to select an Azure region that has availability zones.
-
Under the Managed Application Details, provide a name for your managed application and its managed resource group.
-
Click
Next
You will be taken to the the 'General Configuration' section.
General configuration
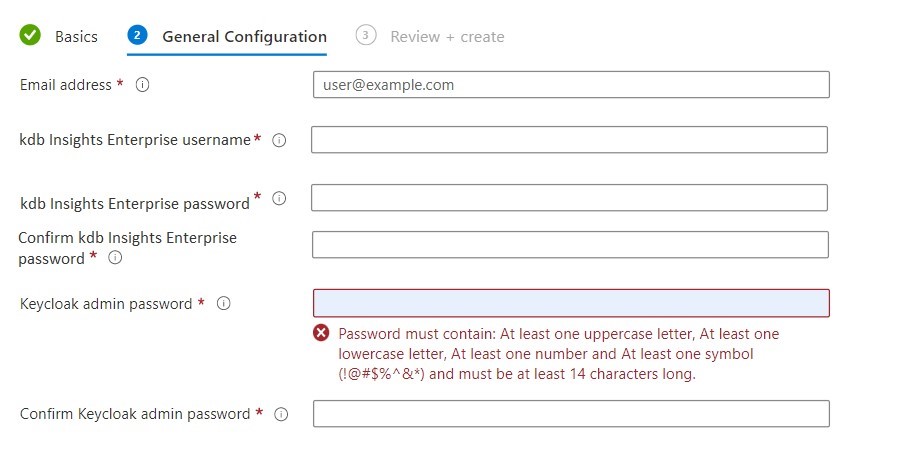
- Add a valid email address for license and certificate registration.
- Create a username and password to log in to kdb Insights Enterprise User Interface.
-
Create a password to log in to Keycloak. Your username will be 'user'.
Passwords must contain the minimum requirements.
Password
These passwords will be used to log in and administer kdb Insights Enterprise, be sure to store them somewhere safe. Also note some special characters are forbidden.
-
If you want to customise your deployment there is an optional Advanced Settings section:

Tick
Show Advanced Settings.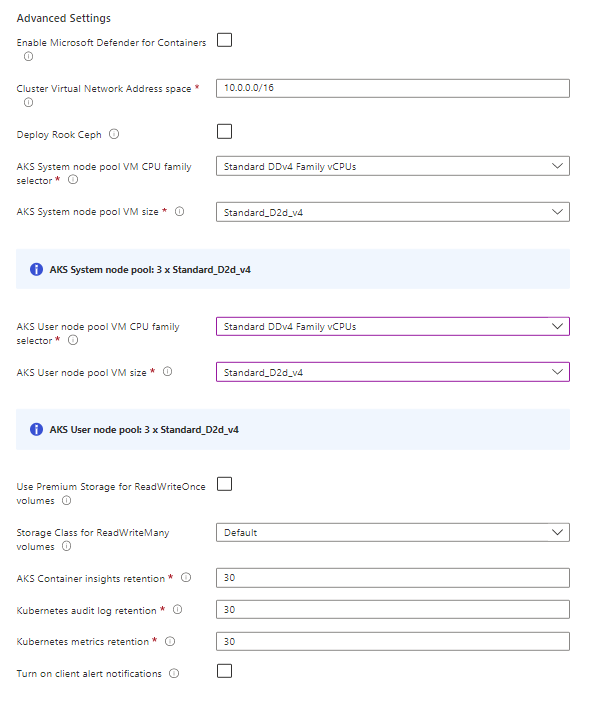
-
Cluster Virtual Network can be manually set up. This can be used to configure Vnet peering if required.
-
If desired, check
Deploy Rook Cephand select Rook CephFS in the dropdown for optimum performance results. If not selected, Azure Storage Class will be defaulted to Azure Files NFS for your shared file system.Warning
Rook Ceph uses local SSD storage. This type of storage provides higher throughput and lower latency for optimum performance, but it is ephemeral. Your data is stored across 3 nodes for resiliency however if 2 nodes go offline, data stored on the SSDs will be lost. You cannot bring down your nodes to save costs without losing data.

-
The next two sections cover AKS System and User Node pools. The defaulted values are the minimum needed for a base deployment and general workload purposes. The System Node Pool is used to host the Azure tools and services with the kdb Insights Enterprise core system services so we do not recommend changing this unless you have special discounts on other options. If you select a different System Node Pool you must select the same minimum size as the default. The User Node Pool hosts the kdb Insights Enterprise assembly resources and should be sized according to your use case, workloads and performance needs.
Note
KX advises you to adjust the User Node Pool to a bigger size ONLY if you have specific workload requirements. Please refer to the guidance section if changing the node pool VM size.
Warning
We do not support smaller sized node pools than the default settings.
-
Storage Class selectors allows you to specify the storage class for both ReadWrite once and ReadWrite many pods. The default settings are recommended unless you have specific performance requirements.
If you choose to deploy rook-ceph, and have high performance requirements, then we recommend selecting Rook CephFS under the ReadWriteMany dropdown for your shared file system.
Data Encryption
Azure Storage protects your data by automatically encrypting it before persisting it to the cloud. If this is important to you then we do not recommend selecting rook-ceph. You should use the default Azure Files NFS shared storage option.
You can learn more here.
-
There are 3 fields where you can choose to change the log retention policy, depending on your company policy, or cost considerations. This can be changed post-deployment so you can leave the defaults, and change at a later date if needed.
-
E-mail notifications are optional, you can enable them by selecting
Turn on client alert notificationsand adding an email address.KX have pre-packaged some useful Alert logic which will trigger email notifications to the Insights Managed Service (IMS) operational team to assist with monitoring the health of the application.
This field is optional and only needs to be populated if you want to add your own email distribution list in addition to the KX IMS Support team. Please refer to the following documentation.

-
-
Click
Next
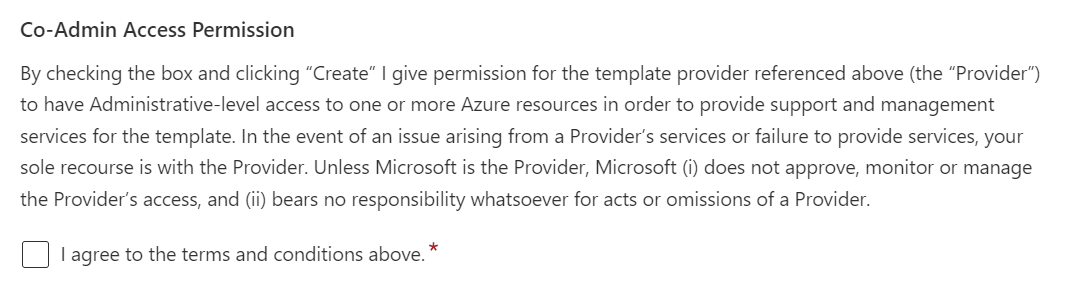
Review + Create
At this stage you should have a Validation Passed message which brings you to 'Review + Create' final page.
You must agree to the Terms and Conditions in order to proceed. This is required in order to provide the Managed Services.
Warning
Do not select 'Download a template for automation'. There is no 'Back' button available if you select this option and you will need to start the workflow again. It is possible to download a template post deployment but KX does not recommend this because we only support the Marketplace deployment method on Azure in this scenario.
-
Click
Createto deploy. -
When your deployment is complete, follow these steps to access keycloak.
Deployment Failures
Please see potential deployment issues for resolutions to errors that may arise if a deployment were to fail. Do not try the 'Redeploy' button.
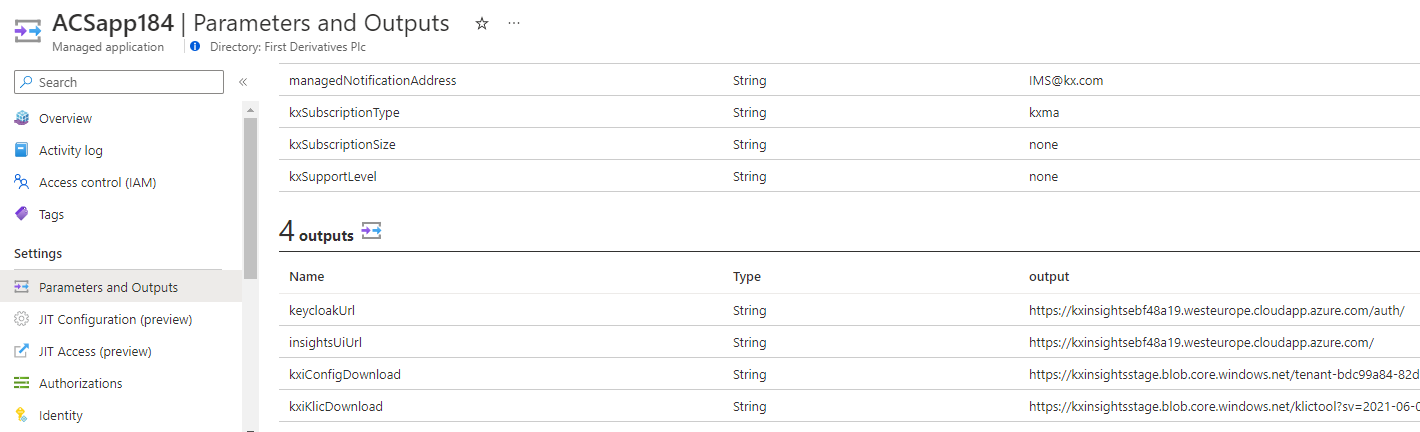
Output
The output of the deployment can be found in Azure Portal under "Managed applications". Once the deployment is selected, the output of the deployment script is available in the "Parameters and Outputs" tab.