Billing kdb Insights Enterprise through Azure
Once you decide to buy kdb Insights Enterprise you must create and configure your account on our transactable SaaS Billing offer. This offer is only used to bill your kdb Insights Enterprise instances.
Note
You will see in your invoices that the Billing offer is billed for the agreed KX License amount, whereas the kdb Insights Enterprise instance will only have infrastructure costs. This allows you to recreate your kdb Insights Enterprise instance whenever you want and we will still be able to generate KX License bills through the Billing offer.
Our offer is MACC (Microsoft Azure Consumption Commitment) eligible, meaning it will contribute to your Azure consumption commitment benefit.
For Private Offer holders only
If you agreed on custom terms and conditions with KX, then KX will create a private offer for you. To do that you need to provide your Azure Billing Account Number.
You can find your billing account number in Azure > Cost Management > Billing Scopes > {Select your preferred scope} > Properties > ID field.
Once the private offer is ready, KX will send you an activation link for your private offer. It will contain the custom terms and conditions as well as the price that you have agreed on with KX.
To accept a private offer, you need to have "Billing account contributor" or "Billing account owner" role on the Billing Account.
Once accepted, you will be able to see your private offer in Azure Marketplace under both the private products and private offer management.
Create transactable Billing Offer
In the following steps you will create a Billing offer.
Warning
The Billing Offer needs to be created by the same user e-mail address used during the kdb Insights Enterprise deployment.
- Go to
Azure Marketplace. -
Search for
Managed kdb Insights Enterprise License. Click on the offer.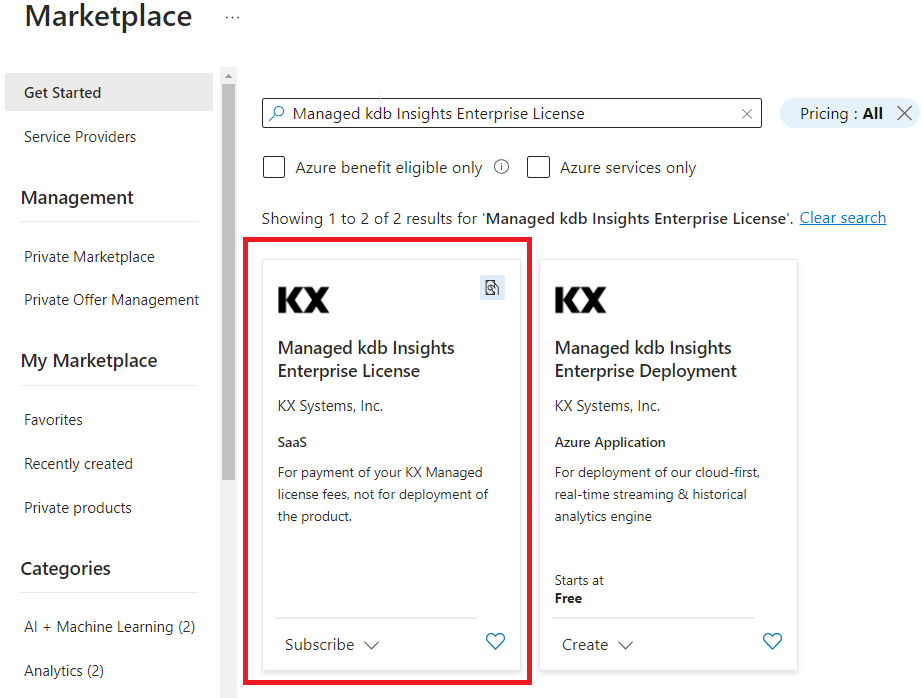
-
Read the Overview, Plans + Pricing and Usage Information + Support page. You can also come back here to provide a rating if you would like to.
-
Select your plan and click
Subscribe.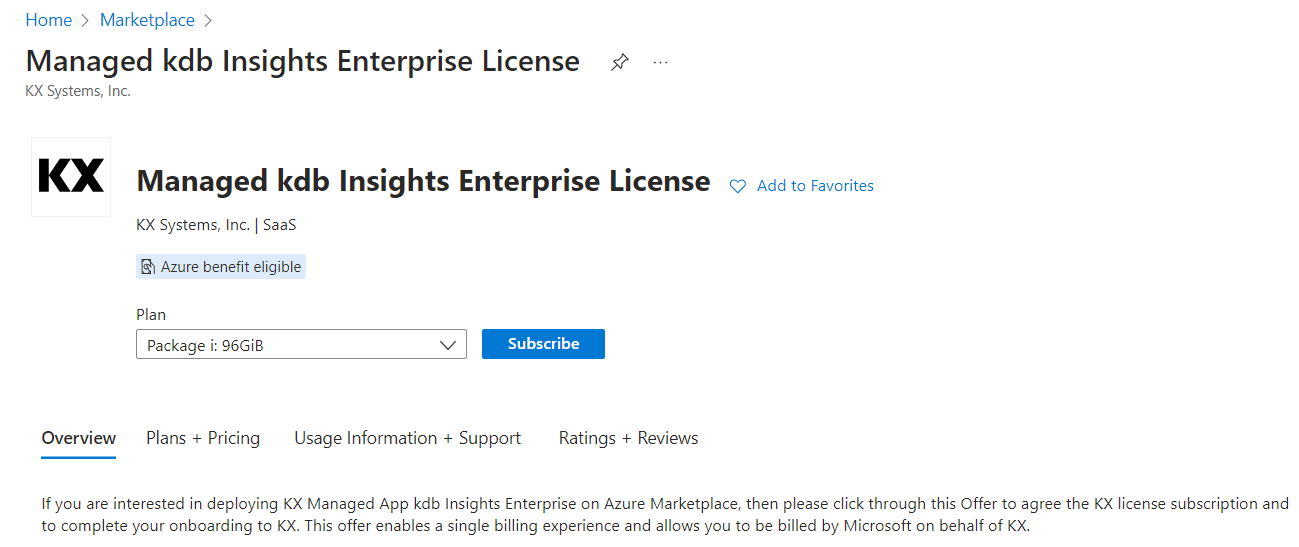
-
Select the
azure subscriptionandresource groupwhere the Billing offer should be stored.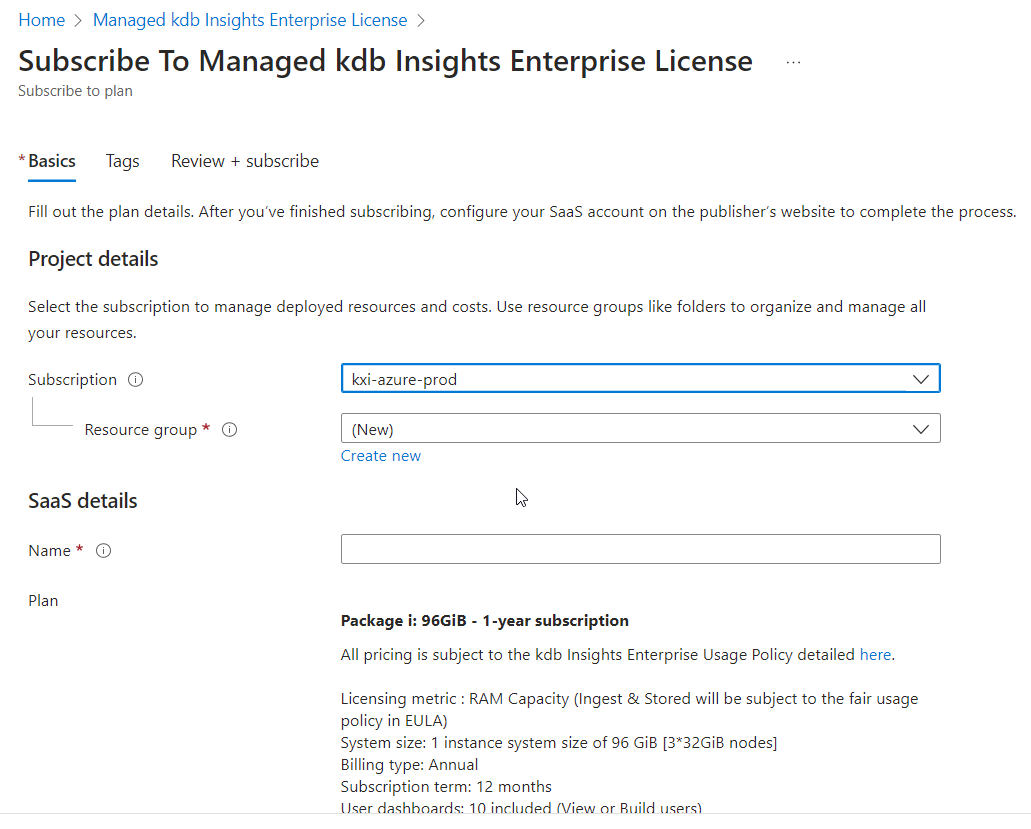
-
We recommend that you create one resource group dedicated for all your KX Billing offers. The name of the resource group can be anything.
-
The name of the KX Billing offer can also be anything. However, since this SaaS offer is used to bill a
kdb Insights Enterprise instancewe recommend naming your SaaS offer something that resembles the name of thekdb Insights Enterpriseinstance.
-
-
Select your preferred
Billing termandPrice + payment frequencyif you have multiple options available. - Select Recurring Billing if you want to auto-renew your offer once the
Billing termhas expired. - Go to Tags. Configure tags as needed based on your policies.
- Go to Review + Subscribe. Review your offer then click
Subscribe.
Configure your account
Once you have created your KX License Billing offer, configure your Account.
Warning
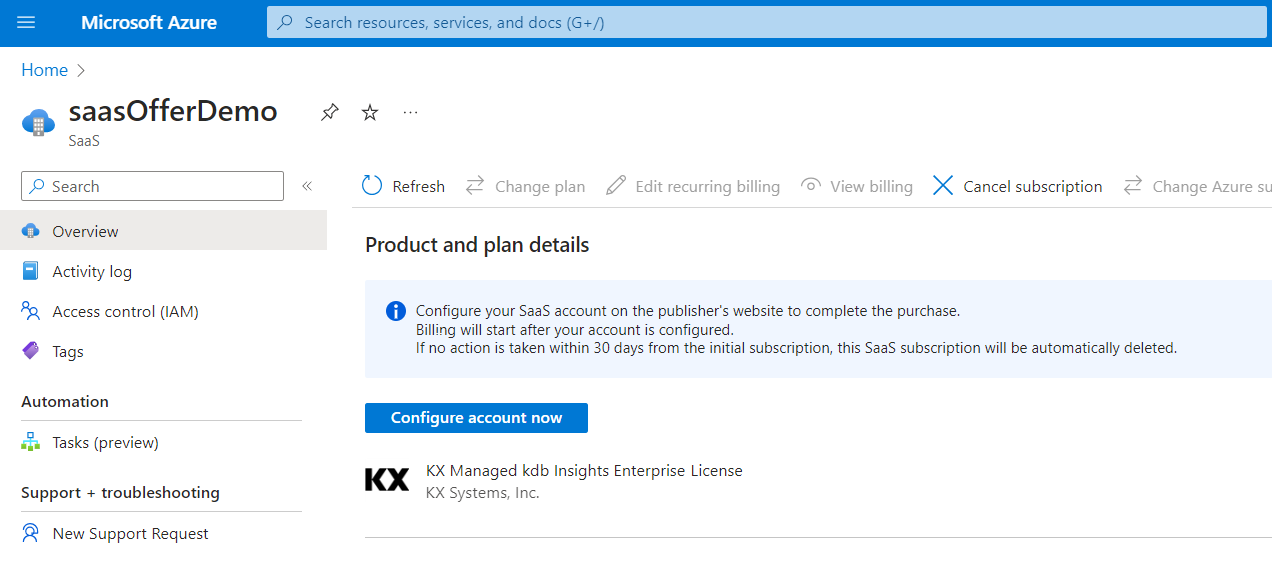
You must complete the following process in 30 days, otherwise the KX License Billing offer will be deleted.
Navigate to the landing page
First, navigate to the Client Landing Page of KX.
There are multiple options to do this:
- Option 1:
When the Billing offer is created, if you click Configure account now you will be taken to the landing page.

- Option 2:
Go to your Billing offer on Azure and click Configure account now or Open SaaS Account on publisher's site if the account is already configured.
- Option 3:
Follow this link: Licensing portal
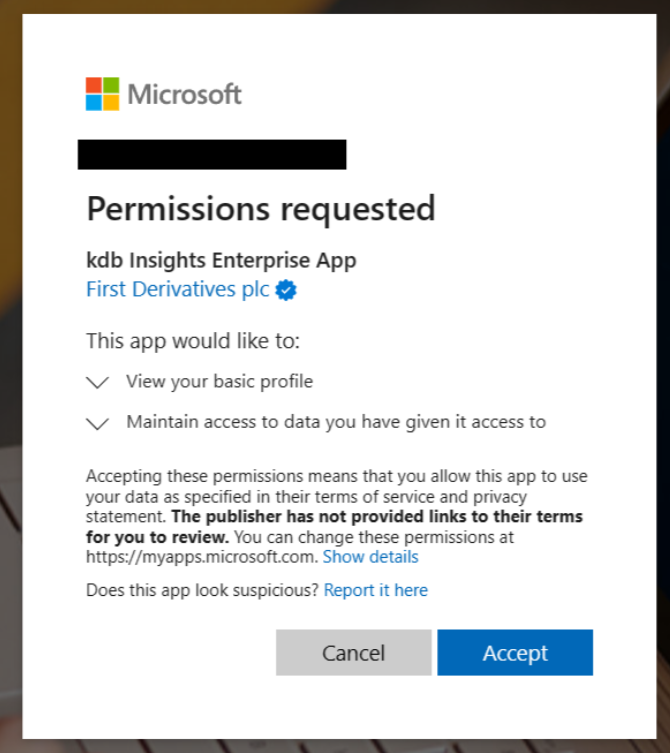
Grant consent to KX Landing Page
When you sign in on our landing page for the first time, our application will require consent to access user data (User.Read scope). Approving it allows us to identify you.
Admin consent to KX Landing Page
By default, any user can consent to this scope, but the permissions required to consent will depend on your Azure Tenant Policies. In some cases, only an Admin user has the appropriate access:
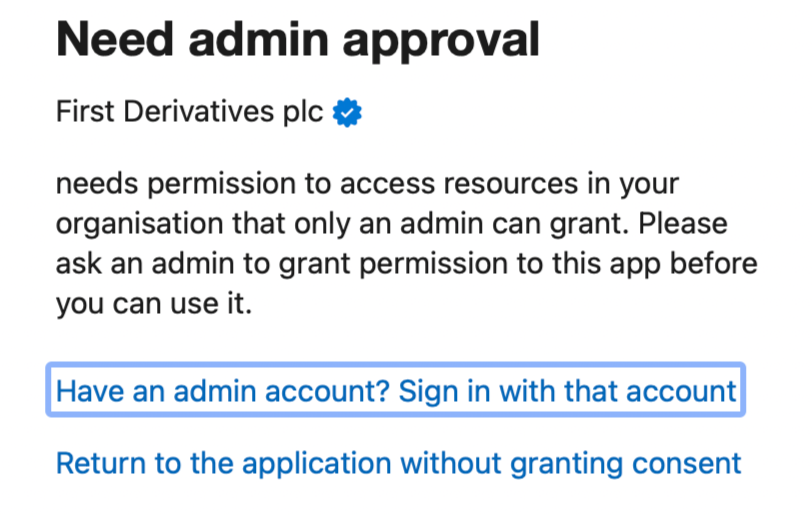
If admin rights are required to consent, you will need to reach out to a person with one of the following roles: Global Administrator, Cloud Application Administrator, Application Administrator
An administrator can either:
- Allow users to consent for apps from verified publishers and mark User.Read scope to be low impact
- Configure admin consent workflow
- Grant tenant-wide admin consent
- Grant consent on behalf of a user
KX license subscription
- Navigate to the landing page by clicking
Configure Account Now. This redirects you to your KX License Details page. - Fill in your contact details, most will be pre-populated and all fields are required.
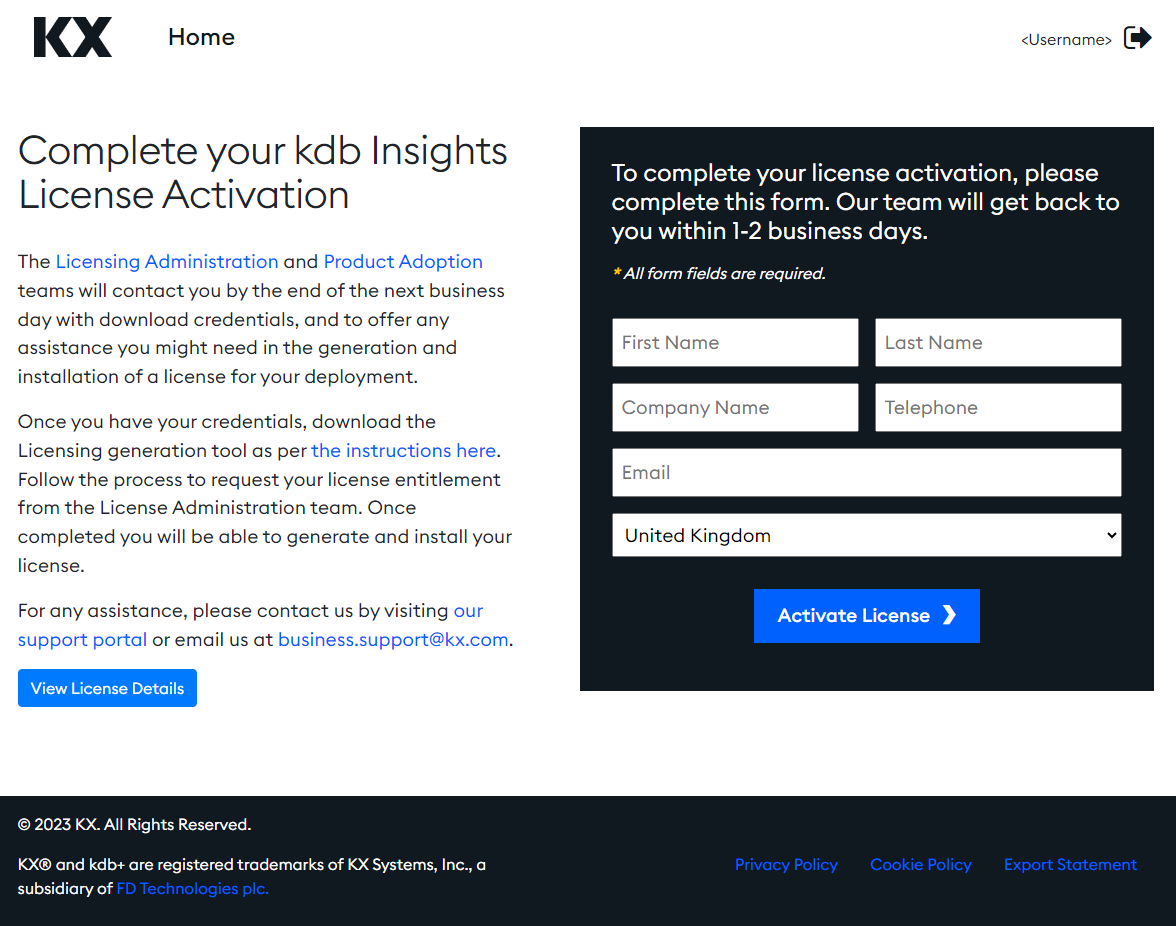
-
Click on View License Details and review your details
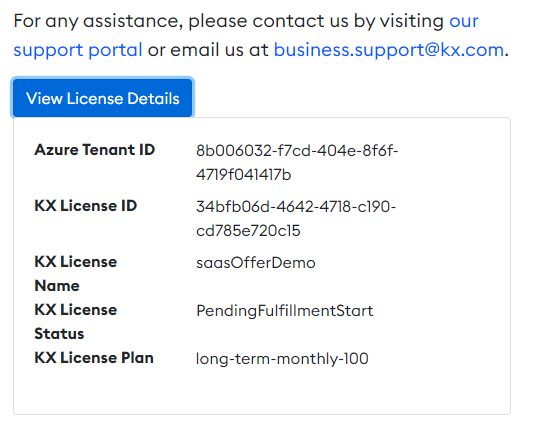
-
Click
Activate LicenseNote
If you navigated to the landing page directly, you can see your license under KX Licenses. You can acitvate it by clicking Activate on the Action menu.
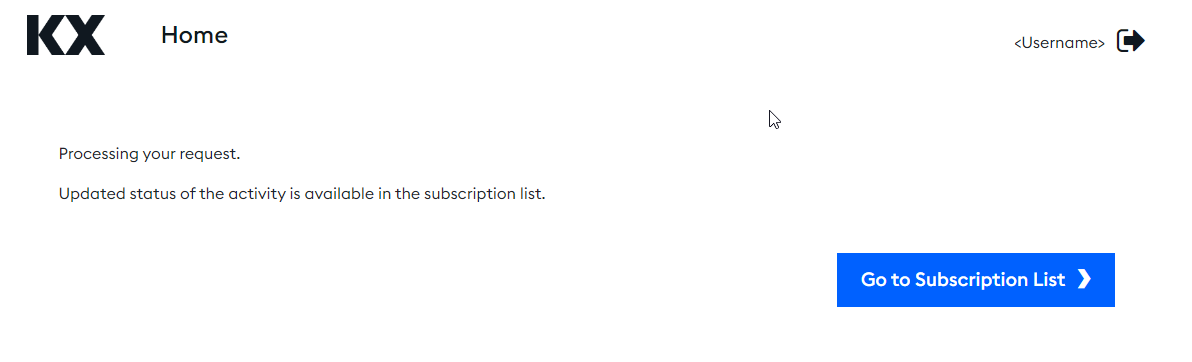
-
Once the Activation has been acknowledged the webpage will inform you that the request is being processed and direct you to the Subscriptions List where you can see the status of your license subscriptions.
Link your deployment to your license
- Go to Deployments. You can see all the kdb Insights Enterprise deployments that were created by the signed in user.
-
Select the deployment that you want to configure and in the Action column click
Change Mapping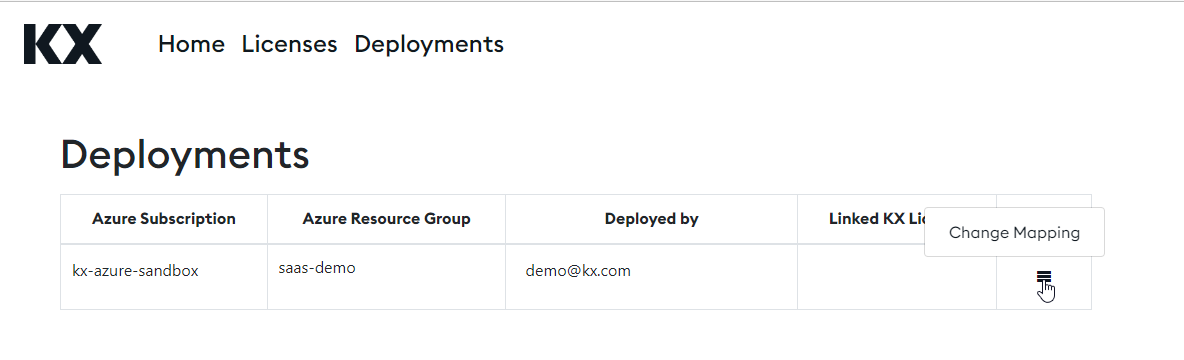
-
You will see the details of your deployments and your available licenses there. Select the license that you want to use for your deployment. Click
Add KX License. Currently, you can only link one license to one kdb Insights Enterprise deployment.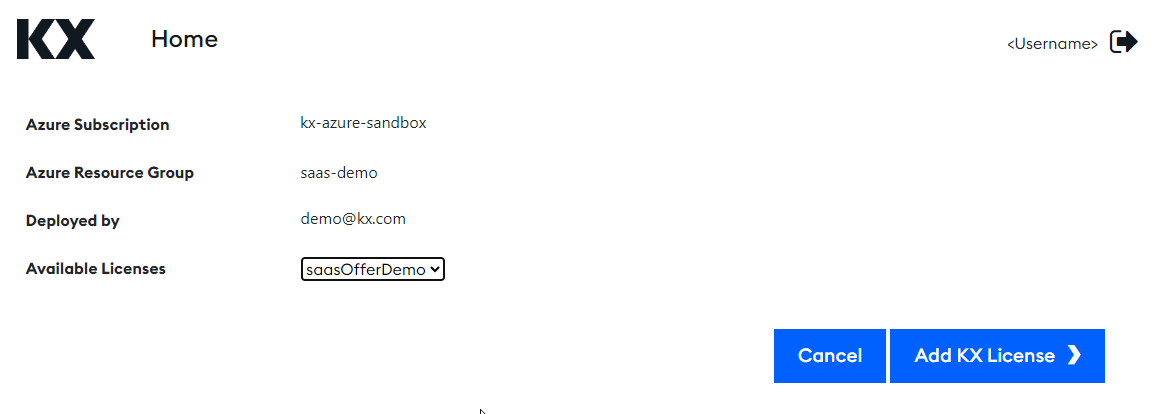
Note
You can change the mapping if required. For example, in case where you wish to recreate your
kdb Insights Enterpriseinstance.