Importer
The Importer allows you to import a variety of dataset formats.
Source
Selecting a format
The Importer provides a number of default formats for importing data.
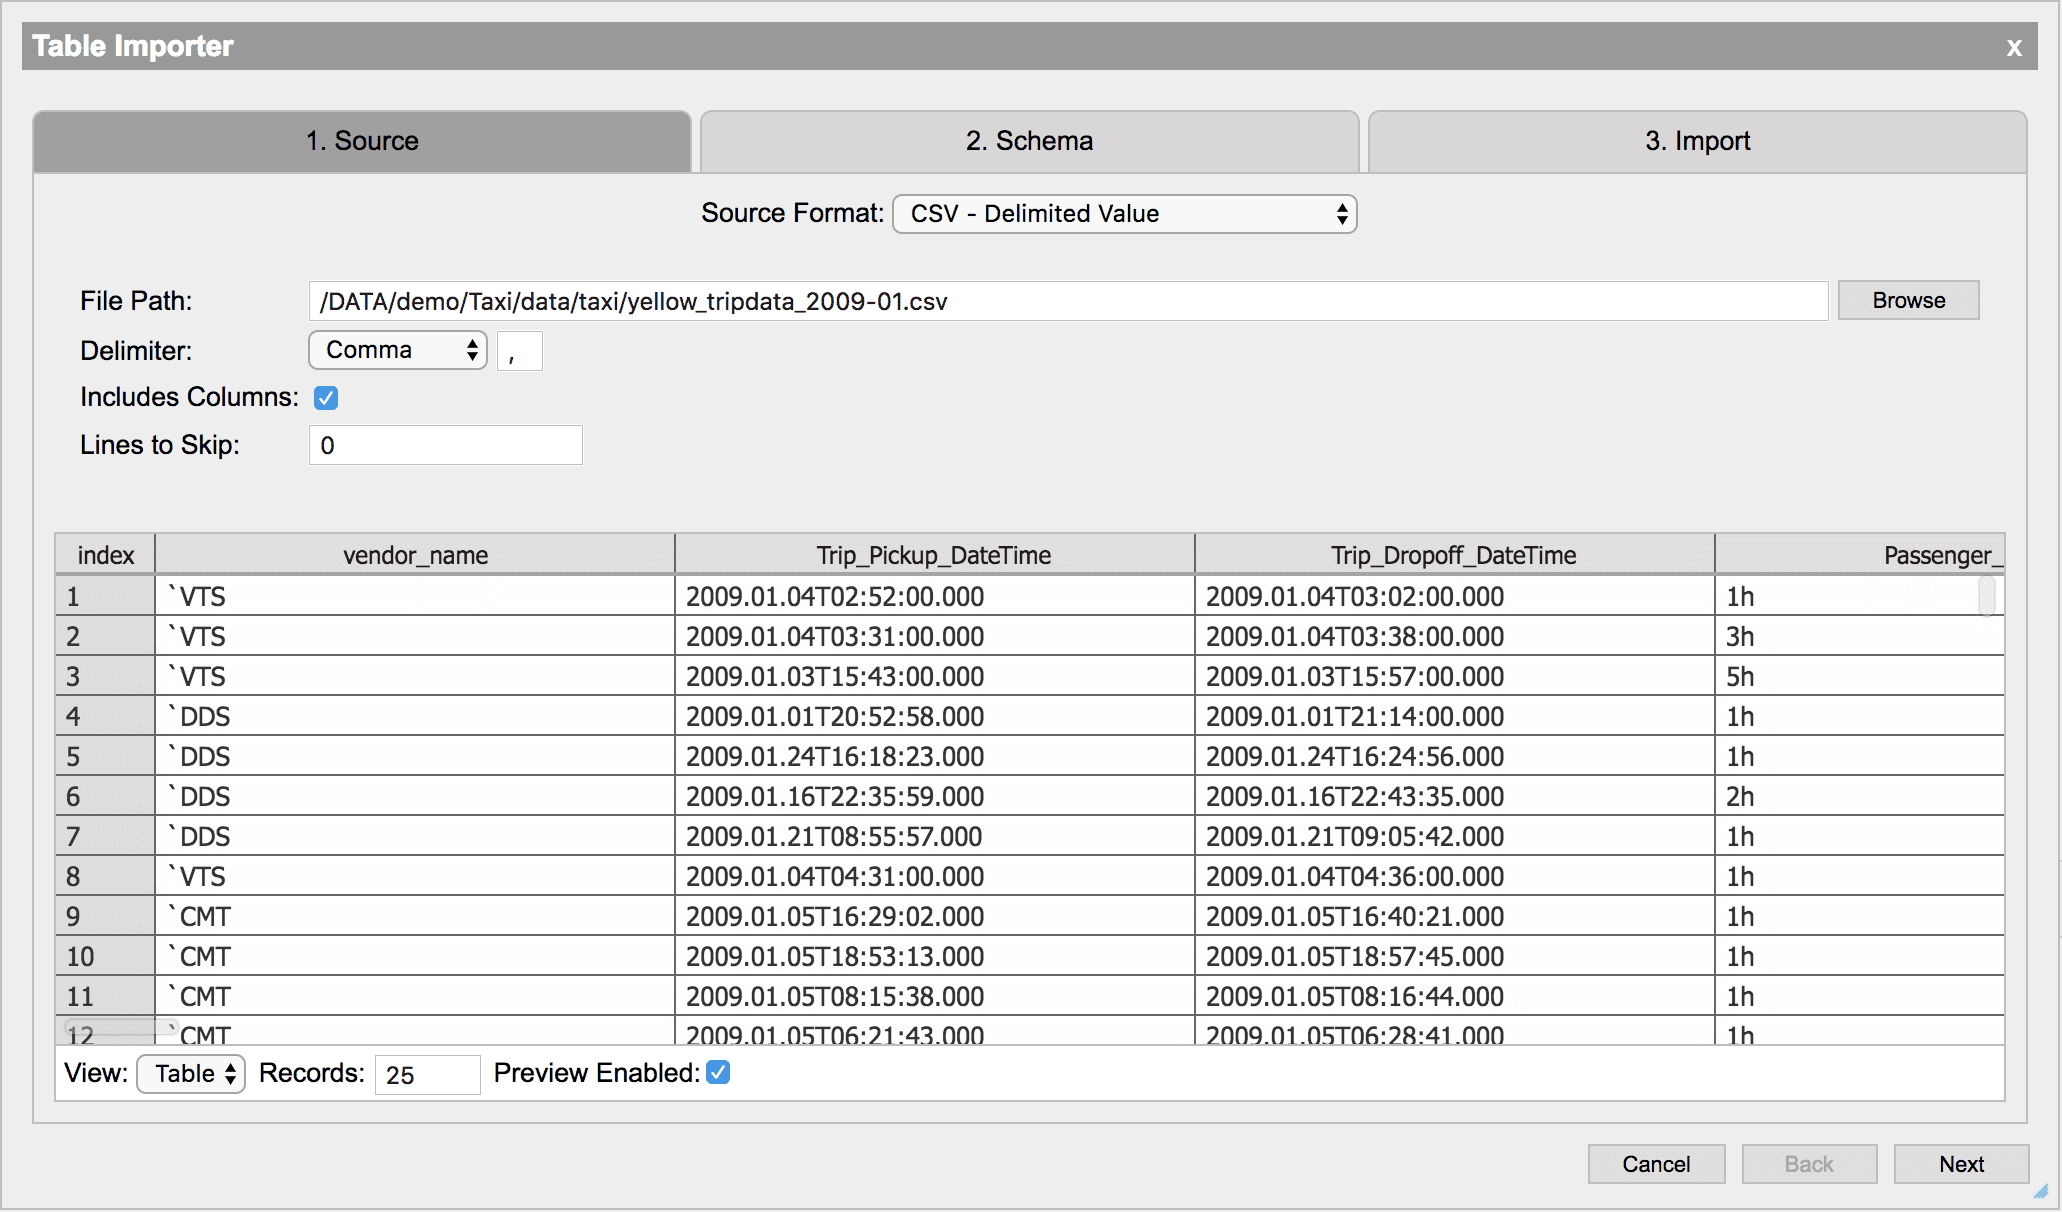
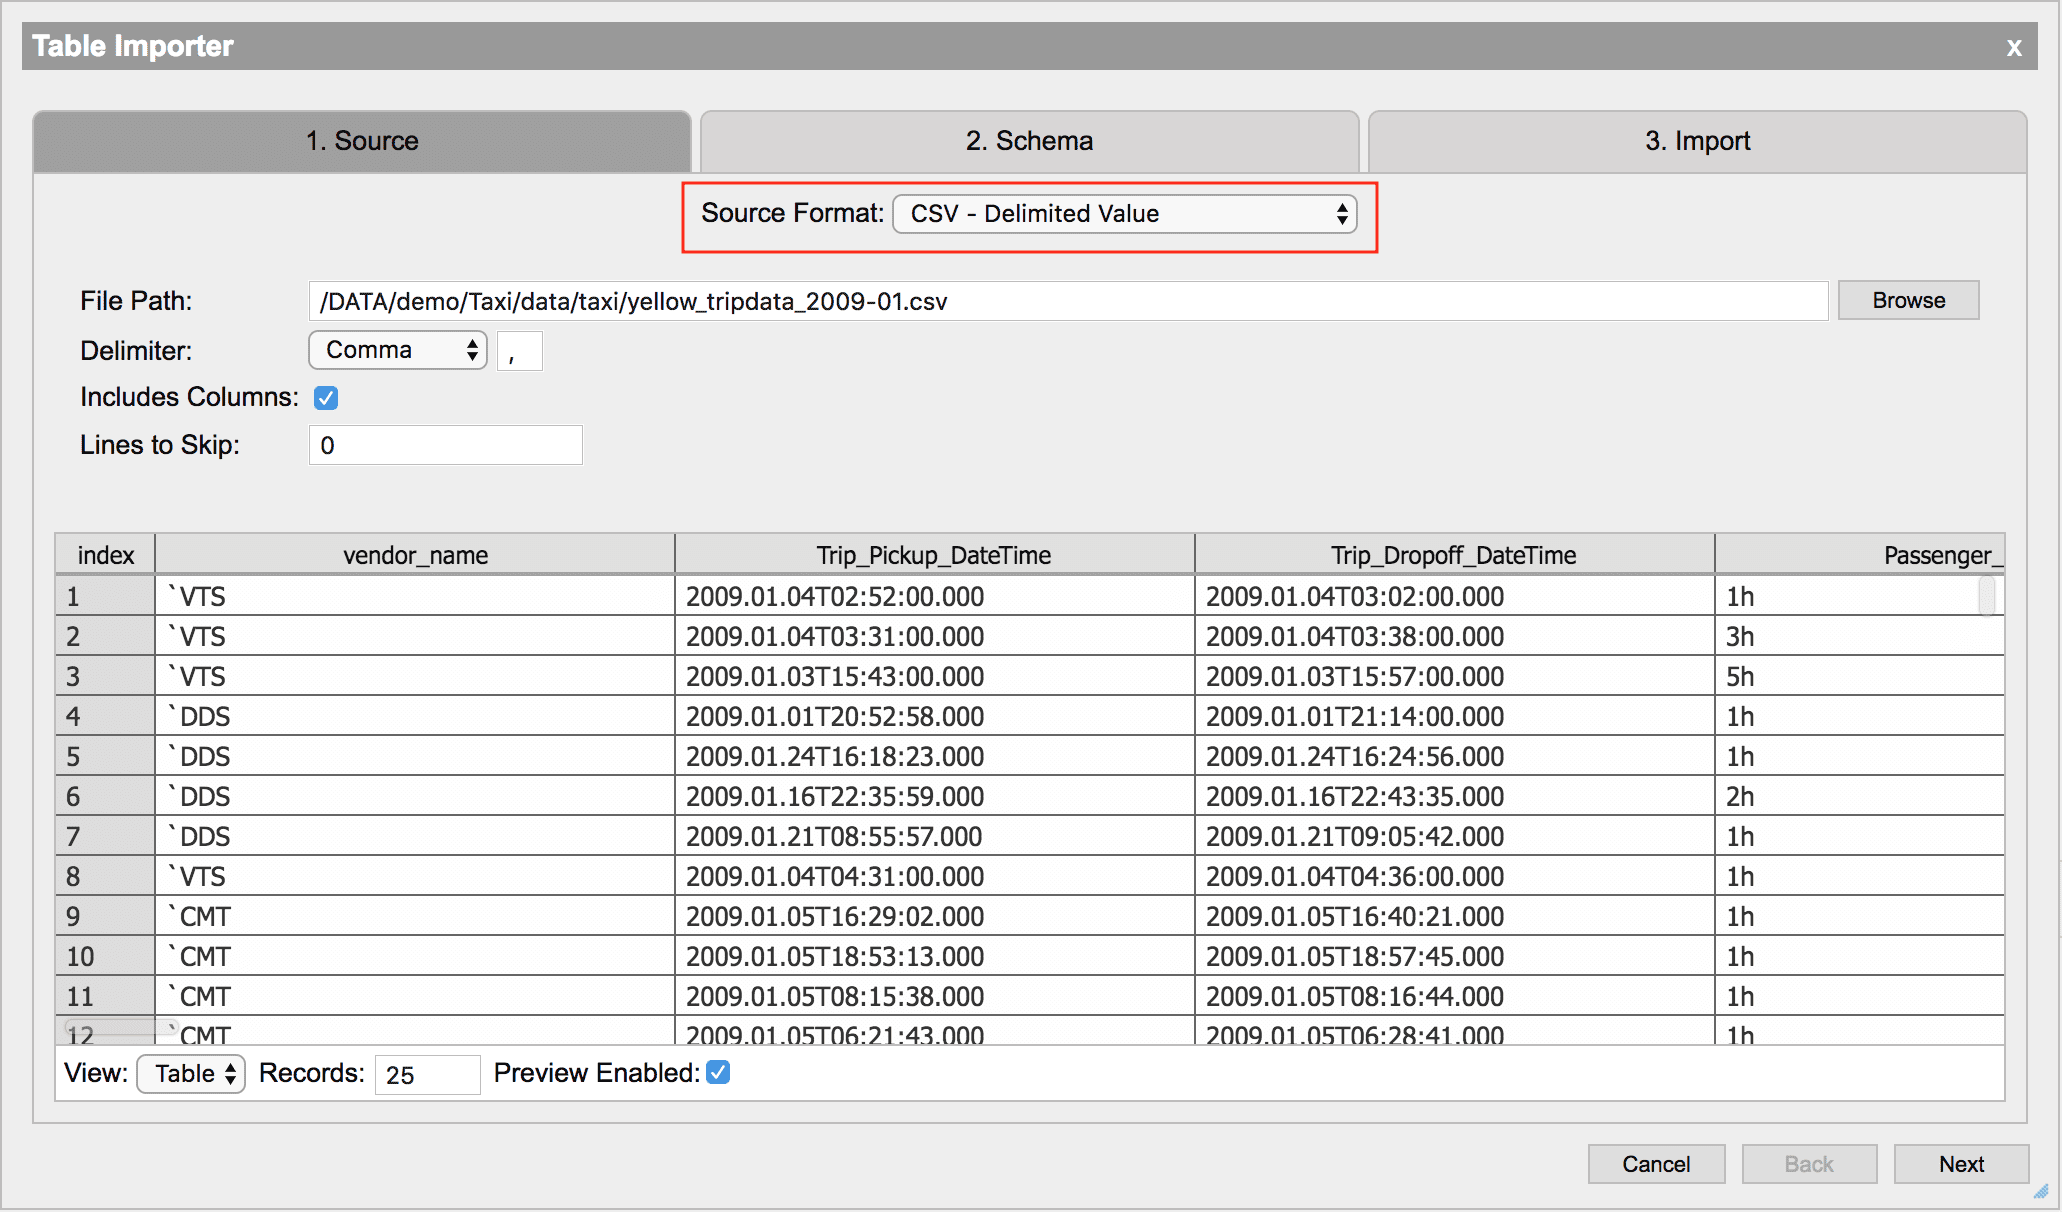
The Source Format dropdown menu allows you to select the format of the data to import.
Once the format is selected the options to import must be completed.
CSV - delimited value
Comma-separated values (CSV) is a simple storage format where records are separated by a special token. By default, this token is a comma but it can be changed to any single character by specifying the Delimiter field. To select a file, either manually enter the relative or absolute file path or use the file browser. To use the file browser, click the Browse button and navigate to the file.
Options
| field | description |
|---|---|
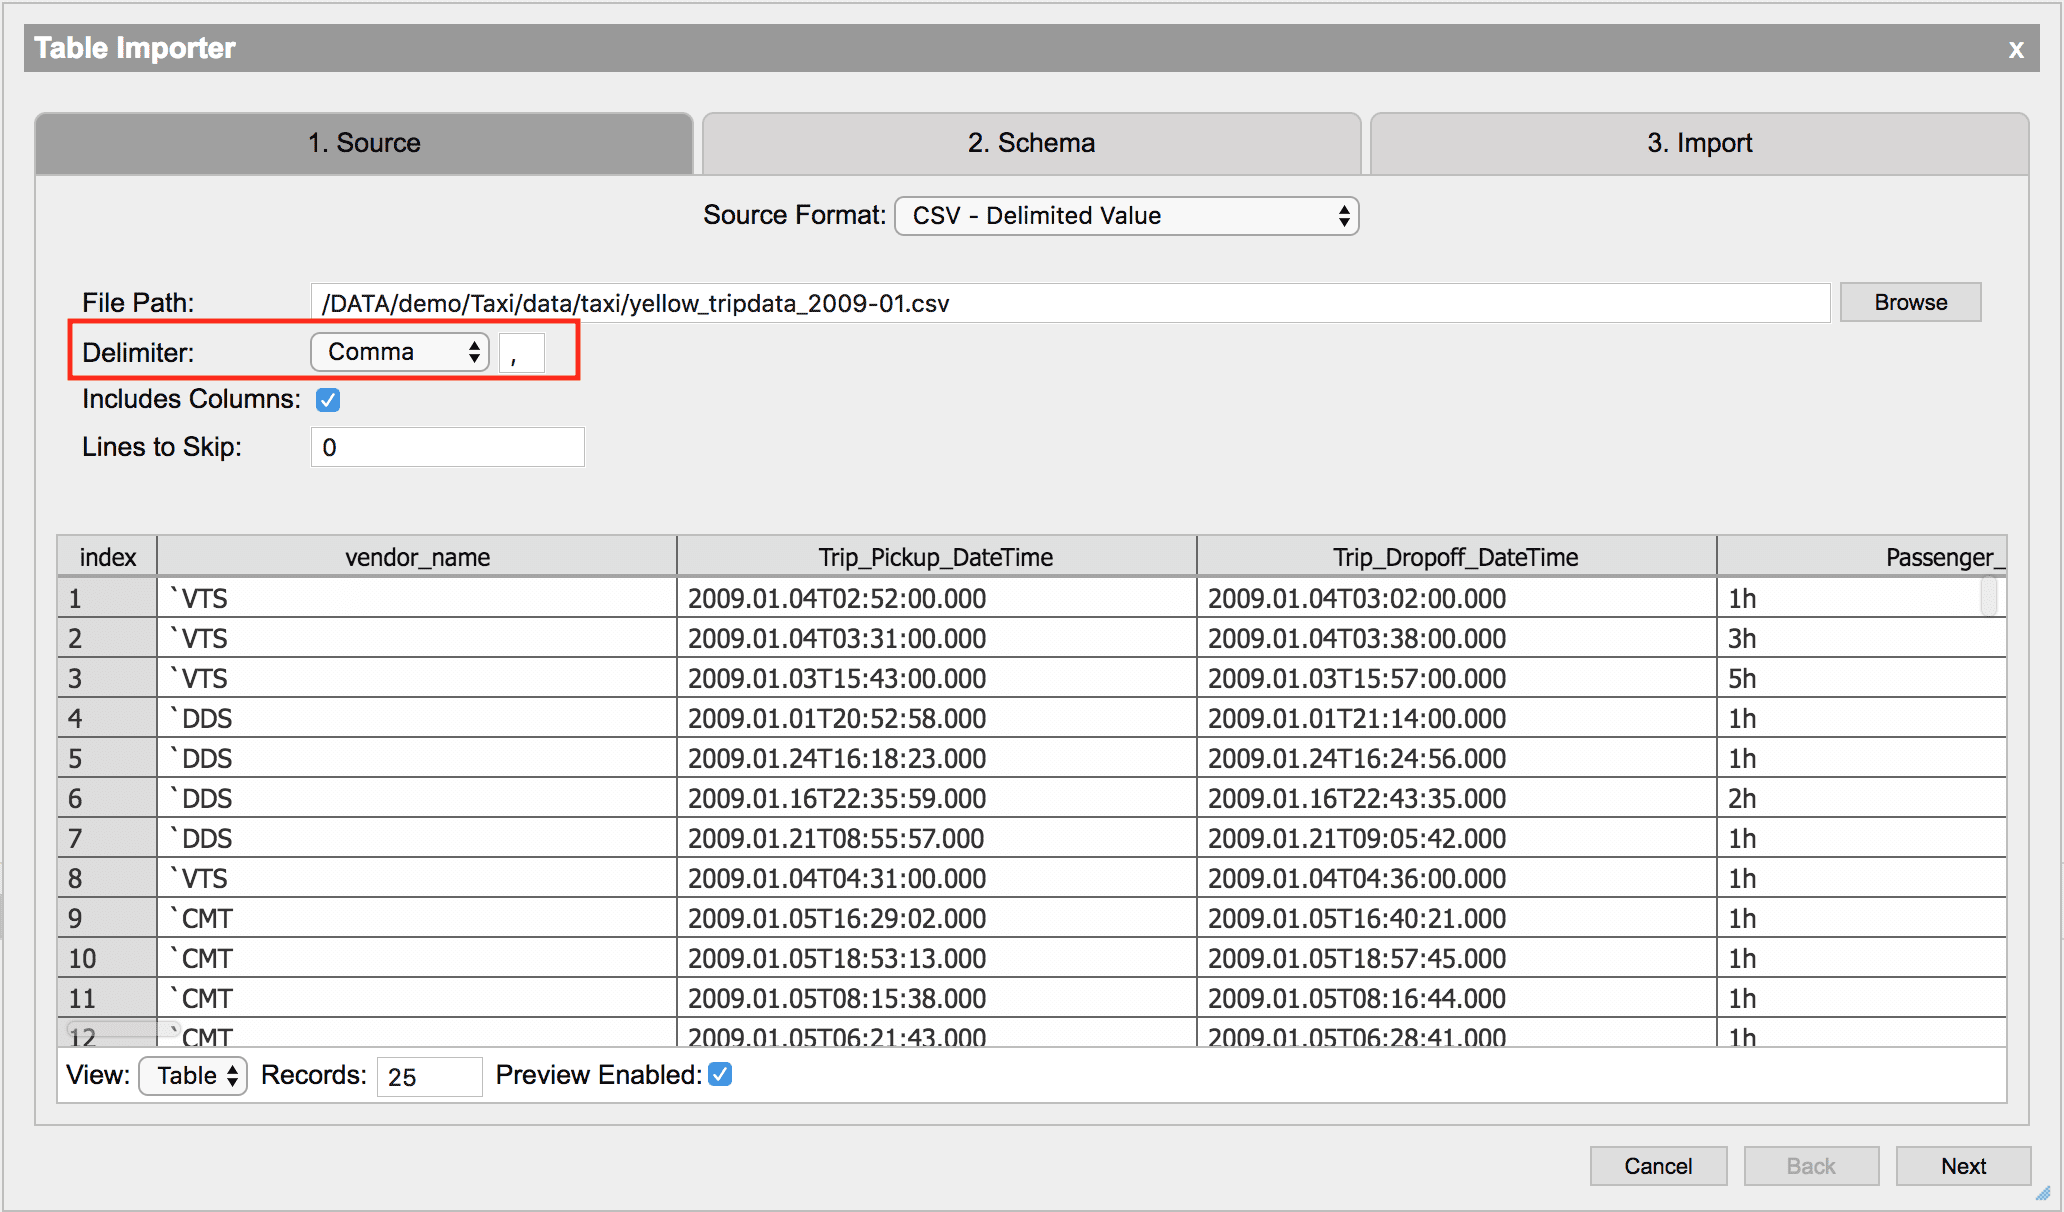
| Delimiter | The delimiter character for the file. An option can be selected from the drop-down or a custom character can be put in the adjacent text field. |
| Includes Columns | If the CSV contains the column names as the first row, this can be selected to use those names |
| Lines to Skip | Used to skip lines at the start of a file. This can be useful for ignoring metadata at the start of a file that is not in CSV format. |
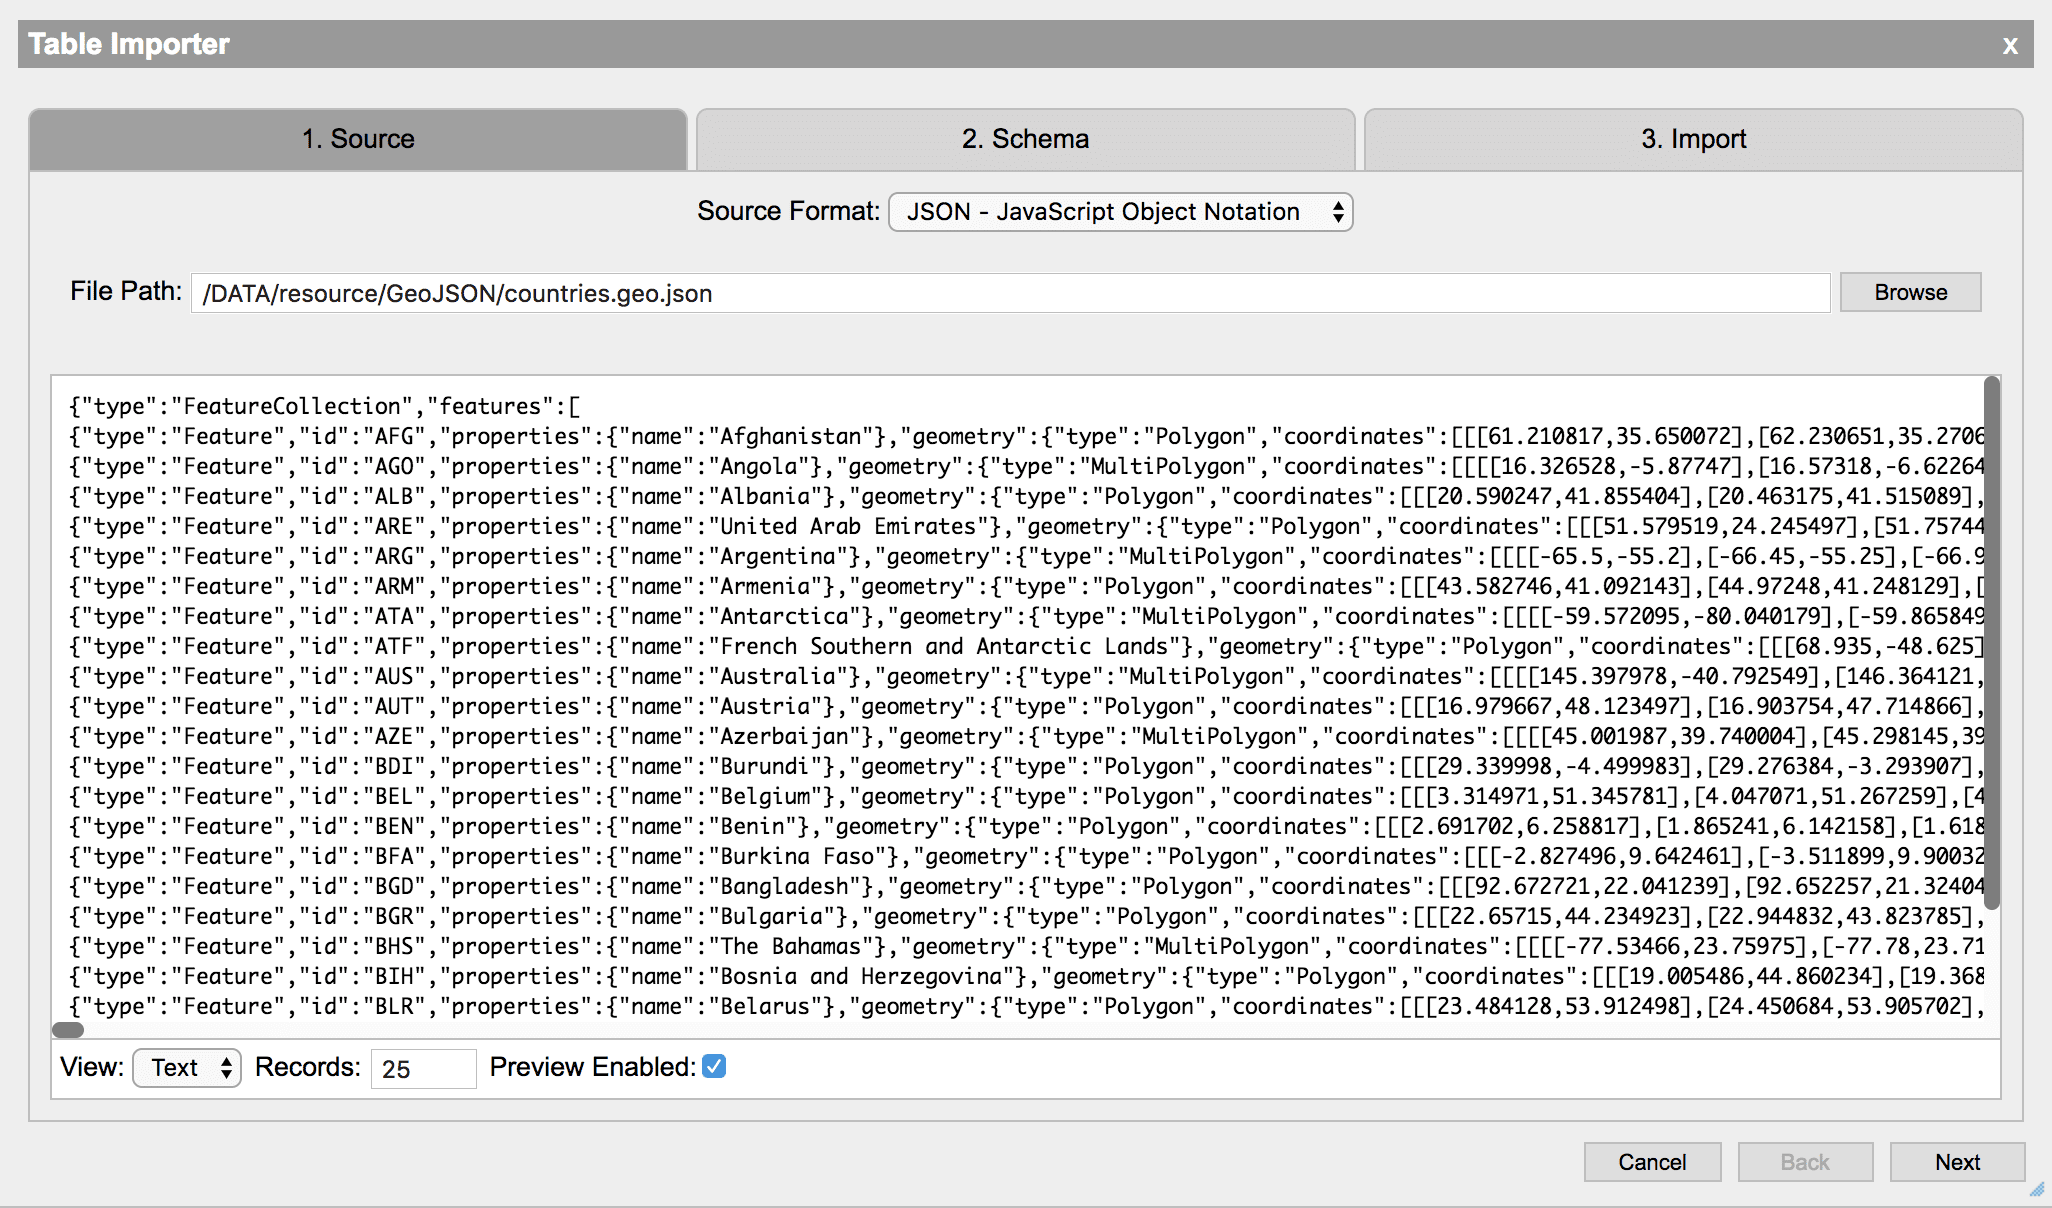
JSON - JavaScript object notation
JSON data can be imported by simply specifying a path to the JSON file. Either enter the path or press Browse and navigate to the file. The importer will read the JSON file and turn it into a table when imported.
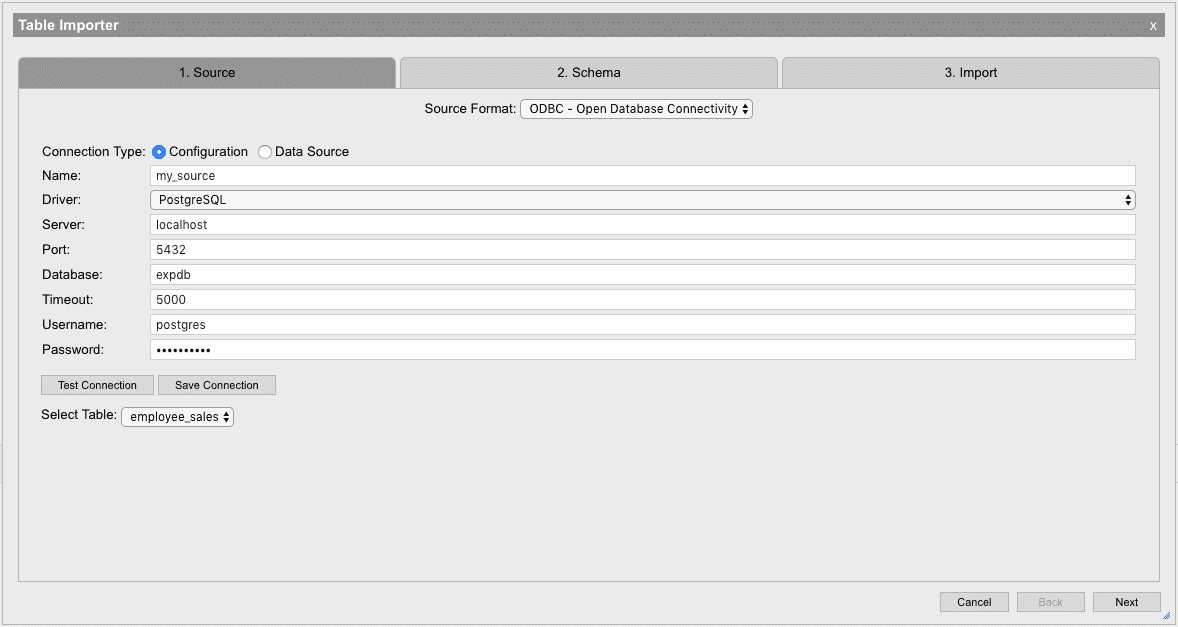
ODBC - open database connectivity
The importer supports loading SQL tables using ODBC to broker connections and data. To use ODBC, the system must have appropriate ODBC drivers installed to communicate with the desired database.
ODBC plugins must be registered with unixODBC. To use ODBC, unixODBC must be installed on the remote system. Database connections require that the appropriate driver is registered with odbcinst.
To view the registered plugins, open the importer and select the ODBC input type. Next, select Configure and view the available drivers under the Driver drop down menu.
ODBC sources that have been configured using unixODBC can be accessed using the Select Source drop down menu. Any sources added using odbcinst will be automatically added to the source list. To manually add a new source to the list, select the Configure Source tab and fill out the appropriate fields.
Options
| field | description |
|---|---|
| Name | This name will be used to reference this configuration by unixODBC. The chosen name will be available in the Data Source tab after it is saved. |
| Driver | The database drive installed to unixODBC to use to connect to the database |
| Server | URL of the data source to connect to. If the database is on the local machine, then use localhost. |
| Port | Port that the database is using to listen for incoming connections for. Ensure that this port is available and not blocked by a system firewall. |
| Database | Name of the database to open a connection with on the remote server. The user connecting to this database must have read permissions for the corresponding database. |
| Timeout | Time in milliseconds to wait for connection to be established before hanging up. |
| Username (optional) | User account to use as credentials when establishing a connection with the remote database. |
| Password (optional) | Password for user account to use to connect to the database. This password will not be saved in the source configuration |
Testing an ODBC connection
Once the connection parameters have been entered, the connection can be tested by pressing the Test Connection button. If there is a failure in the ODBC connector then it will be echoed to the message banner at the bottom of the page. Once a connection has been successfully established, a dropdown menu will appear with the available tables to pull data from. Select a table and press Next to continue.
ODBC - Open Database Connectivity (disabled)
If ODBC is not supported on the current system or the required pre-requisites are not installed, the option for ODBC will be disabled. To enable it, ensure that ODBC is supported on the target system and that all of the pre-requisites are installed.
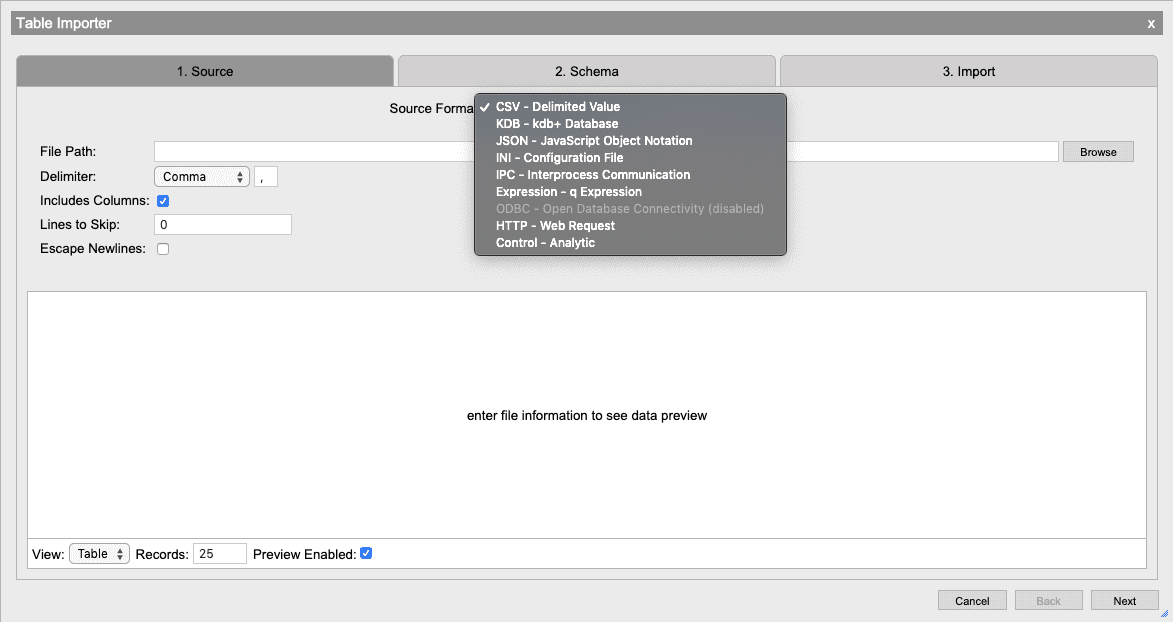
Expression - q expression
A source can be any arbitrary q expression using the Expression source format. This source option allows a q expression to be entered and used to select from a table or generate a table using a q expression. The final line of this expression must return a table that the importer will use as the data.
Options
| field | description |
|---|---|
| Context | This is the namespace that this expression should be evaluated in using system "d <context>" |
| Expression | A field where any q expression can be entered. The final line of the expression needs to result in a table |
IPC - interprocess communication
If the table being imported is in another process, it can be accessed using the IPC data source. This data source can create a connection to another process and evaluate an expression that will return a table. The resulting table will be copied into the current process. Connections can be made to a process on the same machine or to another machine using one of the provided host options.
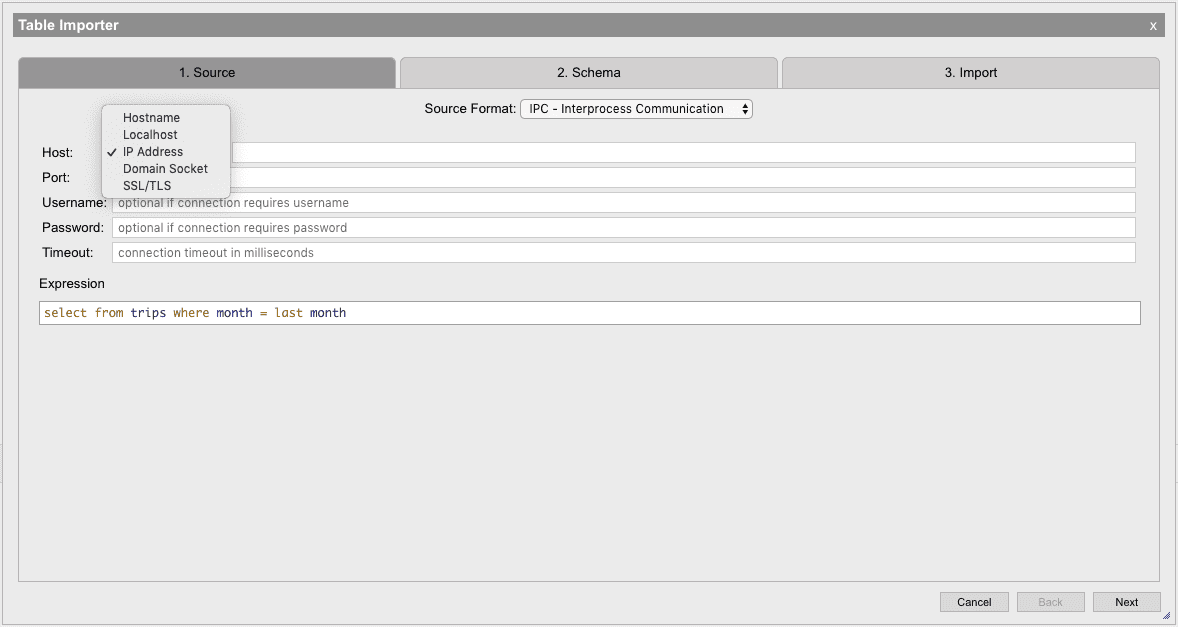
Options
| field | description |
|---|---|
| Host | The location of the process to access. The process can be on the same machine or another. The several host options available: • Hostname: A domain to access the process (www.myserver.com) • Localhost: The process is on the same machine as this process • IP Address: A dot notation IPv4 address to connect to (192.168.1.1) • Domain Socket: Available in kdb+ v3.4+, uses Unix domain socket for data transfer on a local machine • SSL/TLS: Uses secure transport protocol to transfer data to a local or external connection |
| Port | Port of the remote process to connect to |
| Username | User to connect with to the remote process if applicable |
| Password | Password to use for authenticating with the remote process if applicable |
| Timeout | A number of milliseconds to wait when connecting before considering the connection a timeout |
| Expression | A field where any q expression can be entered and will be evaluated on the report process |
HTTP - web request
Data can be pulled from an external server using HTTP. This data source will send a GET or POST request
to a webserver, then pass the response back to a custom parse function that is provided by the user to turn
the data into a table. The resulting table can then be appended to an existing table or can become its own table.
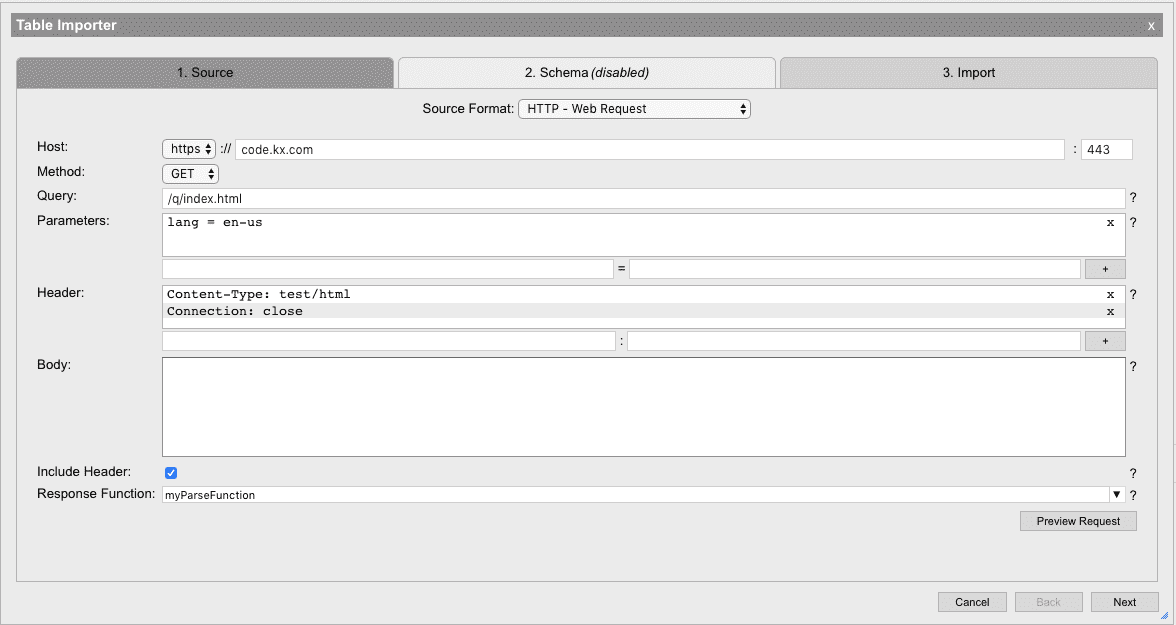
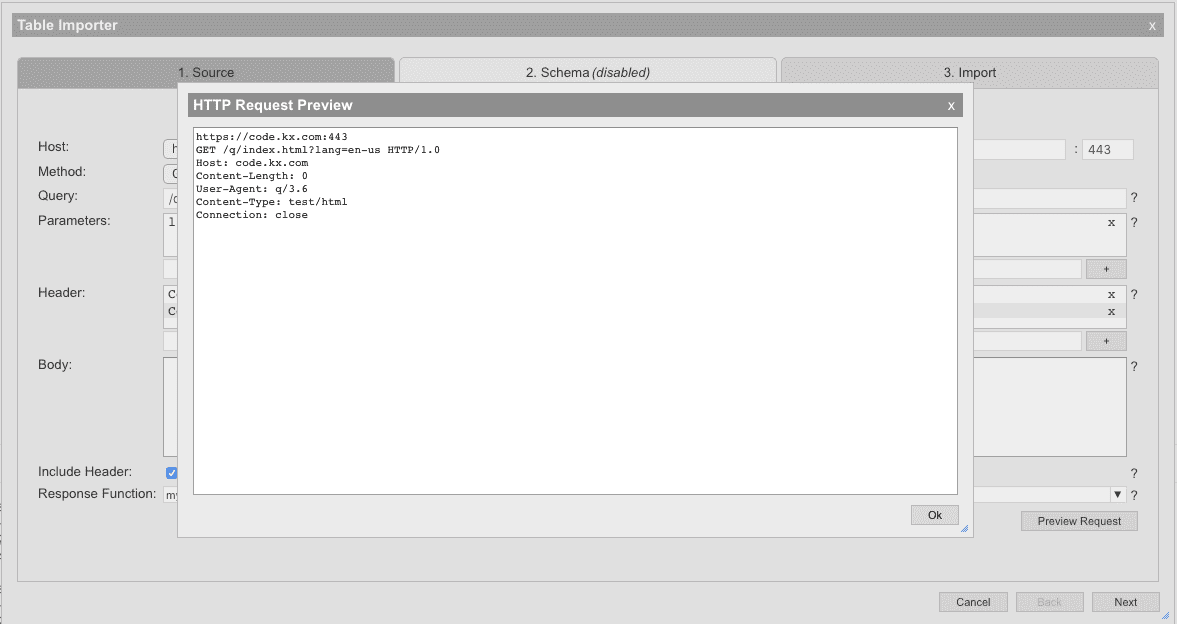
The preview of the Web request can also be previewed by pressing Preview Request. This will open a dialog and present the raw HTTP request that will be used to send this web request
Options
| field | description |
|---|---|
| Host | The domain of the webserver using either http or https and the server port. Example: code.kx.com. |
| Method | HTTP method to use, either GET or POST. |
| Query | URL endpoint on remote server for request. Example: /get/my/data. |
| Parameters | Custom parameters that can be added to the query string. These parameters will be automatically URL-encoded. |
| Header | Custom header fields to include with the web request. |
| Body | The request body that is to be sent to the remote server. |
| Include Header | If the response header should be passed to the Response Function. |
| Response Function | A function that will be used to translate the HTTP response into a table format. This function should take one parameter (the response) and return a table.If Include Header is selected, this function will be passed the entire HTTP response including headers. If not, then the function will only include the body of the response |
Schema
After a table has been successfully accessed by the Importer a schema prompt will appear. The schema selection table allows for selecting specific columns from the source.
Some data types can be cast to other types. To change the type of a column, select the new type from the dropdown menu.
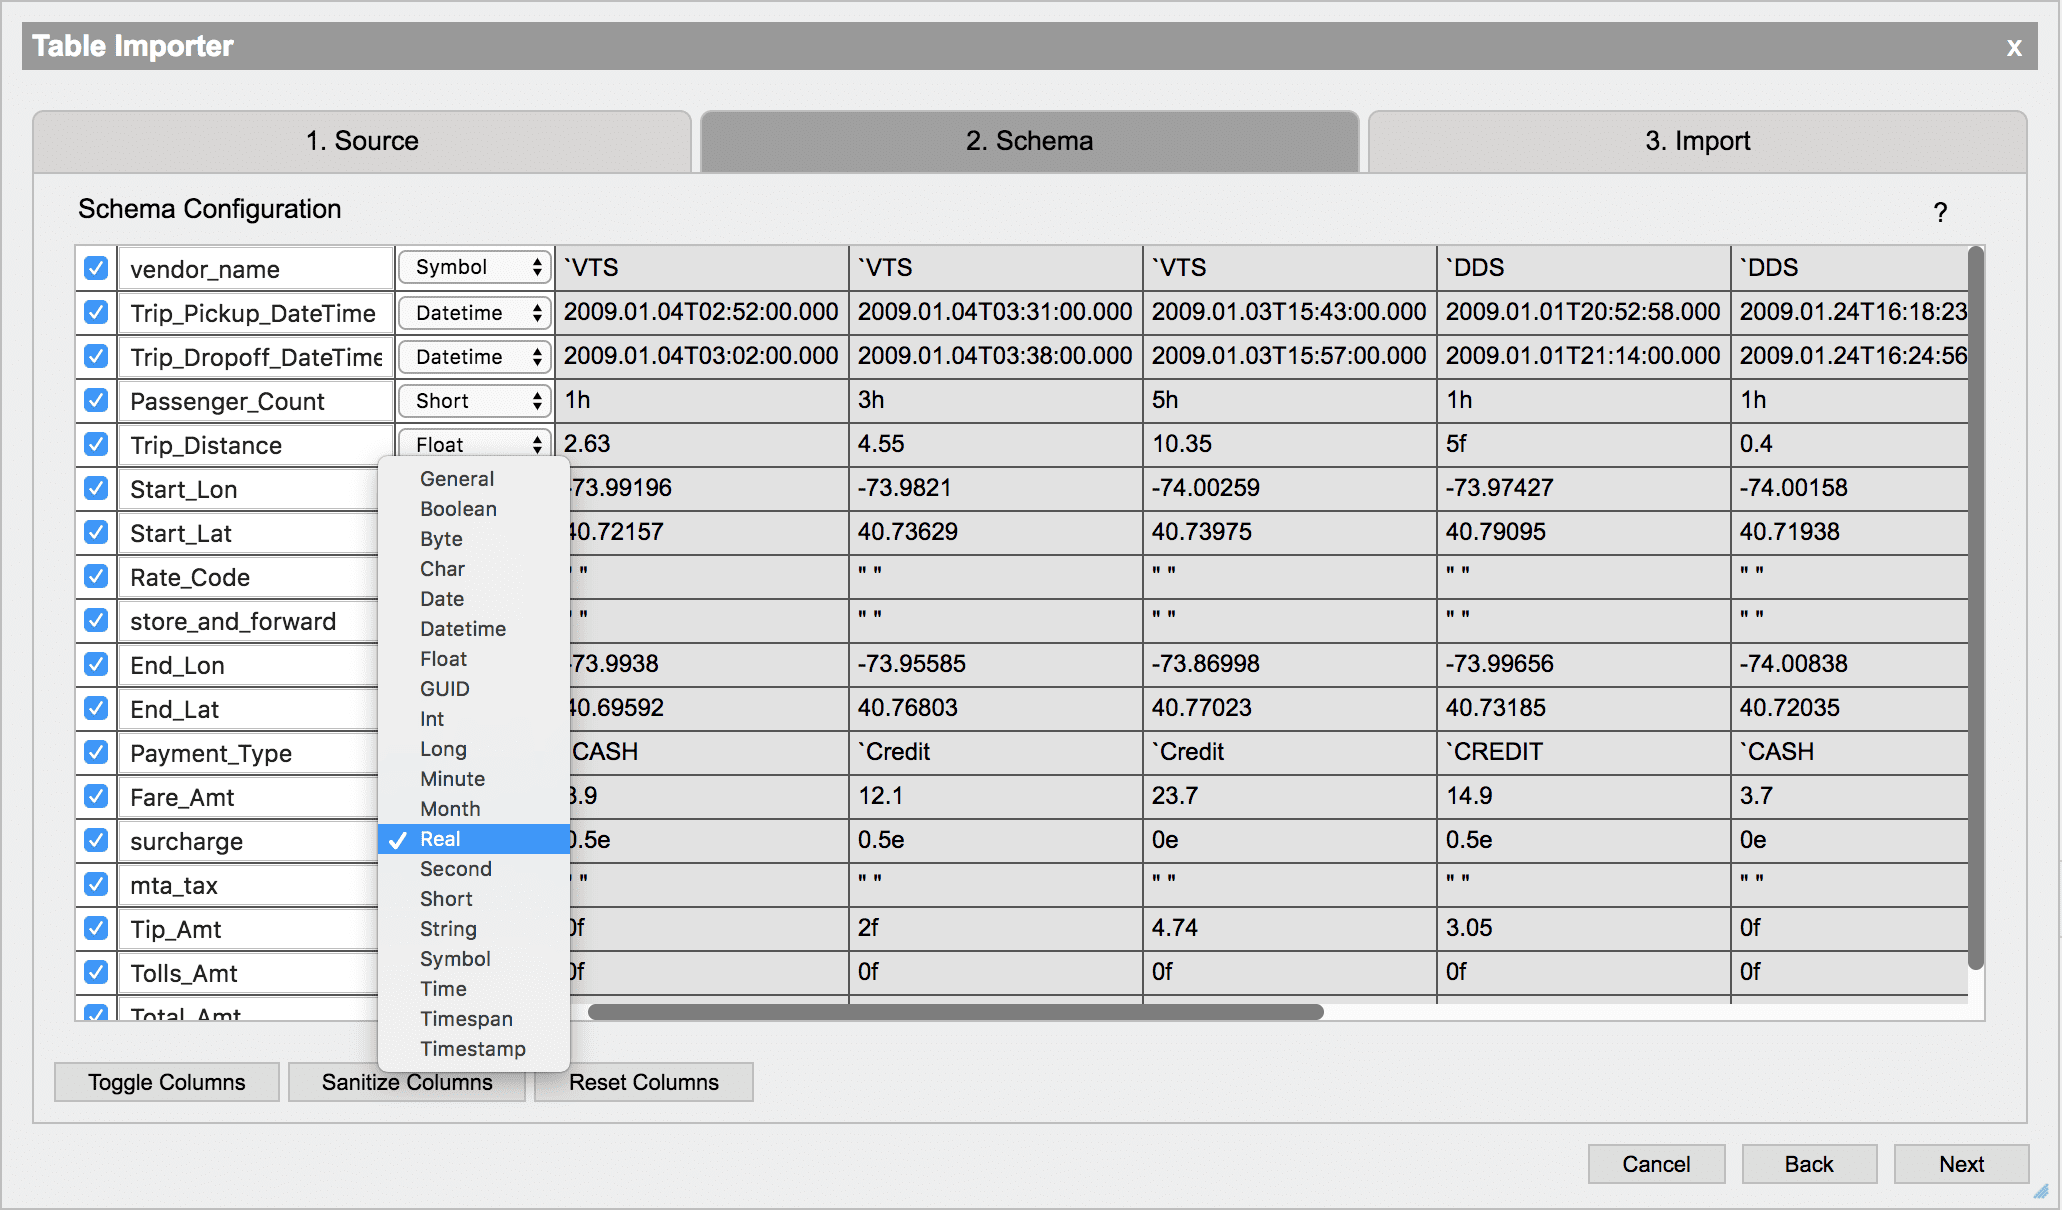
Naming columns
Column names can be changed by entering a new name in the column text field.
If a column name contains an invalid character, such as a space, or is the same name as a q function then it will not be accessible using qSQL. Clicking the Sanitize Columns button will rename all invalid column names so that they are accessible using qSQL. To reset all of the column names to their original names, click Reset Columns.
Import
Once the table configuration is complete the table can be imported. There are four options to bring data into the system:

| option | description |
|---|---|
| Import | Imports the data from the table configuration into memory. The table will be saved into a table in the global namespace using the Table Name as a reference. |
| Export | Opens the table exporter without importing any data. This allows you to translate data from one format to another without importing it all into memory as an intermediate step. The export then allows for configuration of an output location to store the input data. See Exporter for more details. |
| Inspect | Imports the input data in the same way as the Import option. Once the data has been imported a Visual Inspector will be launched to inspect the input data. |
| Transform | (KX Analyst only) Opens the table transformer to further refine the input data. The table transformer will sample the input data without reading it. |
Saving import configurations
Once an import source has been configured it can be saved using the Save Configuration button. Saving an import configuration will save all of the fields to access the desired source.
The configuration settings for an import source can be accessed by invoking the saved configuration object. Invoking a saved configuration with no parameters will return all of the configured values. The following usage guide is embedded within a saved configuration.
Import configurations store schema and target information for configurations built in the Importer.
Parameters
| parameter | description |
|---|---|
| options | An import configuration accepts a single argument, the new target for this configuration. To use the default target which was previously configured, input the generic null (::). If passed a dictionary, the input configuration will apply the appropriate keys to itself. |
Targets
Targets for all file formats are q symbolic handles (e.g. `:path/t.csv). Targets for non-file
formats such as ODBC require specific connection dictionaries.
ODBC configurations use .im.odbc data configurations to specify connections. To create a
connect dictionary from an existing data source registered with unixODBC, use the following command:
conn: .im.odbc.connect.from .im.odbc.dsn.about `myDSN;
To upgrade an ODBC configuration, the connection dictionary must be wrapped in an options dictionary:
.abc.myConfig enlist[`target]!enlist conn;
Example:
q) .abc.myConfig `:path/to/my/table.csv

format    |`csv
target    |`:path/to/my/table.csv
offset    |0
options   |`delimiter`hasHeader!(",";1b)
schema    |+`name`kind`include!(`Row_ID`Order_ID`Order_Date ...
baseschema|+`name`kind`include!(`Row ID`Order ID`Order Date ...
The full .im API can be viewed in the function reference by selecting Help > Analyst Function Reference