Import Wizard
This page describes the Import Wizard, a guided process for creating a pipeline to import data from a number of different sources, including cloud and relational data services.
Create database
The Import Wizard makes reference to a database and table, in the reader and writer steps of the process. Therefore, before proceeding with creating a pipeline using the Import Wizard, you must create a database.
Guided Walkthroughs using the Import Wizard
This page describes the elements of the Import Wizard which assist you in the pipeline building workflow. For detailed examples of using the Import Wizard to create pipelines for ingesting different types of data, refer to the relevant guided walkthroughs.
Build pipelines manually in web interface
As an alternative to using the Import Wizard, you can build a pipeline manually through the web interface using the Pipelines menu.
Using the Import Wizard
This section describes the workflow for creating a pipeline using the Import Wizard.
-
To open the Import Wizard, use one of the following methods:
-
Click Import Data, under Databases in the Quick Actions panel on the Overview page.

-
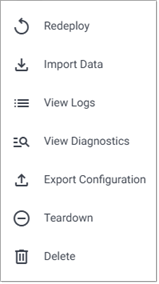
Click on a database name, under the Databases in the left-hand menu, to open the database screen. Click Other Actions and click Import Data.
-
Click on the three dots beside the database name, under Databases in the left-hand menu and click Import Data
In each case, the Import Wizard opens as shown below.
-
The wizard guides you through the following workflow to create a pipeline.
- Select and configure a reader to ingest data into your kdb Insights Enterprise instance
- Select and configure a decoder to convert the data into a format suitable for processing
- Configure the schema to convert data to a type compatible with a kdb+ database
- Configure the writer to transform data to the kdb Insights Enterprise database
- Open the pipeline
To begin, select and configure a reader.
Select and configure reader
Readers enable both streaming and batch data to be ingested into kdb Insights Enterprise.
-
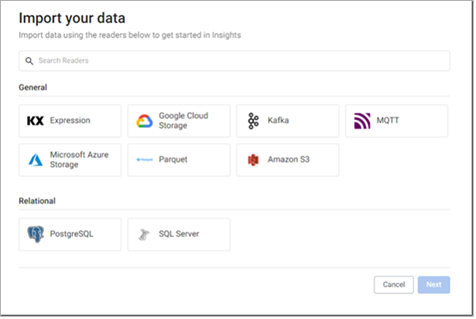
When you open the Import Wizard, as described in the previous section, the Import your data screen is displayed.
This contains the following set of readers which you can use to import data.
- KX Expression
- Google Cloud Storage
- Kafka
- MQTT
- Microsoft Azure Storage
- Parquet
- Amazon S3
- PostgreSQL
- SQL Server
-
Click on the reader that matches the type of data you are ingesting. The wizard presents the configuration screen for the selected reader.
Click on the relevant tab below for details.
The KX Expressions reader enables you to import data directly using a kdb+ expression.
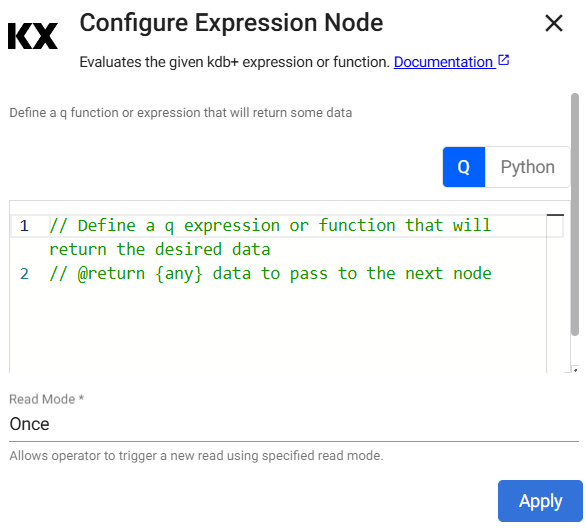
The Kdb Expression Reader starts with a code editor. Add the following kdb+ sample data generator in the node editor:
kdb+ query
n:2000;
([] date:n?(reverse .z.d-1+til 10);
    instance:n?`inst1`inst2`inst3`inst4;
    sym:n?`USD`EUR`GBP`JPY;
    num:n?10)
Refer to Expression for further details on configuring this reader.
The Google Cloud Storage reader enables you to take advantage of object storage by importing data from Google Cloud Storage directly into kdb Insights Enterprise.
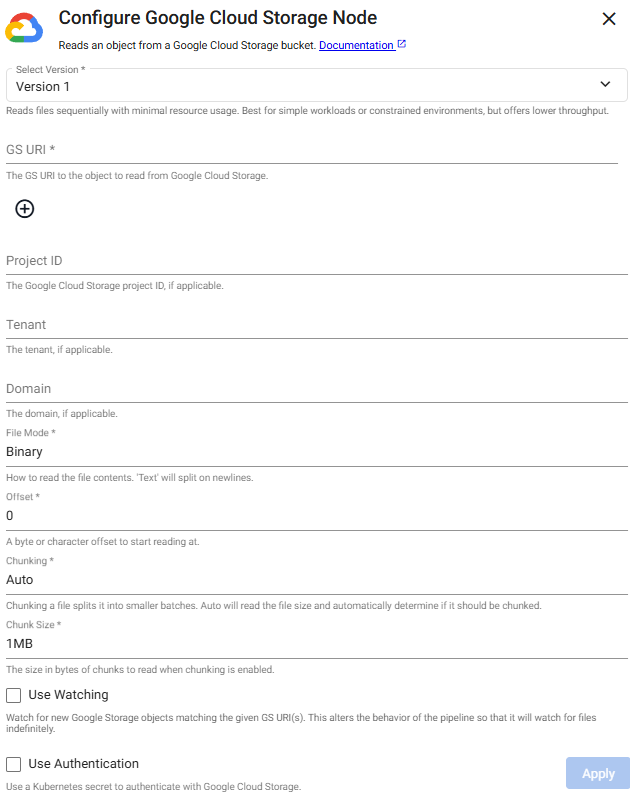
Define the Reader node with GCS details. Default values can be used for all but Path and Project ID. Project ID may not always have a customizable name, so its name is contingent on what's assigned when creating your GCS account.
Sample GCS Reader Node
- Path:
gs://mybucket/pricedata.csv - Project
ID: ascendant-epoch-999999
Other required properties can be left at default values.
Refer to Google Cloud Storage for further details on configuring this reader.
Refer to the Object storage walkthrough for an example using Google Cloud Storage.
The Kafka reader enables you to connect to an Apache Kafka distributed event streaming platform.
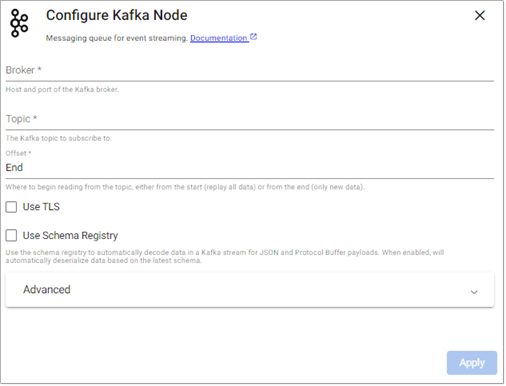
- Define the Kafka Broker details, port information and topic name.
Sample Kafka Reader Node
- Broker:
kafka:9092(note: not a working example) - Topic:
trades - Offset:
Start - Use TLS:
No
Refer to Kafka for further details on configuring this reader.
Refer to the Kafka guided walkthrough for an example using Kafka.
The MQTT reader enables you to subscribe to a MQTT topic.
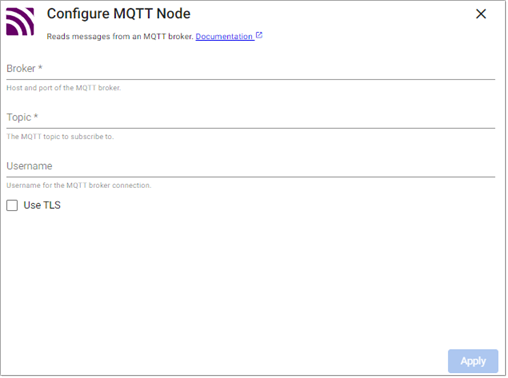
Refer to MQTT for details on configuring this reader.
Refer to the Manufacturing tutorial for an example using MQTT.
The Microsoft Azure Storage reader enables you to take advantage of object storage by importing data from Microsoft Azure Storage directly into kdb Insights Enterprise.
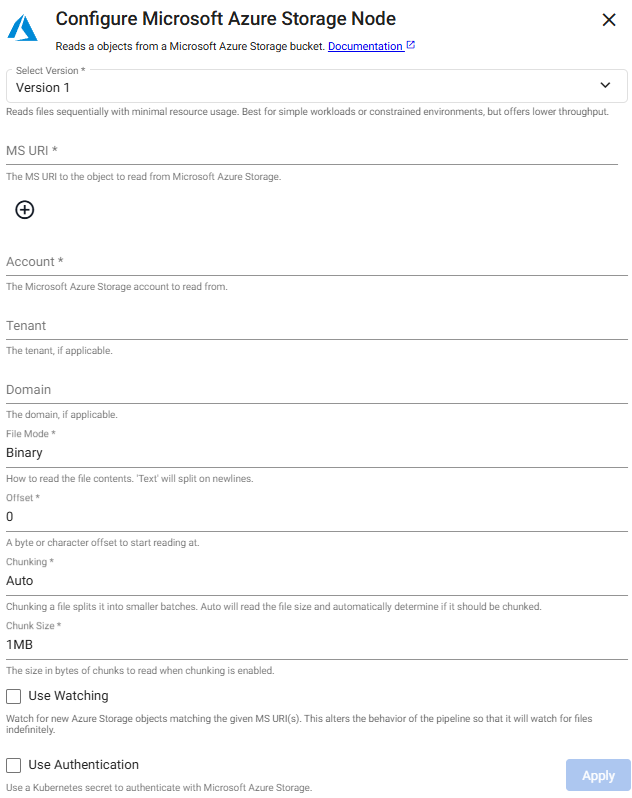
Define the Microsoft Azure Storage node details. Default values can be used for all but Path and Project ID. A customizable account name is supported for ACS.
Sample ACP Reader Node
- Path:
ms://mybucket/pricedata.csv - Account:
myaccountname
Other required properties can be left at default values.
Refer to Microsoft Azure Storage for further details on configuring this reader.
Refer to the Guided walkthrough for an example using Microsoft Azure Storage.
The Amazon S3 reader enables you to take advantage of object storage by importing data from Amazon S3 Storage directly into kdb Insights Enterprise.
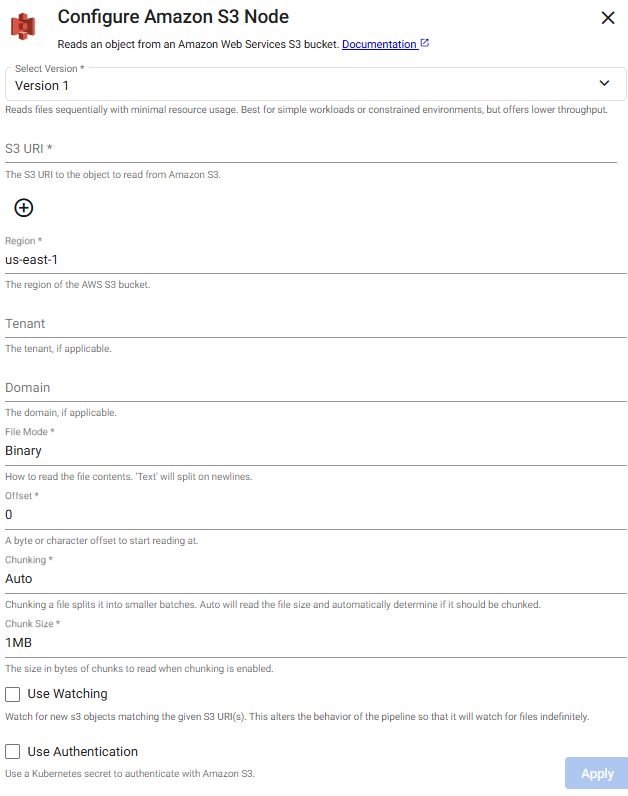
Define the Reader node with the S3 path details for how the file is to be read and optionally, the Kubernetes secret for authentication. Default values can be used for all but Path and Region.
Sample Amazon 3 Reader Node
- Path:
s3://bucket/pricedata.csv - Region:
us-east-1
Refer to Amazon S3 for further details on configuring this reader.
Refer to the Object Storage guided walkthrough for an example using Amazon S3.
The PostgreSQL reader executes a query on a PostgreSQL database.
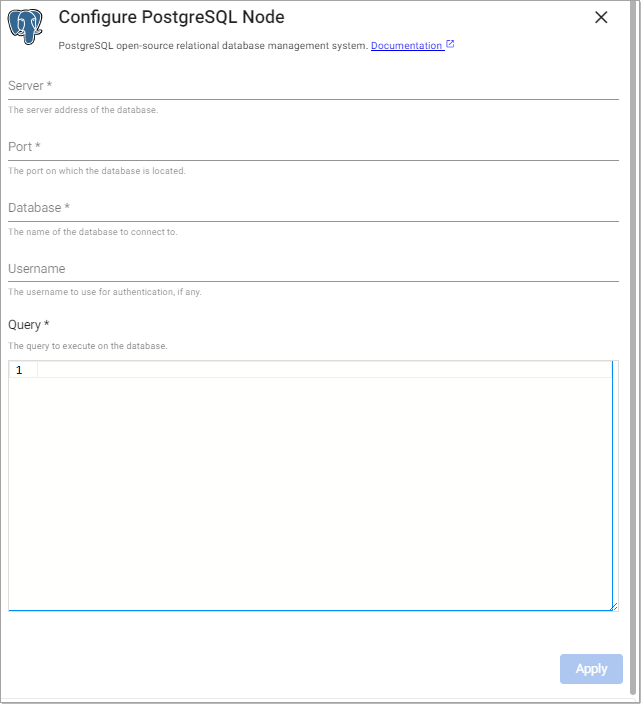
Define the Reader node, including any required authentication, alongside server and port details.
Sample Postgres Reader Node
- Server:
postgresql - Port:
5432 - Database:
testdb - Username:
testdbuser - Password:
testdbuserpassword - query:
select * from cars
Where Server is
postgresql.default.svc, the default is the namespace. FOr example,dbispostgresql.db.svccase sensitive
Node properties and queries are case sensitive and should be lower case.
Refer to PostgreSQL for further details on configuring this reader.
The SQL Server reader executes a query on a SQL Server database.
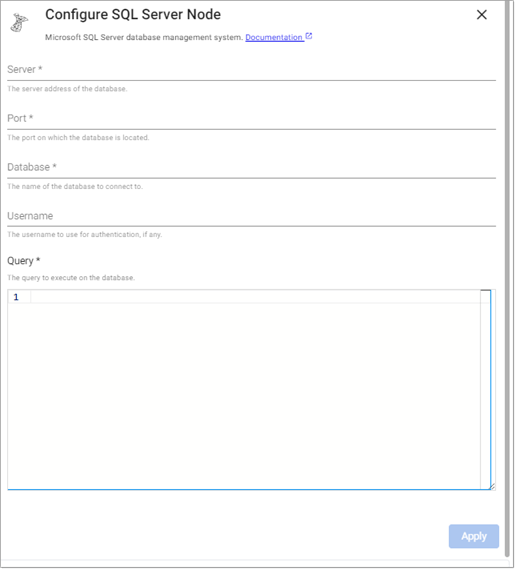
Refer to SQL Server for details on configuring this reader.
Refer to the SQL Database guided walkthrough for an example using SQL Server.
- Path:
Next, select and configure a decoder.
Select and configure a decoder
Decoders convert data to a format that can be processed.
Once you have selected and configured a reader, select a decoder from the list of options:
- No Decoder
- Arrow
- CSV
- JSON
- Pcap
- Protocol Buffers
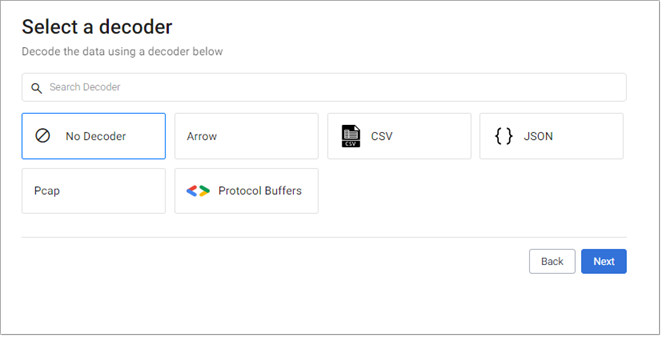
Refer to Decoders for details on configuring each of these decoders.
In addition, some readers have specific decoder requirements. Click on the tabs below for details.
No decoder is required for KX Expression.
This data requires a CSV decoder node. Google Cloud Storage data requires a timestamp column to parse the data.
Typical CSV decoder Node
- Delimiter:
, - Header:
First Row - Encoding Format:
UTF8
Event data on Kafka is of JSON type, so a JSON decoder is required to transform the data to a kdb+ friendly format. Data is converted to a kdb+ dictionary. There is no need to change the default setting for this.
JSON decode
- Decode Each:
false
This data requires a CSV decoder node. Microsoft Azure Storage data requires a timestamp column to parse the data.
Typical CSV decoder Node.
- Delimiter:
, - Header:
First Row - Encoding Format:
UTF8
This data requires a CSV decoder node. Amazon S3 data requires a timestamp column to parse the data.
Typical CSV decoder Node
- Delimiter:
, - Header:
First Row - Encoding Format:
UTF8
Other required properties can be left at default values.
Next, configure the schema.
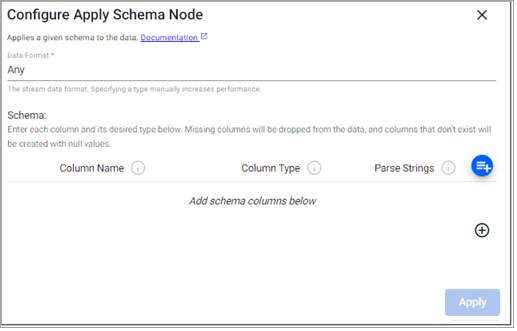
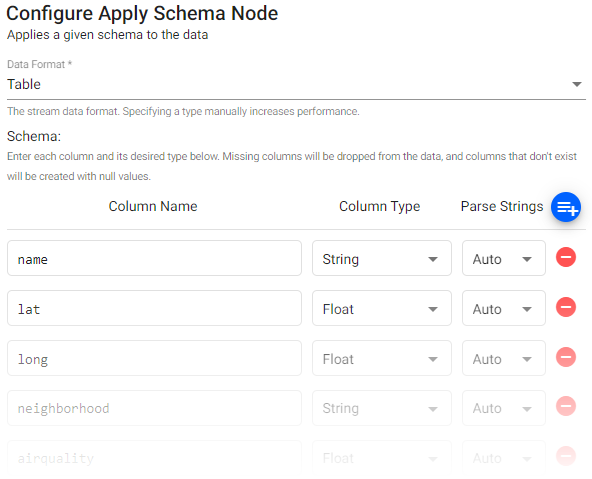
Configure the schema
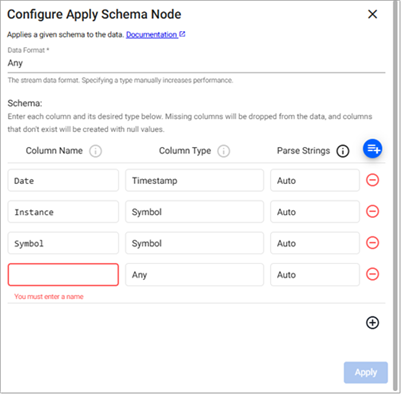
Once you have selected and configured a decoder, configure the schema. The schema converts data to a type compatible with a kdb+ database. Every imported data table requires a schema; and every data table must have a timestamp key to be compatible with kdb's time series columnar database.
The schema configuration can be done manually, or preferably, loaded from a database. Click on a tab below for details on each method.
- Click + in the section Add schema columns below and add each column setting a value for Column Name and Column Type. Parse Strings can be left at
Auto.
The following table provides a sample schema configuration.
| Column name | Column type | Parse strings |
|---|---|---|
| Date | Timestamp | Auto |
| instance | Symbol | Auto |
| symbol | Symbol | Auto |
| num | Integer | Auto |
A schema can also be loaded from a database by clicking ![]() .
.
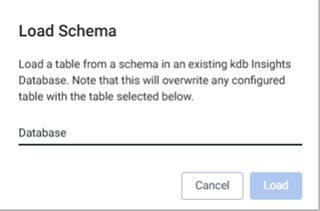
Refer to Apply Schema for details on the configuration options for this node.
Refer to schemas for further information on schema configuration.
Next, configure the writer.
Configure the writer
The writer writes transformed data to the kdb Insights Enterprise database.
After you have selected and configured a schema, configure the writer.
The writer configuration can be done manually, or preferably, by selecting an existing database. Click on a tab below for details on each method.
- Click + Database to go to the Create Database screen.
- Following database creation instructions described in Databases.
-
Click Select Database to choose the database to write data to.
-
Click Select Table to choose the table, in the selected database, to write data to.
These are usually the same database and table from the schema creation step.
Refer to kdb Insights Database writer for further details.
Schema Column Parsing
Parsing is done automatically as part of the import process. If you are defining a manual parse, ensure parsing is enabled for all time, timestamp, and string fields unless your input is IPC or RT.
Next, open the pipeline.
Open the pipeline
After you have selected and configured a writer, open the pipeline.
-
Click Open Pipeline to open the Create Pipeline dialog.
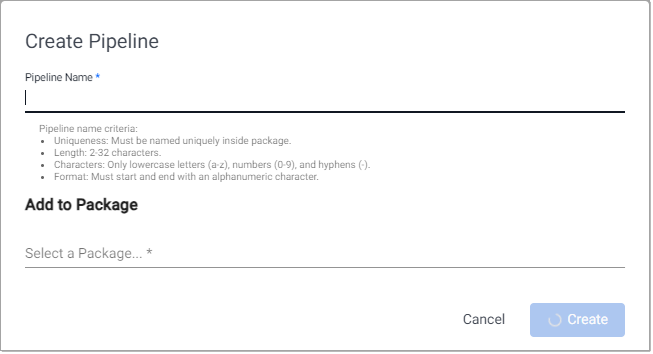
-
Enter a unique Pipeline Name that is 2-32 characters long, uses lowercase letters, numbers, and hyphens, and starts and ends with an alphanumeric character.
-
Click Select a package under Add to Package, to display the list of packages this pipeline can be added to.
Click Create new package if you want to add the pipeline to a new package. Enter a unique package name that is 2-32 characters long, uses lowercase letters, numbers, and hyphens, and starts and ends with an alphanumeric character.
See packages for further details about packages.
Pipeline editor
Once a pipeline has been created, using the Import Wizard, it can be modified using the Pipeline editor.
Advanced Settings
Each pipeline created by the Import wizard has an option for Advanced pipeline settings. The Advanced settings include Global Code which is executed before a pipeline is started; this code may be necessary for Stream Processor hooks, global variables and named functions.
See Pipeline Settings for further details.
Next, if you are configuring a Kafka pipeline you need to add and configure a map node. Refer to the additional step for Kafka for details.
Otherwise you can proceed to deploying the pipeline.
Additional step for Kafka
For Kafka pipelines, built using the Import Wizard, a Map function node is required to convert the data from a kdb+ dictionary to a kdb+ table.
-
In the search box of the pipeline screen, enter Map to locate the Map function. Click and drag this node onto the pipeline workspace.
-
Insert the Map between the Decoder and the Transform Schema as shown below:

-
Click on the Map node and in the Configure Map Node panel replace the existing code with the following.
Map function
{[data] enlist data } -
Click Apply.
- Click Save.
Next, you can deploy the pipeline.
Deploy the pipeline
To deploy the pipeline:
-
In the pipeline template screen, click Save & Deploy.
The pipeline is deployed when the status is Running. This is indicated with a green tick beside the pipeline name in the left-hand Pipelines list.
Read pipeline status for further details on pipeline status values.
Next steps
After you have completed the steps outlined in the sections above to create a pipeline using the Import Wizard you are ready to: