Getting started
The Developer package contains both the Developer environment, as well as the AxLibraries libraries and utilities which can be used by q developers and build systems outside of Developer.
Download
For more information on installing and using the libraries outside of Developer, see the libraries installation instructions. The following information details how to install and run KX Developer.
Prerequisites
To install and use Developer, you must have installed 64-bit kdb+ V3.4+ and set the required
q environment variables (QHOME, QLIC, append q to PATH), and should be running one of the
following supported
operating systems:
- RHEL 6.5/7/8
- Windows 10
- Windows Server 2012/2016
- Ubuntu 16.04/18.04/20.04
- macOS 10.10+
The following dependencies are also required.
OpenSSL version
Developer is built against the default OpenSSL version for a given operating system. As a result, Developer expects to find OpenSSL 1.0.X on RHEL 6, RHEL 7, and Ubuntu 16, and expects to find OpenSSL 1.1.X on RHEL 8 and Ubuntu 18/20. For compatibility reasons, Developer on macOS can work with either version of OpenSSL.
OpenSSL q symlink
In some distributions, OpenSSL isn't linked as libssl.so, and
is instead provided as libssl.so.1.0.0 or equivalent, for example.
q looks for libssl.so when loading with TLS enabled, so a symlink
may be required.
Linux
- (rhel6/7, ubuntu 16) OpenSSL 1.0.0 or newer
- (rhel8, ubuntu 18/20) OpenSSL 1.1.0 or newer
- fontconfig 2.8.0 or newer
- (rhel6) freetype 2.3.11 or newer
- (rhel6, ubuntu) libpng 1.2.49 or newer
- (rhel7/8) libpng 1.5.13 or newer
- glibc 2.12 or newer
- libgcc 4.4.7 or newer
- libstdc++ 4.4.7 or newer
macOS
MacOS dependencies can be installed via Homebrew.
- OpenSSL 1.0.1+ or OpenSSL 1.1.0+
Note: Developer on macOS expects to find the OpenSSL libraries libcrypto.1.0.0.dylib and
libssl.1.0.0.dylib in /usr/local/opt/openssl/lib, which is where they are commonly installed.
If OpenSSL was installed to a different location, you may see errors similar to:
Error loading q_git k_libgit2_tag_delete:dlopen(/Users/<username>/developer/ws/lib/q_git.so, 2):
  Library not loaded: /usr/local/opt/openssl/lib/libssl.1.0.0.dylib
  Referenced from: /Users/<username>/developer/ws/lib/libssh2.1.dylib
  Reason: image not found
To fix this, the files will need to be symlinked to the expected location. For example, if OpenSSL was installed using Anaconda, you may need to run commands similar to the following. Note that the Anaconda paths used in this example may be different for your install of Anaconda:
mkdir -p /usr/local/opt/openssl/lib && cd /usr/local/opt/openssl/lib
ln -s ~/anaconda2/lib/libcrypto.1.0.0.dylib libcrypto.1.0.0.dylib
ln -s ~/anaconda2/lib/libssl.1.0.0.dylib libssl.1.0.0.dylib
Windows
- Visual C++ Redistributable 2015
If using authentication with Developer , or using q with TLS enabled:
- OpenSSL 0.9.8 or newer (see Knowledge Base: SSL for more information)
Install
After extracting the Developer directory from the compressed archive, the bash script install.sh
can be used to install Developer on any supported *nix platform with bash installed, or the batch
script install.bat can be used to install Developer to any supported version of Windows.
The install script will display instructions when run with the -h or --help flag. By default, the
installer will pose a series of questions which will be used to construct a configuration file, then
use that configuration to install Developer.
TLS certificate paths will be requested during installation
If not using TLS, ignore these prompts. If using kdb+ <3.6, the SSL environment variables
SSL_CERT_FILE and SSL_KEY_FILE should be used and should be set up outside of the
Developer config by the user. The Developer config sets the KX_SSL_* environment variables
used in kdb+ 3.6+. See knowledge base: SSL for more information.
When the installation completes, a config file will be written to <install>/config/config.profile
on *nix or <install>/config/config.bat on Windows.
Starting Developer
Linux and macOS
If you added the alias output by the installer to your shell config file (eg. .bashrc or
.bash_profile), simply open a terminal and type developer to start Developer.
To start it manually, open a terminal and source the config file, then launch q and load the
launcher.q_ file:
source /path-to-install-dir/config/config.profile
q /path-to-install-dir/launcher.q_
Replace /path-to-install-dir/ with the path to where Developer was
installed. Note that for TLS-enabled installs, you must pass q the -E 2 flag:
q /path-to-install-dir/launcher.q_ -E 2
Windows
To start Developer on Windows, you must run the config.bat file and then load the
launcher.q_ script into q. To do so, open a Command Prompt and run the following:
C:\path-to-install-dir\config\config.bat
q C:\path-to-install-dir\launcher.q_
Replace C:\path-to-install-dir\ with the path to where Developer was installed.
As per the instructions for *nix systems, you will need to pass the -E 2 flag to q if the
install is TLS-enabled. Note that on Windows systems with authentication enabled, the password
entered in the Command Prompt is not hidden.
Connecting to Developer
To connect to Developer, open a modern web browser and navigate to the URL output to the q console when you start Developer.
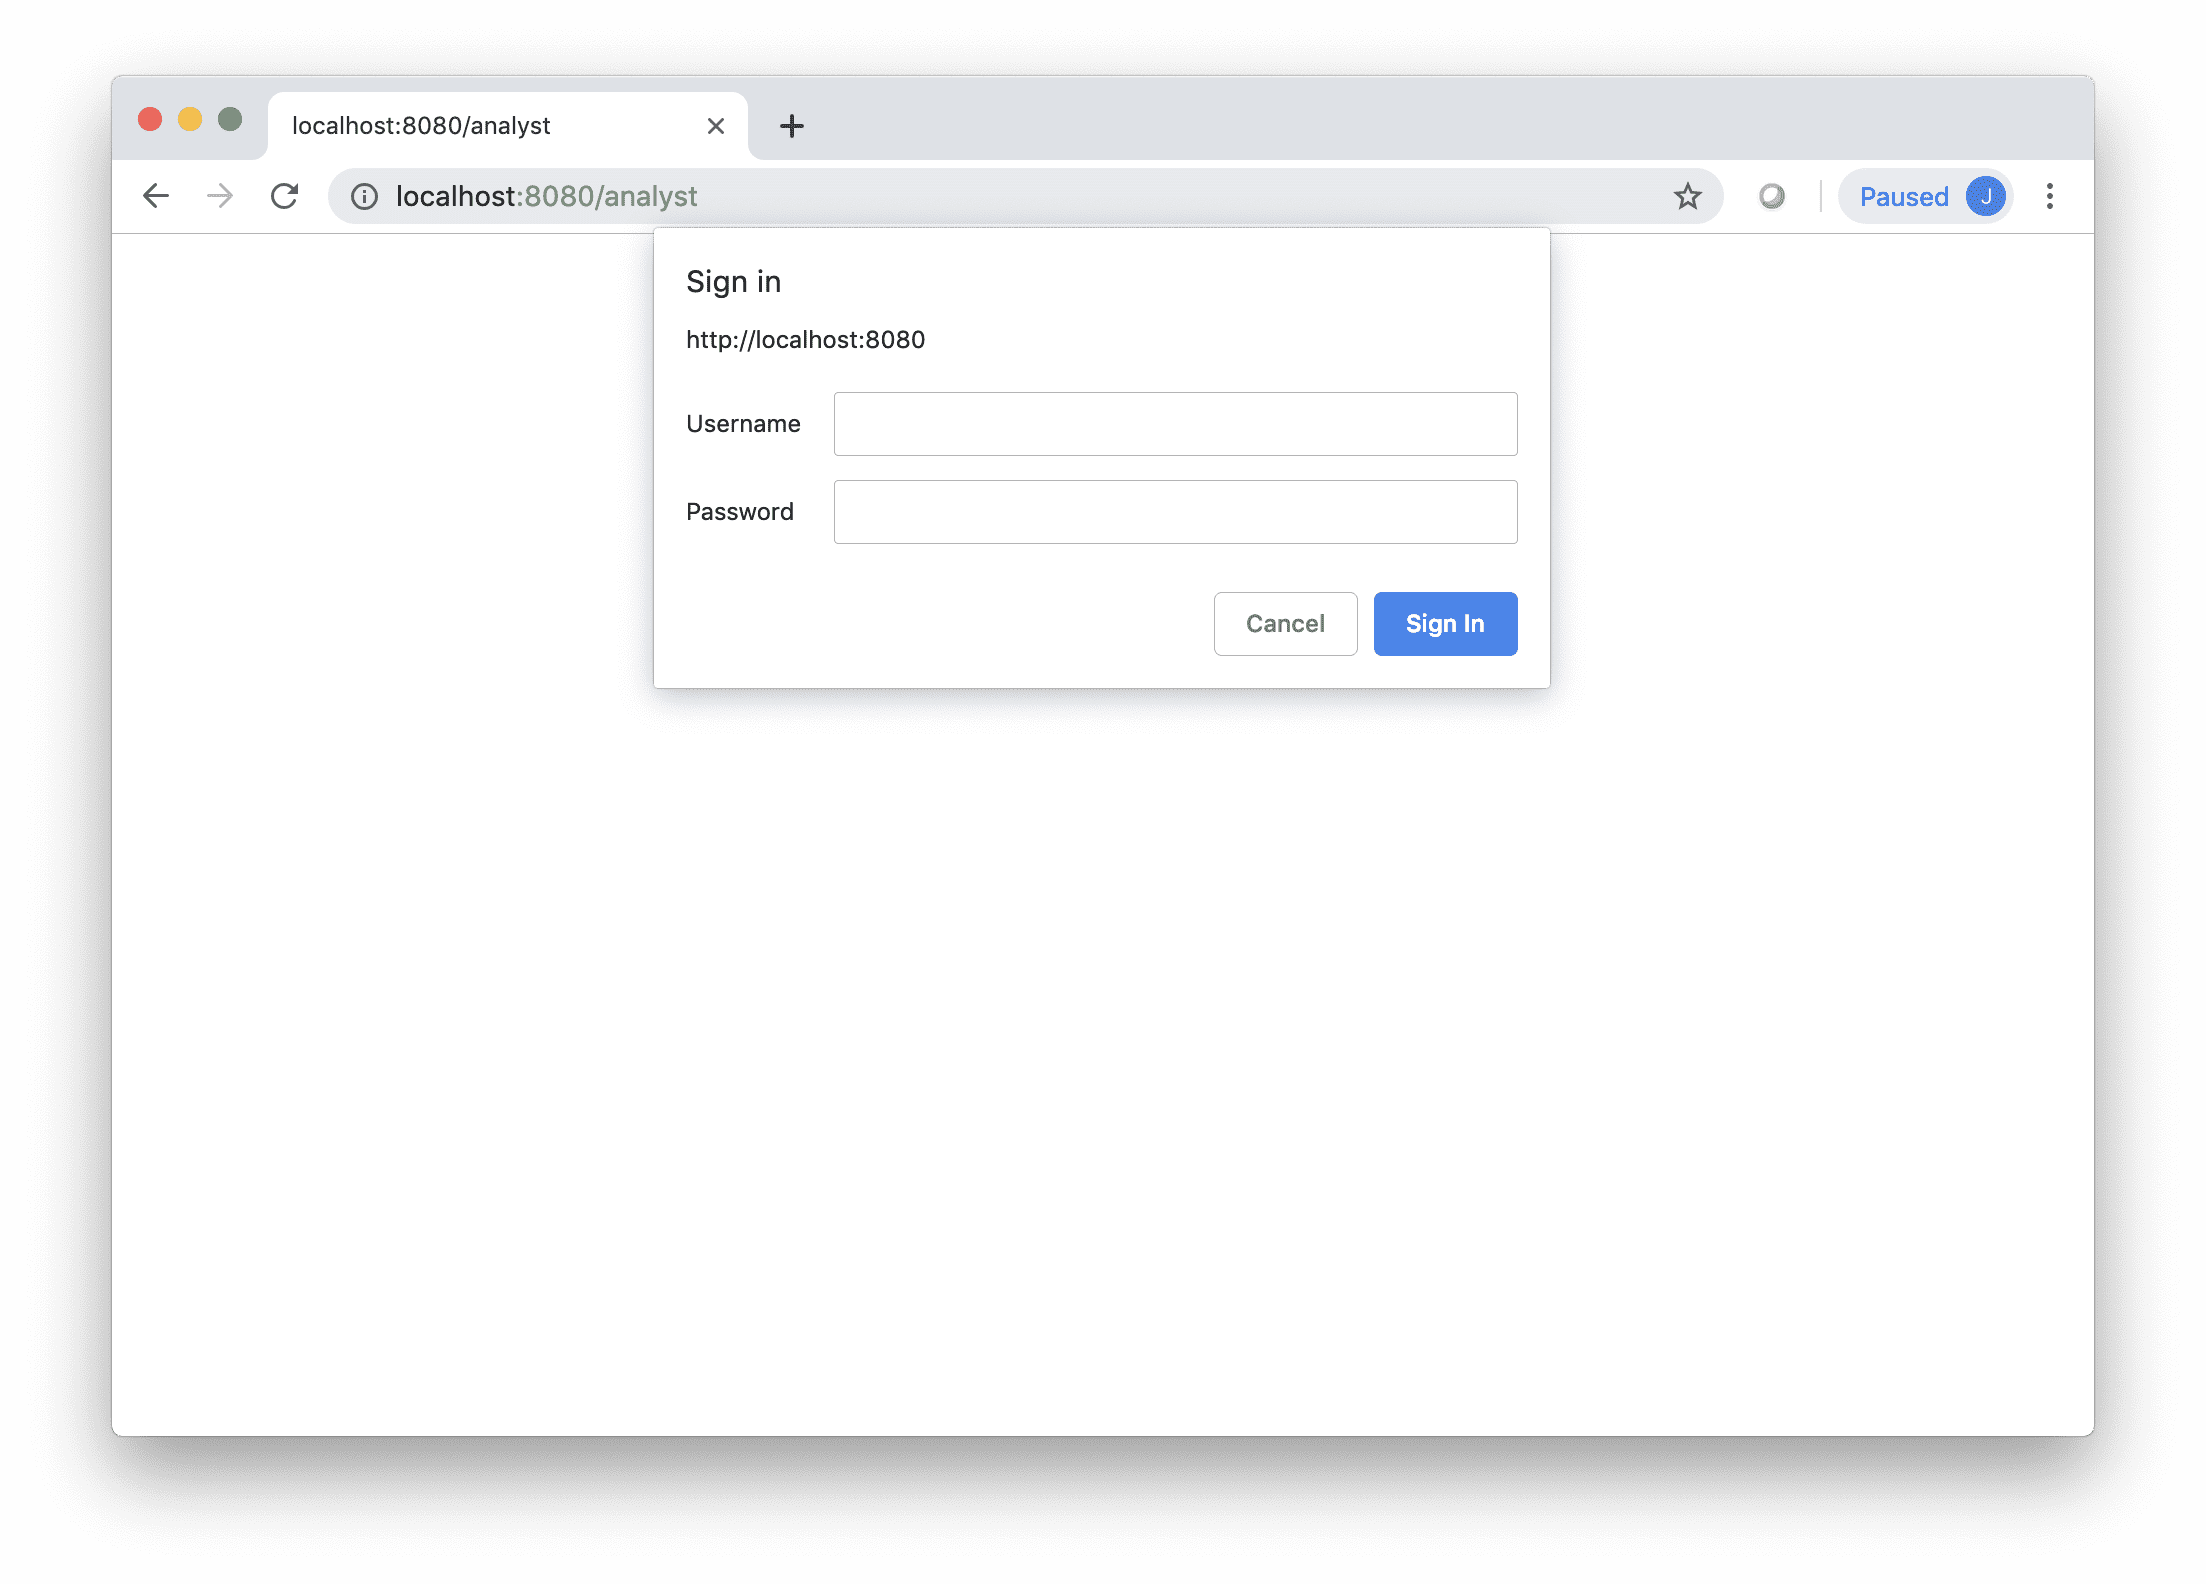
If you have enabled authentication for your install, you will be prompted by your browser to enter credentials when you navigate to the Developer URL. Enter the credentials you set when starting Developer at the command line to login.
If you disabled authentication, you will not be prompted for credentials and will instead be taken directly to the Workspace Browser.
Workspace Browser
After you have connected to Developer, the Workspace Browser will be displayed. Here you can create a new workspace or choose an existing workspace workspace to load.
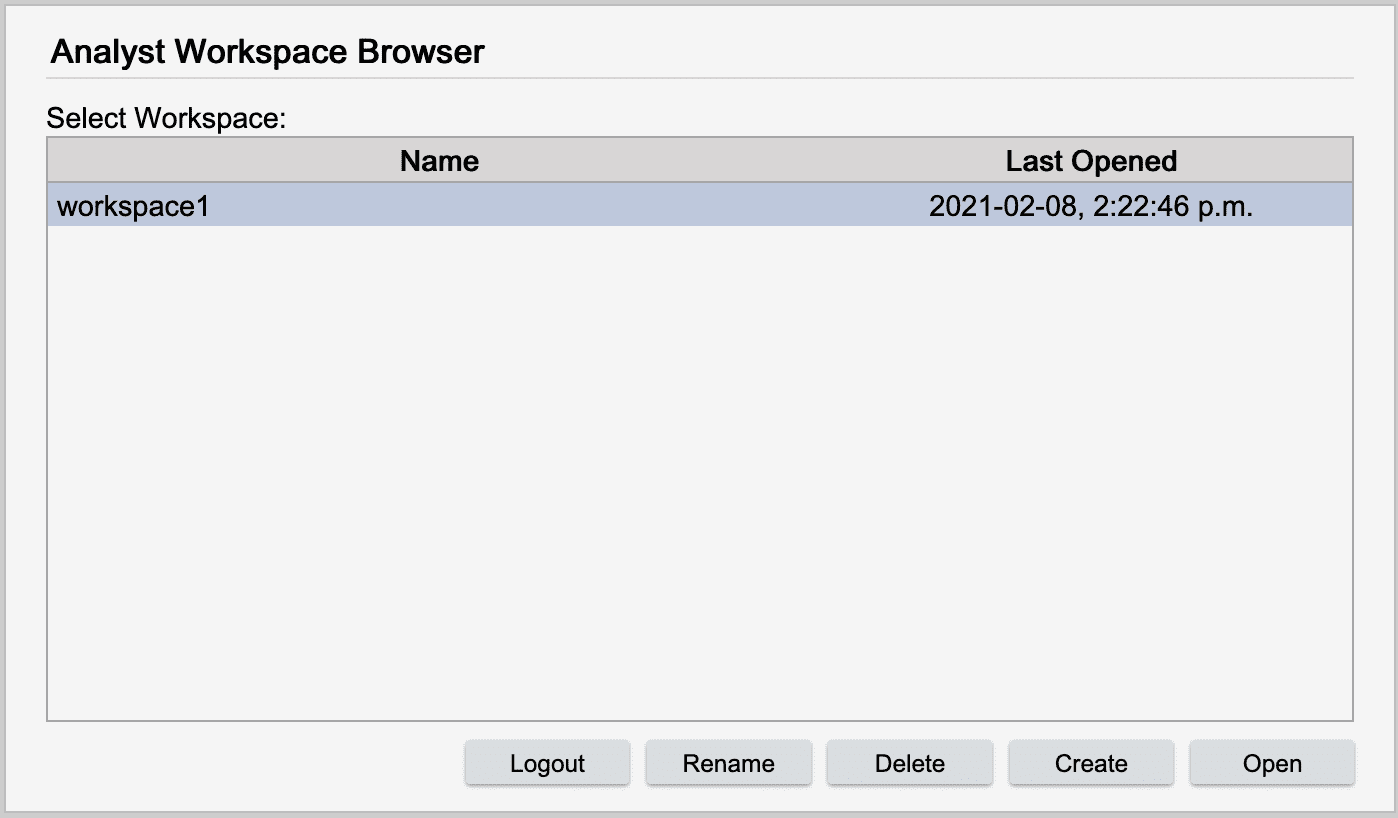
Creating a workspace
- Click Create.
- Enter a valid workspace name in the dialog.
- Click OK.
The workspace will appear in the workspace list.
Opening a workspace
- Select a workspace from the workspace list.
- Click Open, or double-click the workspace.
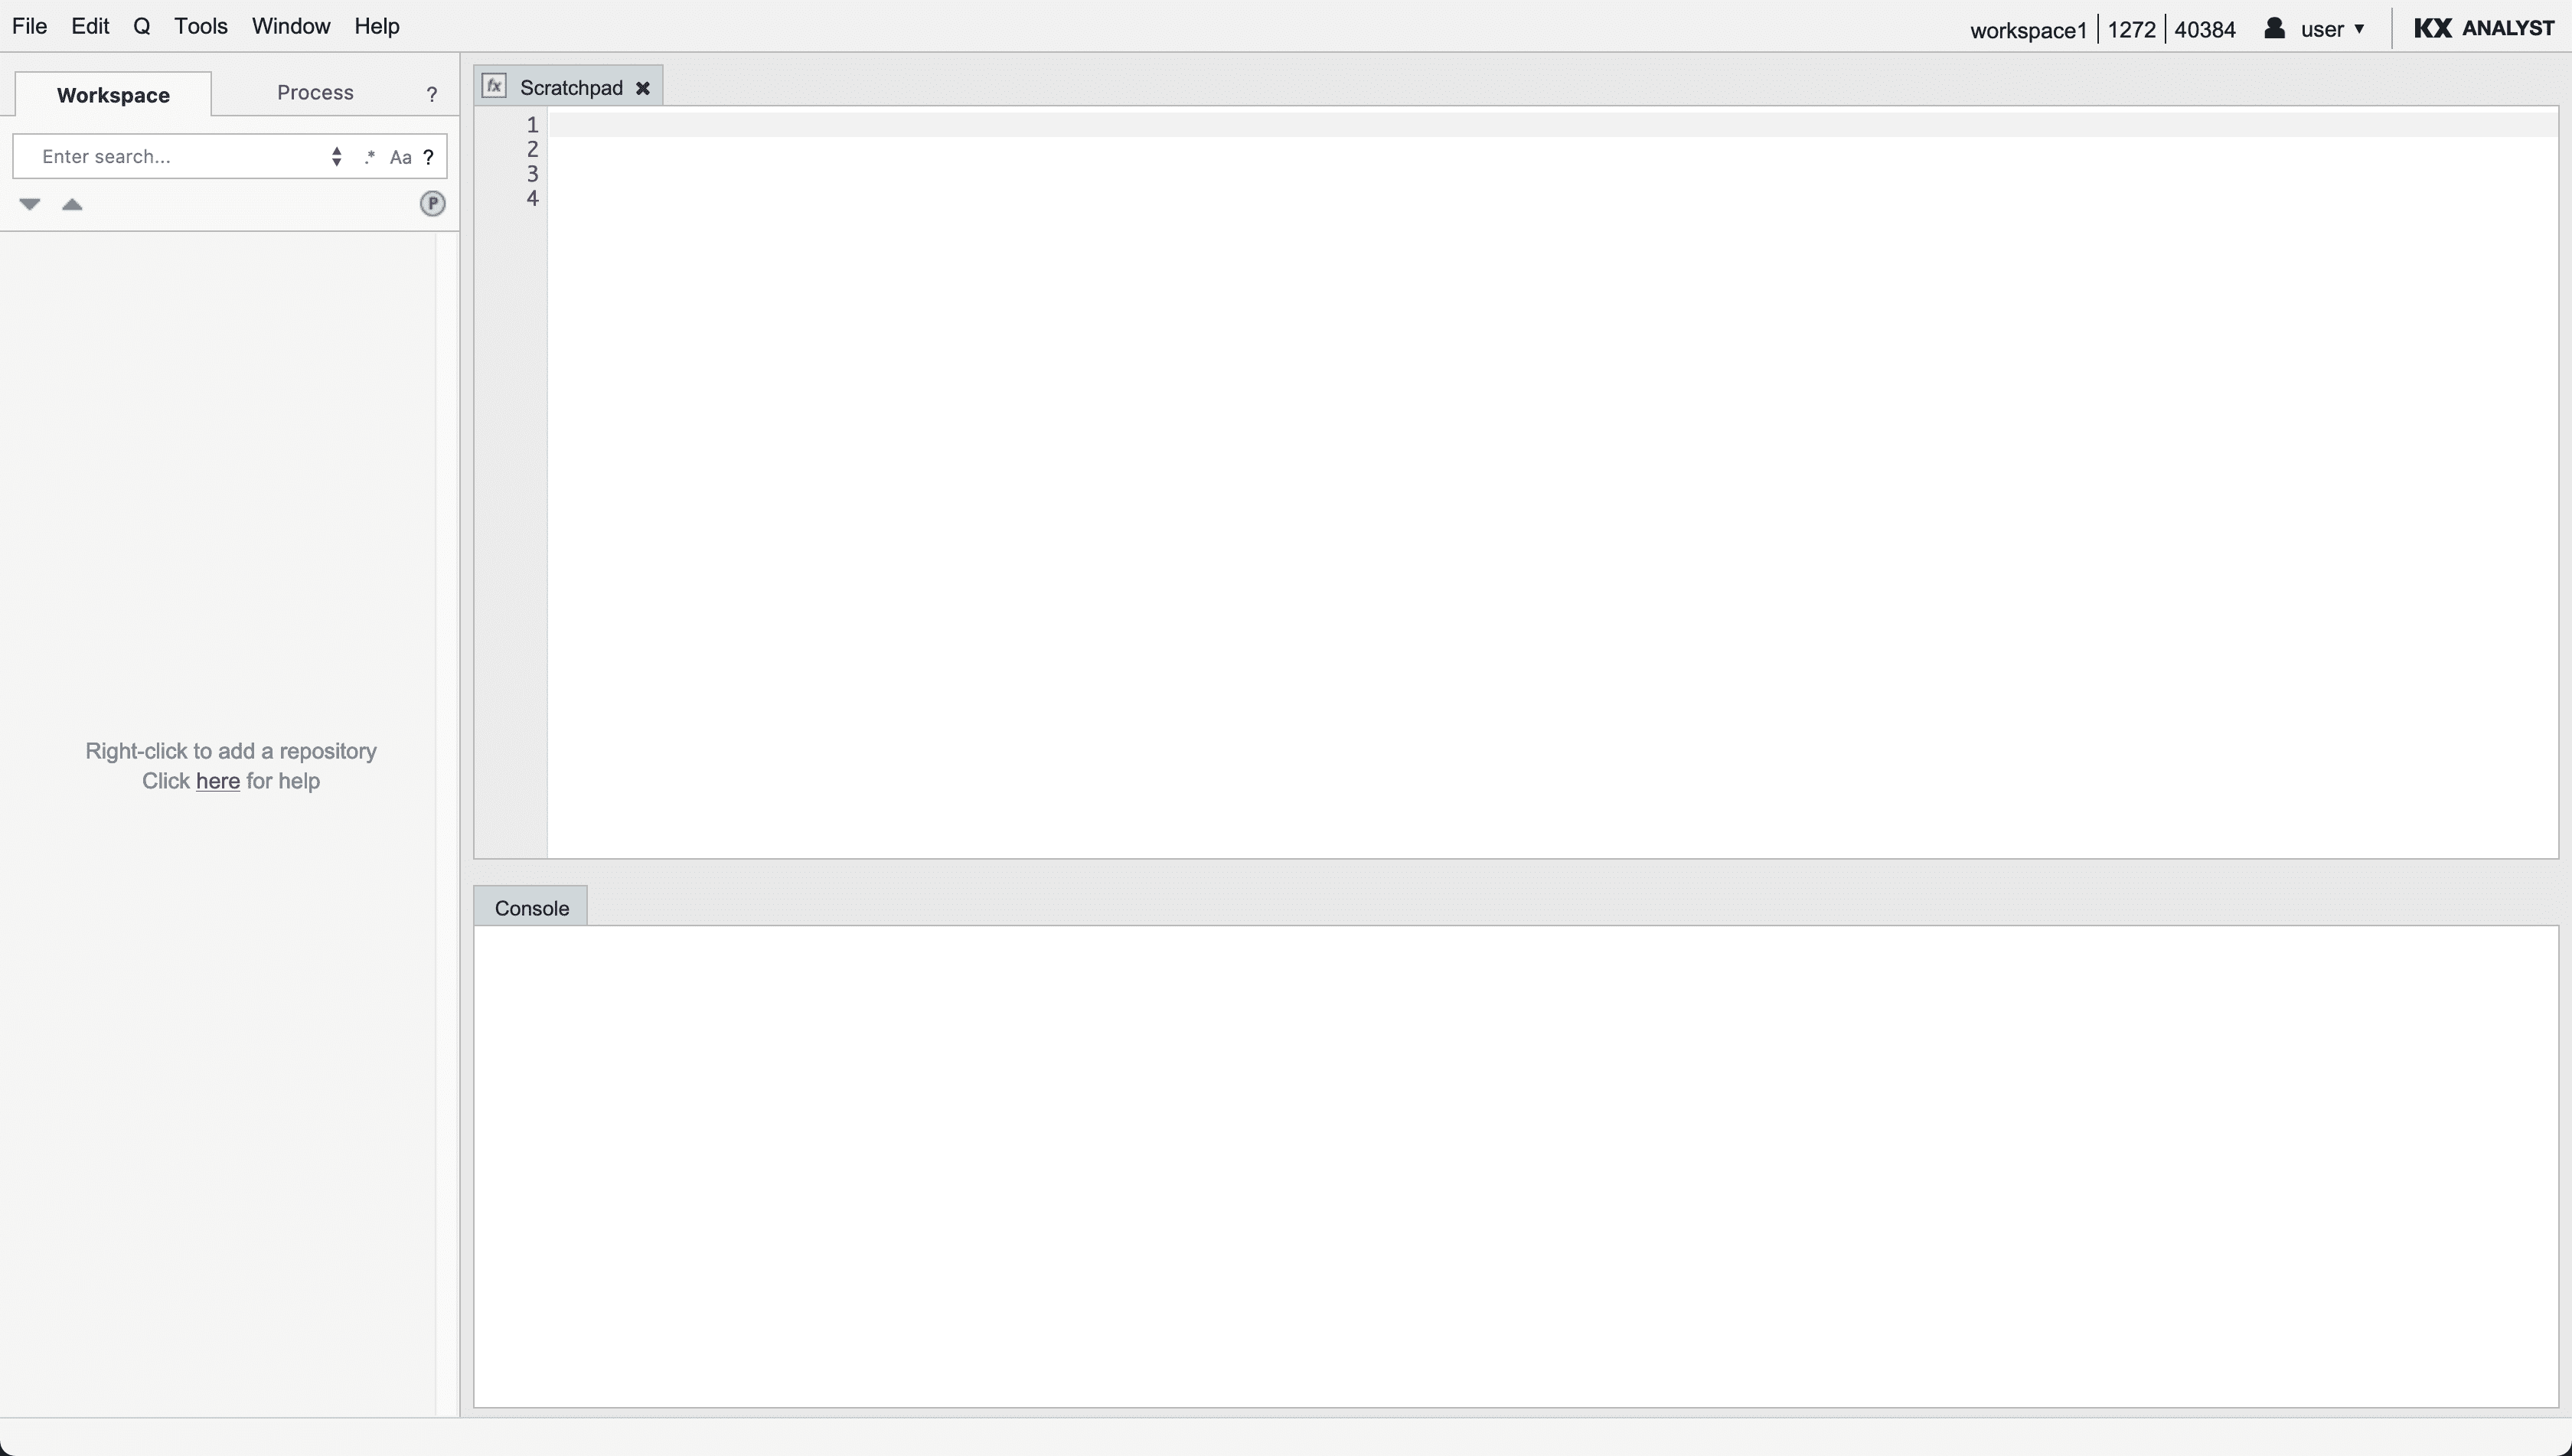
That workspace will be opened in the Explorer.
Deleting a workspace
- Select a workspace from the workspace list.
- Click Delete
- Read the warning, and click OK if you would still like to delete the workspace.
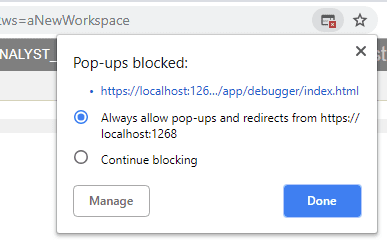
Pop-ups
The first time you log into Developer you may need to unblock pop-ups. If using the Chrome web browser, click on the window icon as shown below and select Always allow pop-ups. The process will be slightly different in other web browsers.
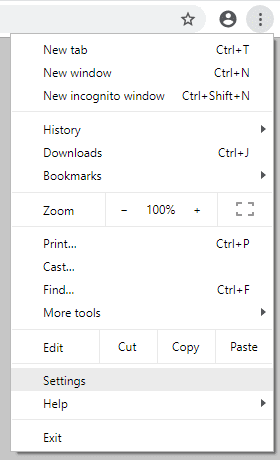
Alternatively you can set your pop-up control manually to prevent this message from occurring when you log in to a workspace. If this is desired you will need to set your Chrome options to allow pop-ups from the Developer server URL. Select the icon in the top right corner of your Chrome browser and select Settings from the menu. The menu structure may vary slightly depending on your browser version and computer platform.
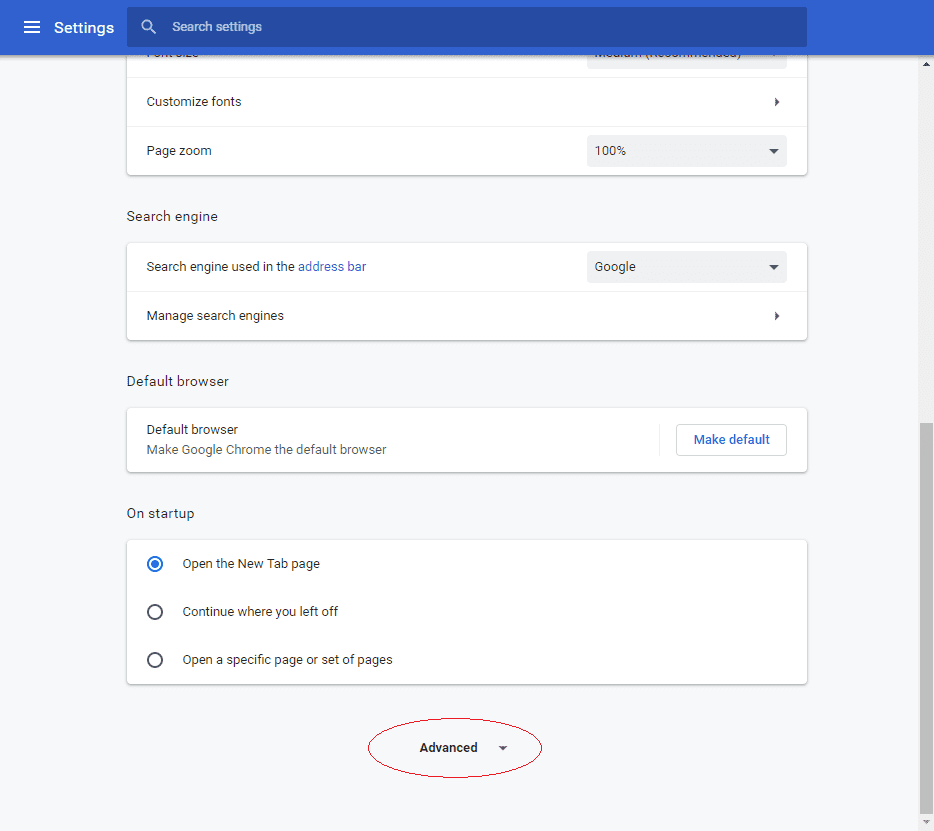
Click the Advanced link at the bottom of the page.
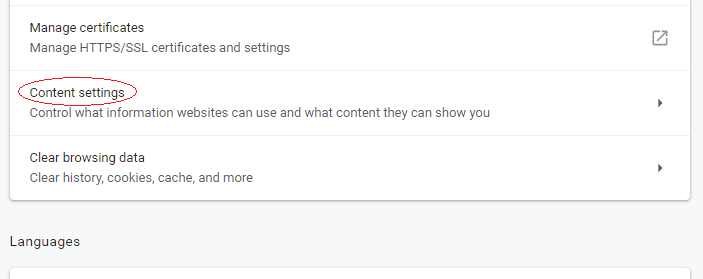
Click the Content settings button in the Privacy and security section.
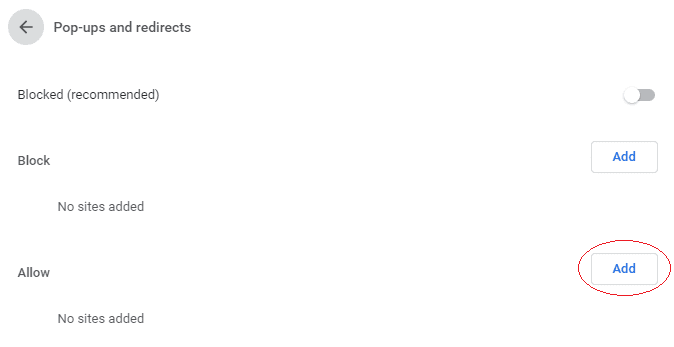
Click Pop-ups and redirects.
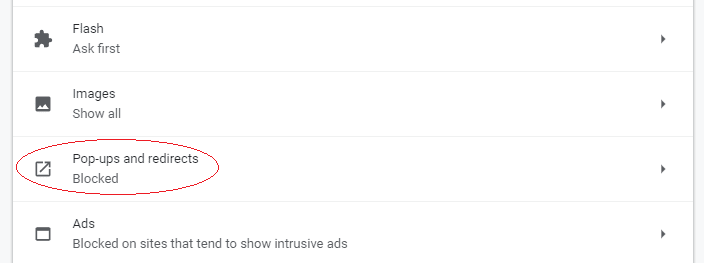
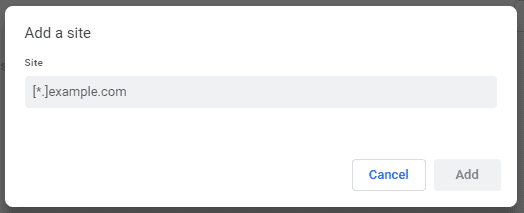
In the Allow section click Add.
Enter your Developer URL in the dialog. Then click Add. The Developer URL now allows pop-ups and should function properly.
Logging out of Developer
You are able to logout of Developer if Authentication is enabled. To do so,
- Under the Account Options menu click Logout.
- You will be logged out and prompted for credentials again
- Close the browser window.
Merely closing the browser window will not log you out of your session. When you re-open Developer, it will take you back to your previous session.
For sessions without authentication enabled there is no logout feature.