Database
Welcome to this introductory walkthrough to the KX Insights Platform. In this walkthrough you will learn about the features of the platform, import data and visualize the results.
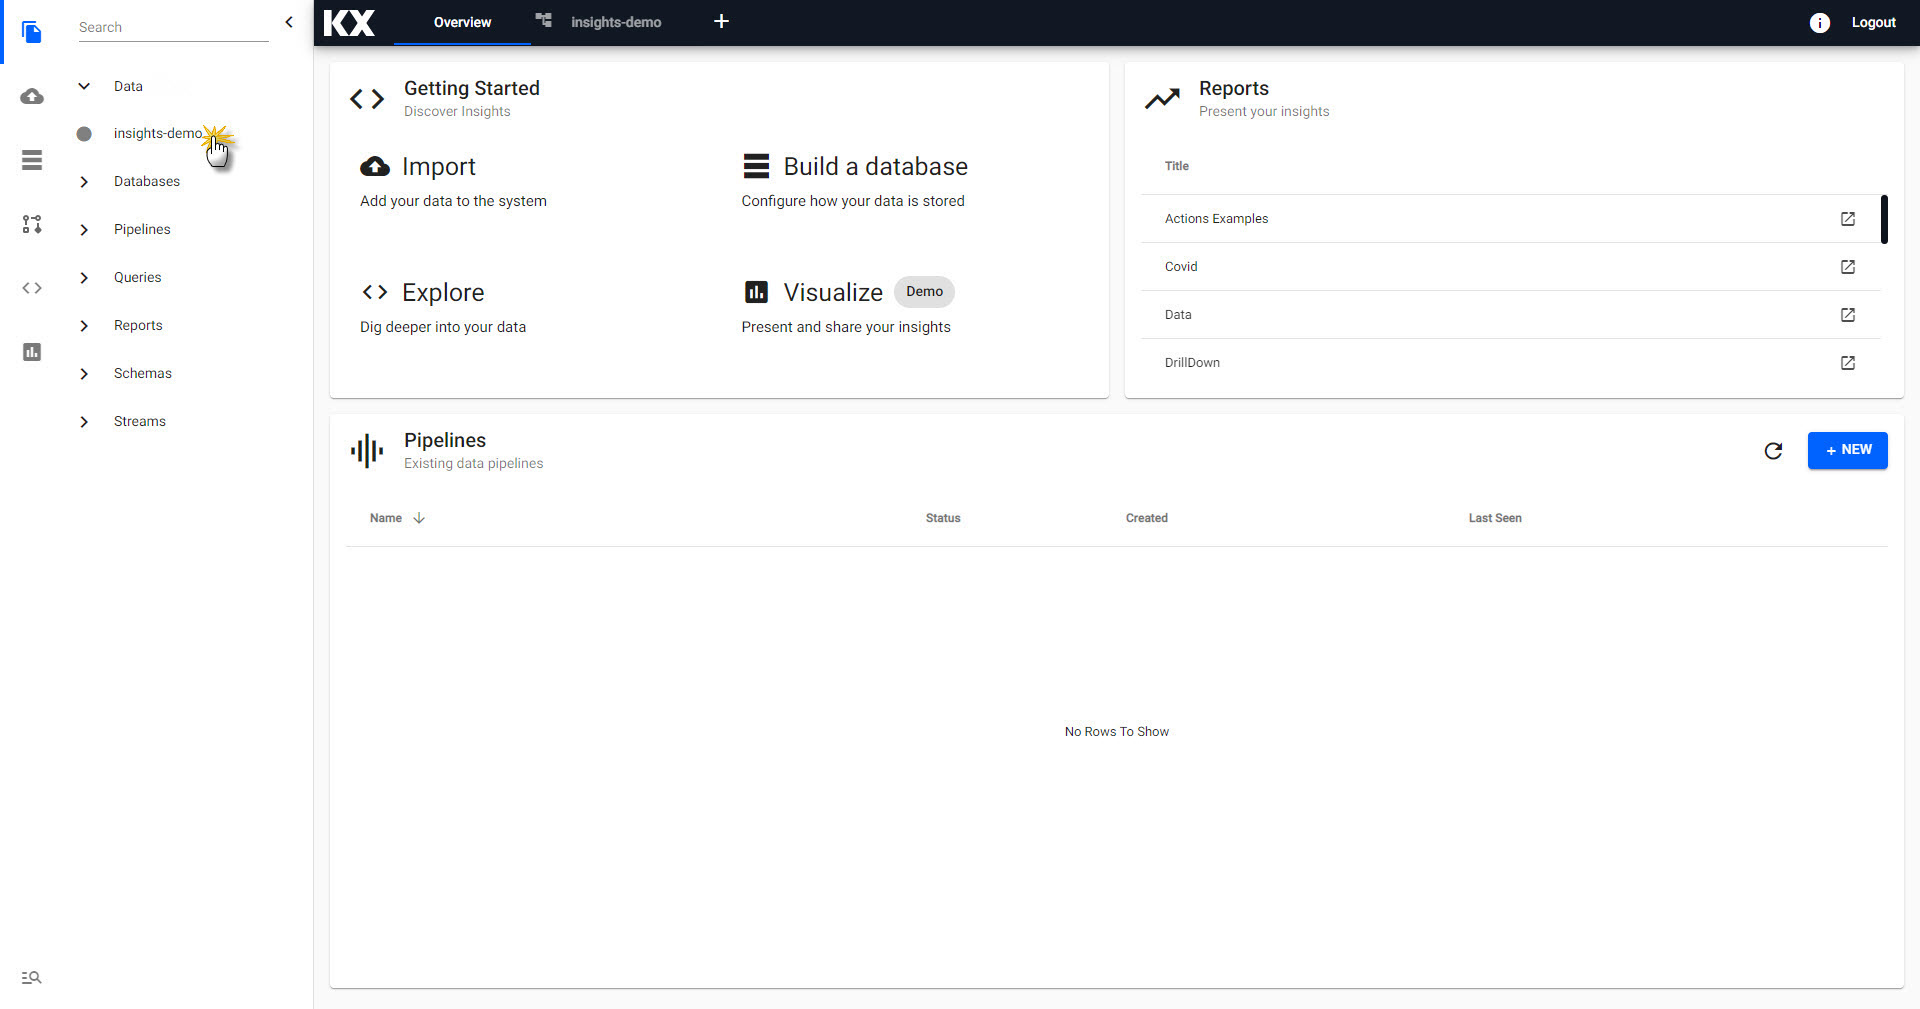
The Free Trial version of Kx Insights Platform comes with a ready-made data assembly called insights-demo; an assembly is a collection of elements necessary to store, manage and explore your data. With the insights-demo walkthrough tutorial, you will learn how to access through the platform. You will find insights-demo listed under Data in the left-hand entity tree menu.
When you are ready to build your own Data assembly you can do so using a step-by-step wizard, but before that, lets look at the elements of insights-demo. The insights-demo assembly is composed of a:
To access data from a Data assembly , a pipeline with a KX Insights Platform Writer node directing data to that assembly is required. Both the referenced assembly and pipeline have to be deployed and active for the data to be explored. For Free Trial, all pipelines send data to the insights-demo assembly , so by associating our Free Trial pipelines with the insights-demo assembly, we can deploy both pipelines and assembly on just a single deploy of insights-demo.
Assembly and Pipeline Deployments
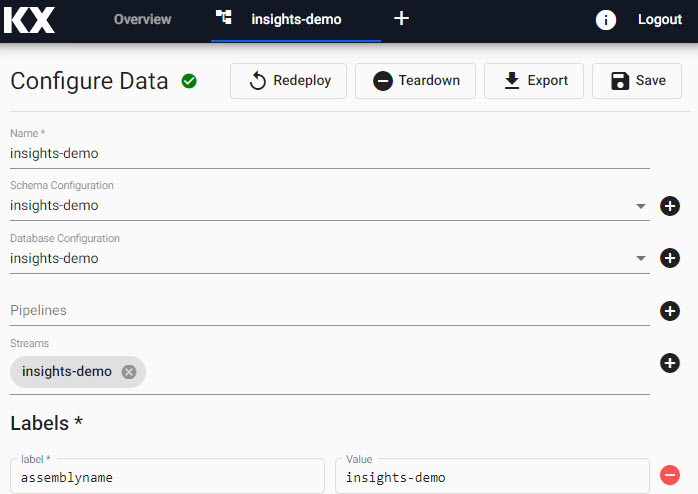
Assemblies can be deployed without pipelines, and pipelines can be deployed directly without been associated with an assembly . A successfully deployed pipeline with a KX Insights Platform Writer node requires the referenced assembly to be actively deployed in order for its data to be explored. A successful deployment of an assembly will show a green tick next to its name; at that point, the data it contains can be explored.
I want to build my own Data assembly.
Data Assembly
Database
A KX Insights Platform database is an organized collection of data stored on the cloud. Free Trial users have a ready-made database for insights-demo so no further configuration is required. More advanced users can choose to optimize their database settings (but not for Free Trial), although optimizing a database in KX Insights Platform is not typically required.
I want to optimize my database.
Schema
A KX Insights Platform schema keys ingested data to kdb+ data types - required for querying on the platform. The insights-demo has pre-defined schemas for each the four data sets available: weather, subway, health, and crime.
Depending on the method of data import, KX Insights Platform may assign the kdb+ types for you, but there may be situations when schemas have to be manually created and assigned for ingested data; this can be done with a custom schema. Free Trial users do not have to configure a schema and can move to pipelines to continue the tutorial.
Switch through the tabs to view data column names (which would be used in your queries) and respective kdb types for the four sample insights-demo data sets:
| column | type char | type |
|---|---|---|
| timestamp | p | timestamp |
| sensor | s | symbol |
| airtemp | f | float |
| name | s | symbol |
| borough | s | symbol |
| longitude | f | float |
| latitude | f | float |
| color | s | symbol |
| column | type char | type |
|---|---|---|
| trip_id | s | symbol |
| arrival_time | p | timestamp |
| stop_id | s | symbol |
| stop_sequence | h | short |
| stop_name | s | symbol |
| stop_lat | f | float |
| stop_lon | f | float |
| route_id | h | short |
| trip_headsign | s | symbol |
| direction_id | s | symbol |
| route_short_name | s | symbol |
| route_long_name | s | symbol |
| route_desc | C | string |
| route_type | h | short |
| route_url | s | symbol |
| route_color | s | symbol |
| column | type char | type |
|---|---|---|
| name | C | string |
| lat | f | float |
| long | f | float |
| neighborhood | C | string |
| airquality | f | float |
| trafficcongestion | f | float |
| bikeacccnt | i | integer |
| caracccnt | i | integer |
| timestamp | p | timestamp |
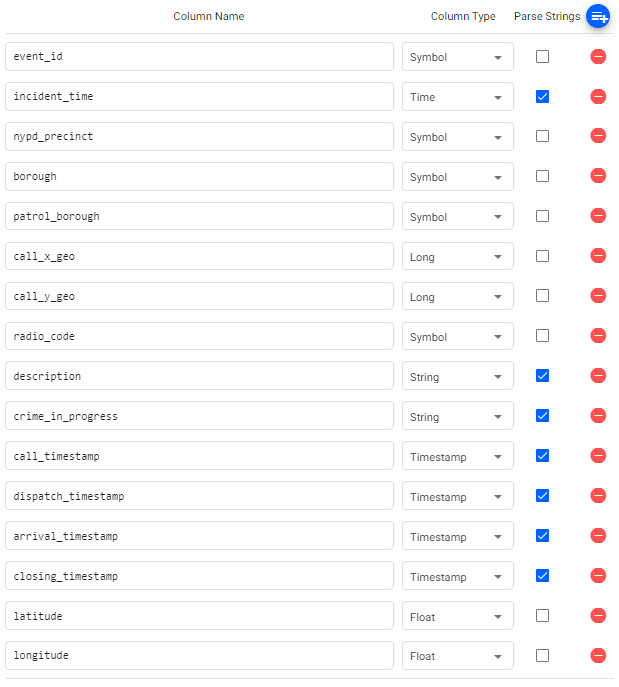
| column | type char | type |
|---|---|---|
| event_id | s | symbol |
| incident_time | t | time |
| nypd_precinct | s | symbol |
| borough | s | symbol |
| patrol_borough | s | symbol |
| call_x_geo | j | long |
| call_y_geo | j | long |
| radio_code | s | symbol |
| description | C | string |
| crime_in_progress | C | string |
| call_timestamp | p | timestamp |
| dispatch_timestamp | p | timestamp |
| arrival_timestamp | p | timestamp |
| closing_timestamp | p | timestamp |
| latitude | f | float |
| longitude | f | float |
I want to build a manual schema for my data table
Pipelines
Pipelines are how KX Insights Platform ingests data from its source for later querying in the platform. Pipelines offer a large number of potential data sources for importing from, and are highly configurable; a data import wizard is available to help users get data into a pipeline and will be used during the walkthrough process.
To access and explore pipeline data it can be deployed directly or it can be associated with an assembly prior to the latter's deployment. In the case of a direct pipeline deployment, that pipeline should contain a writer node which contains details of the assembly and table to write to. In addition, the assembly the data is written to must also be actively deployed.
Each of the insights-demo pipelines have a writer node and can be deployed without first associating them with an assembly. For Free Trial, ready-made pipelines are available for weather, crime, health and subway datasets - this is the one exception Free Trial offers over an individual Data assembly . Custom Data assemblies do not offer pre-made pipelines, but pipelines can be created and added as part of the assembly deploy. A Data assembly can be deployed without requiring a pipeline.
As part of the Free Trial tutorial, instructions for recreating each of the free pipelines are given below.
Streams
Streams is how KX Insights Platform pushes data from a source to the platform. For example, real-time events like a ticker price would be streamed data. Free trial does not currently offer a streaming data source. I want to learn more about Streams.
Deploying a Data assembly
When using KX Insights Platform, the first step is to deploy an empty database to store the data you want to ingest.
The Data assembly required for this walkthrough is called insights-demo and can be launched by selecting Overview -> Data -> insights-demo.
If you wish you can create your own Data assembly , instructions are available here.
During deployment, the Data assembly will go from Deploying to Ready and will show a solid green-circle next to its name in the left-hand entity tree menu when ready to use.
While it is deploying you can hover on the icon to see the status of the deployment and View the logs.
Check the status of an Data assembly deployment and troubleshoot problems.
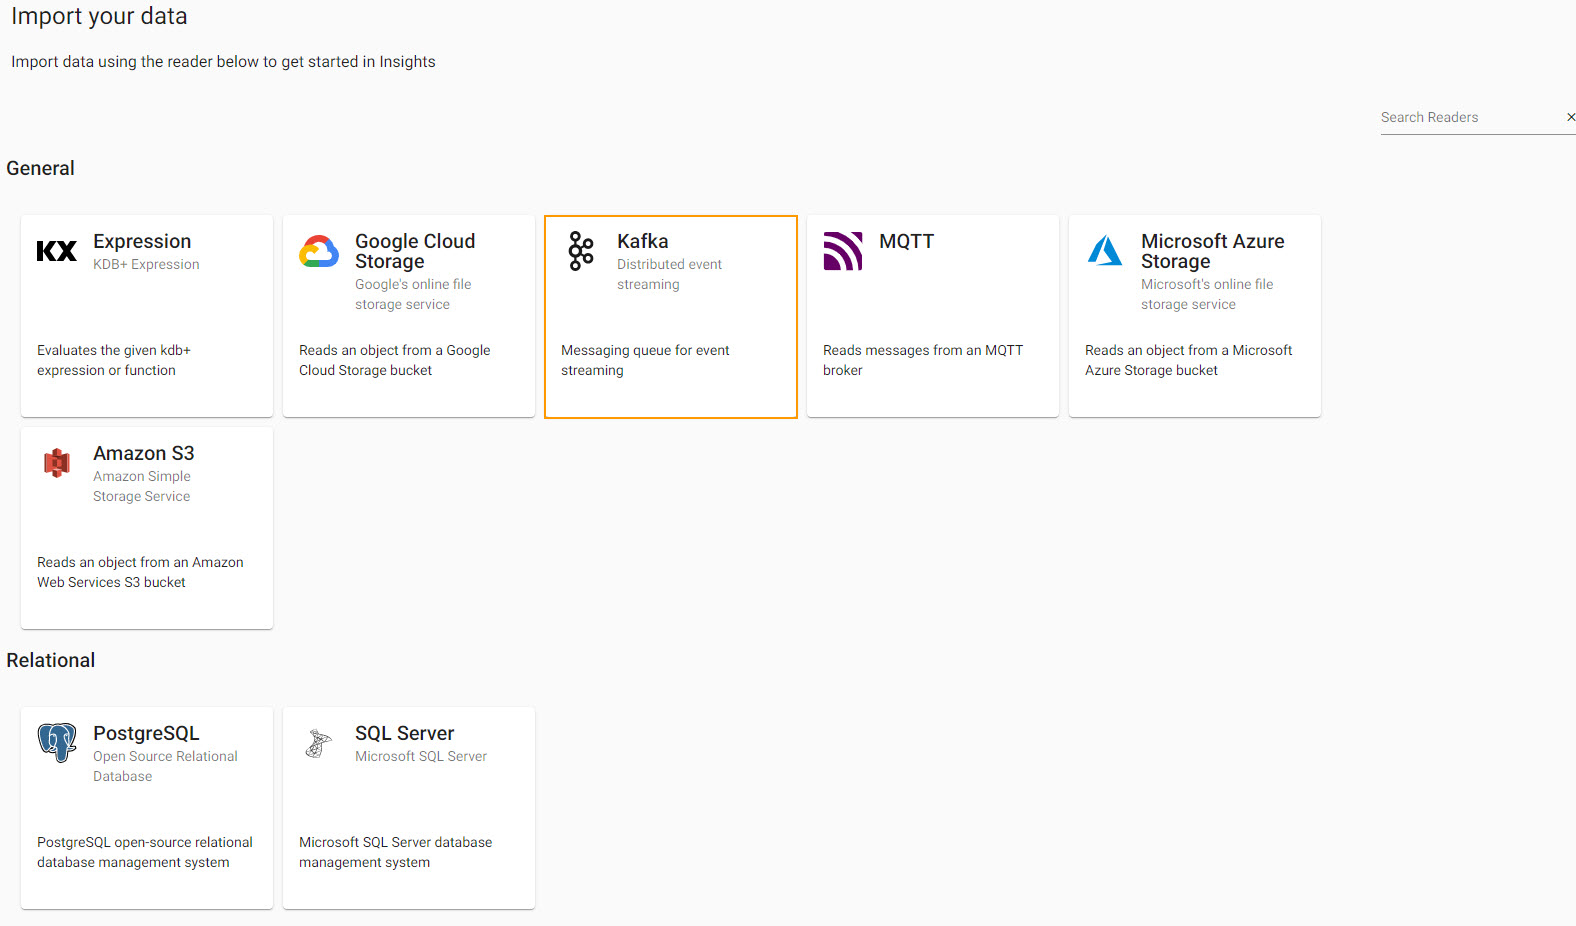
Import and Explore
Once the Data assembly has been deployed you can build pipelines and Explore the data imported.
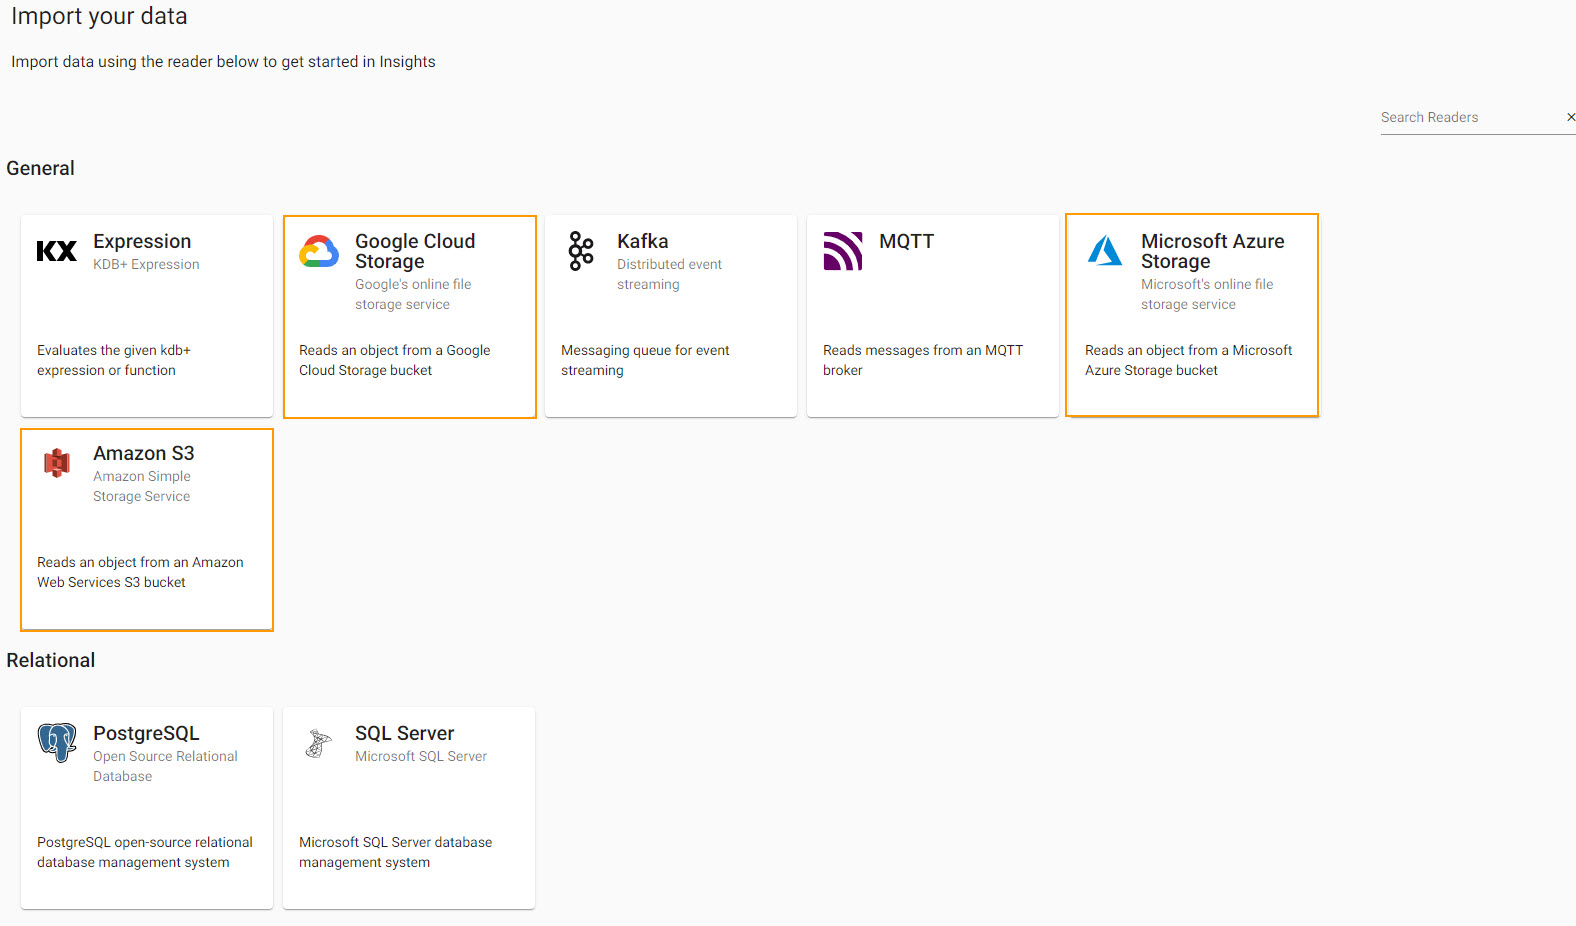
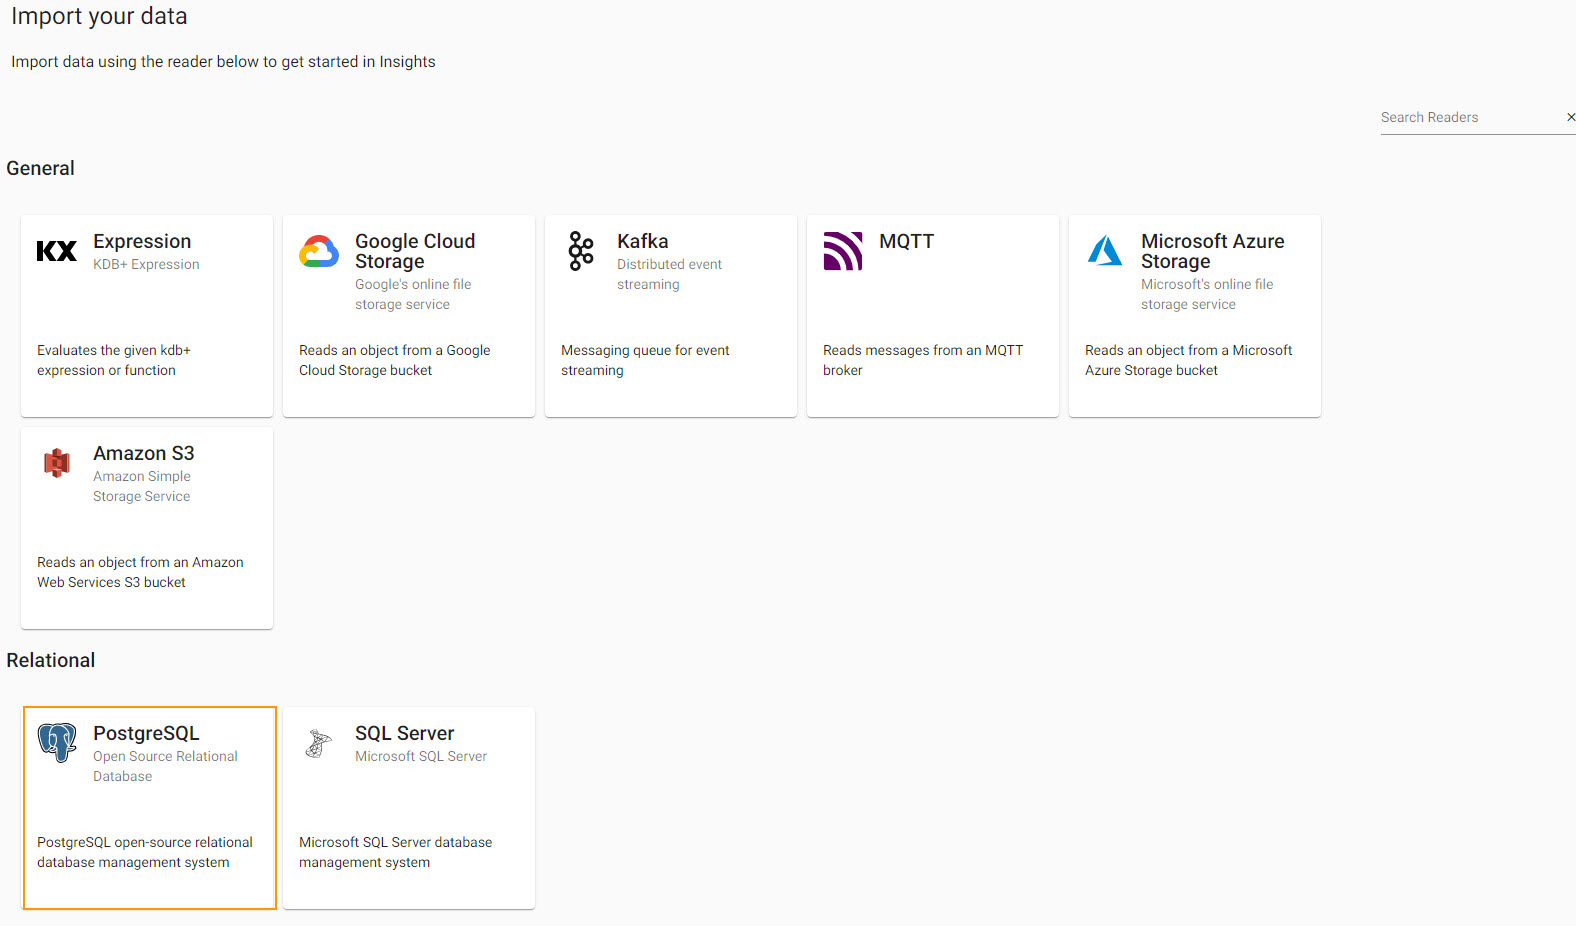
Select a pipeline to build depending on where the data is currently stored:
- Weather data -
Object Storage - Subway data -
Kafka - Health data -
SQL Database - Crime data -
Protocol Buffers
Object storage is a means of storage for unstructured data, eliminating the scaling limitations of traditional file storage. Limitless scale is the reason object storage is the storage of the cloud; Amazon, Google and Microsoft all employ object storage as their primary storage.
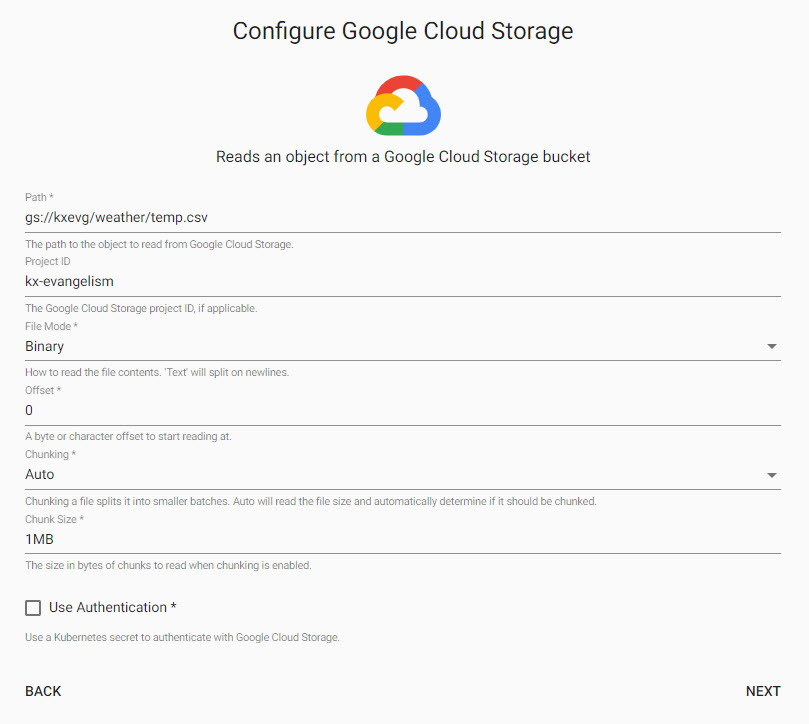
Free Trial offers a sample weather dataset hosted on each of the major cloud providers. Select one of the cloud providers and enter the relevant details for that provider into the first input form.
=== " Google Cloud Storage "
setting | value |
---------------------| --------------------------- |
| Path* | gs://kxevg/weather/temp.csv |
| Project ID | kx-evangelism |
| File Mode* | Binary |
| Offset* | 0 |
| Chunking* | Auto |
| Chunk Size* | 1MB |
| Use Authentication | No |
<!--  -->
=== " Microsoft Azure Storage"
setting | value |
---------------------| ------------------- |
| Path* | ms://kxevg/temp.csv |
| Account* | kxevg |
| File Mode* | Binary |
| Offset* | 0 |
| Chunking* | Auto |
| Chunk Size* | 1MB |
| Use Authentication | No |
<!--  -->
=== " AWS S3"
setting | value |
---------------------| -------------------------- |
| Path* | s3://kxevangelism/temp.csv |
| Region* | eu-west-1 |
| File Mode* | Binary |
| Offset* | 0 |
| Chunking* | Auto |
| Chunk Size | 1MB |
| Use Authentication | No |
<!--  -->
Click Next when done.
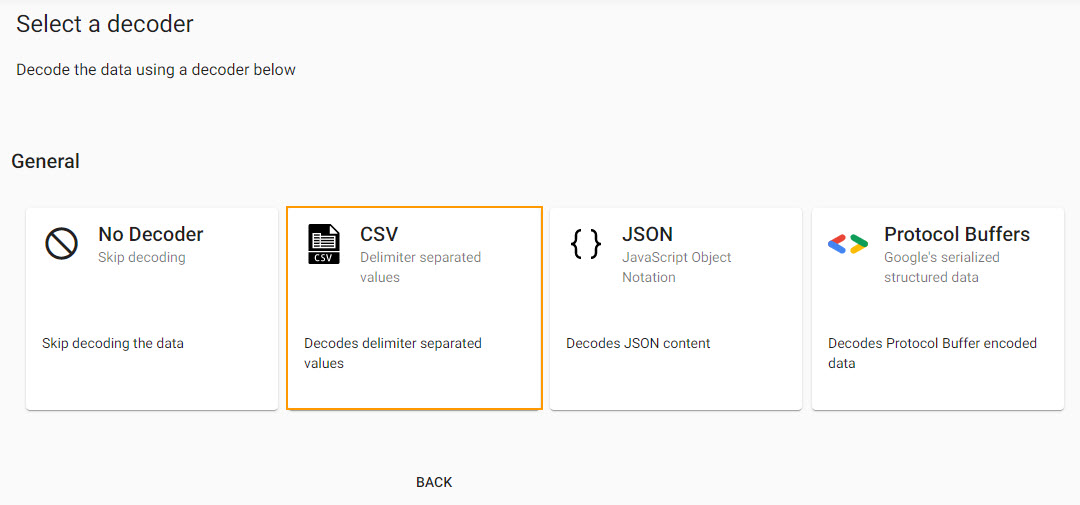
Select a Decoder
With the data source defined, next step defines a decoder which references the type of data we are importing. The source data is a csv file, so set the delimiter type - typically a comma for a csv file - and if the source data has a header row.
| setting | value |
|---|---|
| Delimiter | , |
| Header | First Row |
Click Next when done.
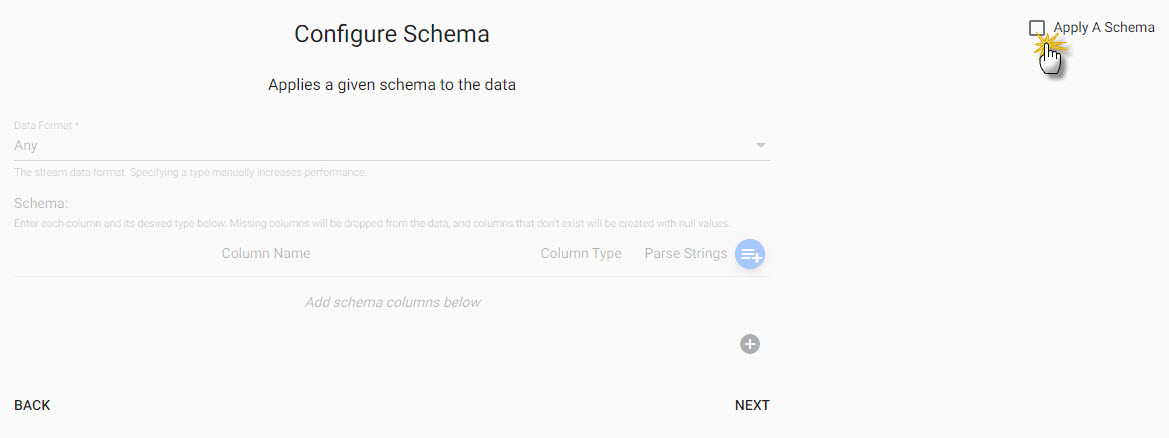
Configure Schema
Imported data requires a schema compatible with the KX Insights Platform. The insights-demo has a predefined set of schemas for each of the data sets available in Free Trial, referenced in the schema table. The configure schema step applies the kdb+ datatypes used by the destination database and required for exploring the data in Insights, to the data we are importing.
However, not every data set imported to KX Insights Platform requires a schema. In this example, there is no requirement to apply a schema, so the Apply A Schema box can be unchecked which disables the schema form.
| setting | value |
|---|---|
| Apply a Schema | Uncheck |
Click Next when done.
!!! note "Writing data to a table when Apply a Schema is unchecked" For the Free Trial Object Storage import, the Apply a Schema box is unchecked in the Configure Schema step. When it comes to Configure Writer, available tables to write too are pulled from the Schema associated with the Assembly . For Free Trial, these schemas have already been defined for each of the sample data sets, so no further action is required in this tutorial. However, for custom imports it may be necessary to add a data schema to the Assembly for situations where there is no appropriate table in the dropdown to assign the imported data too.
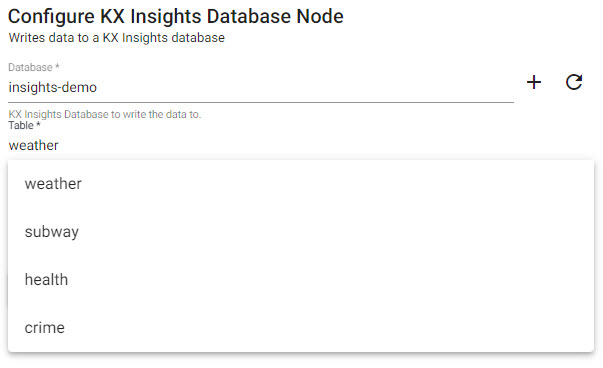
Configure Writer
The final step in pipeline creation is to write the imported data to a table in the database. With Free Trial we will use the insights-demo database and assign the imported data to the weather table.
| setting | value |
|---|---|
| Database | insights-demo |
| Table | weather |
| Deduplicate Stream | Yes |
Click  when done. This will complete the import and open the pipeline in the pipeline viewer
!!! note "Writer - KX Insights Database"
The Writer - KX Insights Database node is essential for exploring data in a pipeline. This node defines what assembly and table to write the data too. As part of this, the assembly must also be deployed; deployments of an assembly or pipeline can de done individually, or a pipeline can be associated with an assembly and all pipelines associated with that assembly will be deployed when the latter is deployed.
Pipeline view
The pipeline view allows you to review and edit your pipeline by selecting any of the nodes. However, this is not required as part of our Free Trial tutorial.

Click Save and give the pipeline a name. This name should be unique to the pipeline; for Free Trial, there is a pipeline already named weather, so give this new pipeline a name like weather-1.
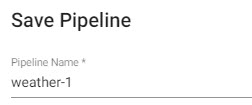
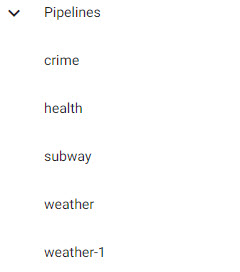
The newly created pipeline will now feature in the list of pipelines in the left-hand-entity tree.
Apache Kafka is an event streaming platform that can be easily published to and consumed by the KX Insights Platform. The provided Kafka feed has live alerts for NYC Subway trains containing details such as arrival time of train, stop location coordinates, direction and route details, all as part of the subway data set.
Start by selecting Kafka from the import options
Configure Kafka
| setting | value |
|---|---|
| Broker* | 34.130.174.118:9091 |
| Topic* | subway |
| Offset* | End |
| Use TLS | No |
Click Next when done.
Select a Decoder
Event data on Kafka is of JSON type; select the related decoder to transform the imported data to a kdb+ friendly format (a kdb+ dictionary).
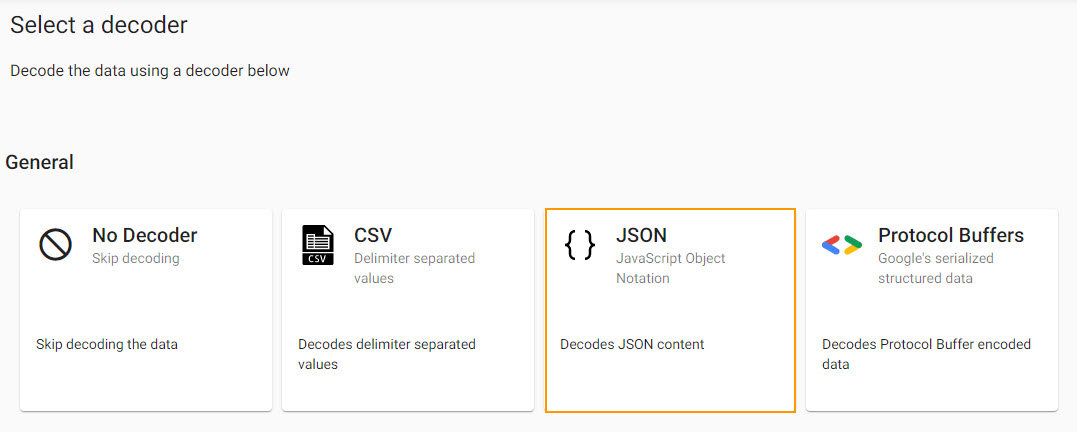
Click Next when done.
Configure JSON
The next step is a decoder step specific to JSON, and defines whther the decode parse should be done on each value. This can be left unchanged.
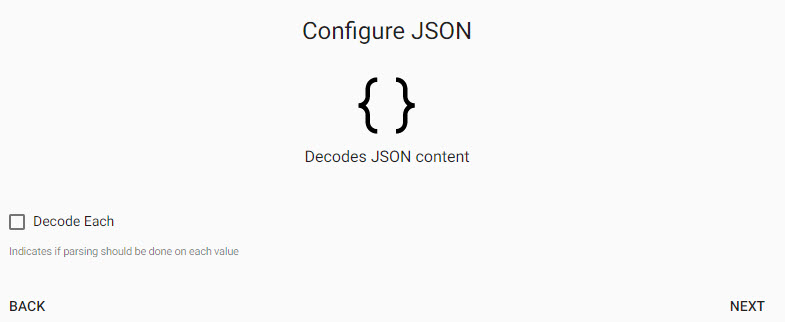
Click Next when done.
Configure Schema
Imported data requires a schema compatible with the KX Insights Platform. The insights-demo has a predefined set of schemas for each of the data sets available in Free Trial, referenced in the schema table. The configure schema step applies the kdb+ datatypes used by the destination database and required for exploring the data in Insights, to the data we are importing.
The next step applies a schema to the imported data.
| setting | value |
|---|---|
| Apply a Schema | Checked |
| Data Format | Table |
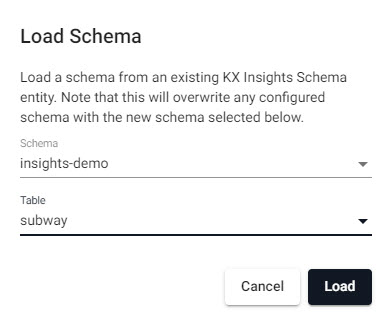
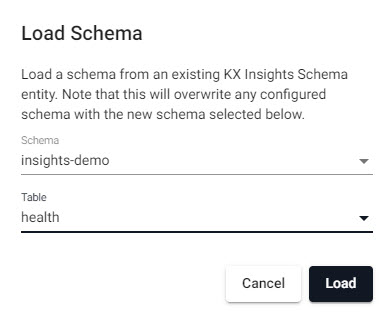
Then attach the schema to the data set, click 
Select the insights-demo Schema from the dropdown
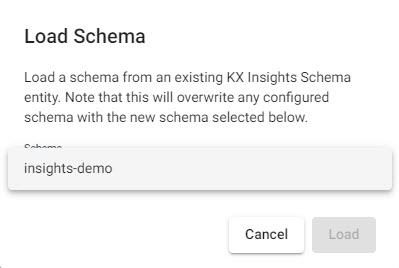
then choose the Table, subway
check Parse Strings for the arrival_time and route_desc columns. This is an essential step, and may cause issues during pipeline deployment if incorrectly set.
Parse Strings
This indicates whether parsing of input string data into other datatypes is required. Generally for all time, timestamp, and string fields, Parse Strings should be ticked unless your input is IPC or RT.
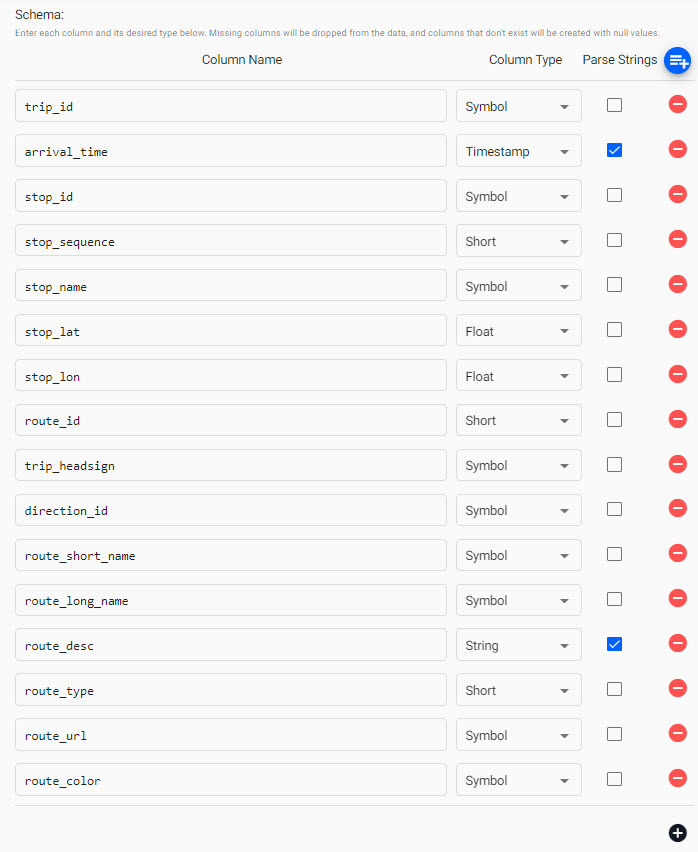
Click Next when done.
Configure Writer
The final step in pipeline creation is to write the imported data to a table in the database. With Free Trial we will use the insights-demo database and assign the imported data to the subway table.
| setting | value |
|---|---|
| Database | insights-demo |
| Table | subway |
| Deduplicate Stream | Yes |
Click when done. This will complete the import and open the pipeline in the pipeline viewer
Writer - KX Insights Database
The Writer - KX Insights Database node is essential for exploring data in a pipeline. This node defines what assembly and table to write the data too. As part of this, the assembly must also be deployed; deployments of an assembly or pipeline can de done individually, or a pipeline can be associated with an assembly and all pipelines associated with that assembly will be deployed when the latter is deployed.
Pipeline view
The pipeline view allows you to review and edit your pipeline by selecting any of the nodes.

Additional functionality is required to convert this particular Kafka import to a kdb+ table before it's deployed. This can be done by inserting a Function node into the pipeline created by the import wizard.
From the Pipeline entity-tree menu, select the Map function and drag this inside the pipeline workspace
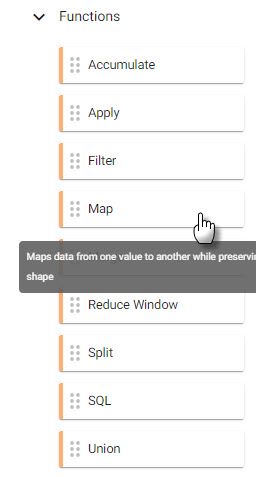
We will connect this to the pipeline between the Decoder and Transform nodes.
Select the Map function node to edit its properties
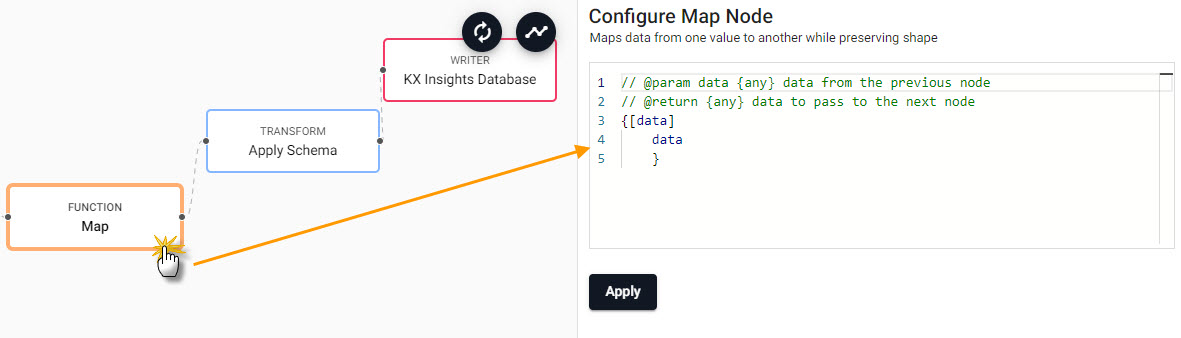
The Map function will transform the kdb+ dictionary format using enlist. To achieve this, copy-and-paste into the Configure Map Node code editor the following kdb+/qand select Apply.
{[data]
    enlist data
}
Save the pipeline; the pipeline name should be unique; for Free Trial, there is a pipeline already named subway, so give this new pipeline a name like subway-1.

The newly created pipeline will now feature in the list of pipelines in the left-hand-entity tree.
SQL database is a relational database, managed using SQL programming language. In this example, the health data set has information relating to air quality, traffic congestion, car and bike accidents in New York. If you are interested in viewing the data using a PostgreSQL client, instructions are given in the note below - but this step is not required for the Free Trial tutorial.
Optional: Accessing health data using a local PostgreSQL client install
$ psql "sslmode=disable dbname=postgres user=postgres hostaddr=34.132.151.134"
Password for user postgres: dxrHvgtjHHvsOH7B
psql (14.1, server 13.4)
Type "help" for help.

postgres=> \connect health
psql (14.1, server 13.4)
You are now connected to database "health" as user "postgres".
health=> \dt

                List of relations
schema |         name         | type  |  owner
-------+----------------------+-------+----------
public | health               | table | postgres
(5 rows)
For Free Trial we start by selecting PostgreSQL from the Relational database import options
Configure PostgreSQL
Complete the form of the server details
| setting | value |
|---|---|
| Server | 34.132.151.134 |
| Port | 5432 |
| Database | health |
| Username | postgres |
| Query | select * from health |
Click Next when done.
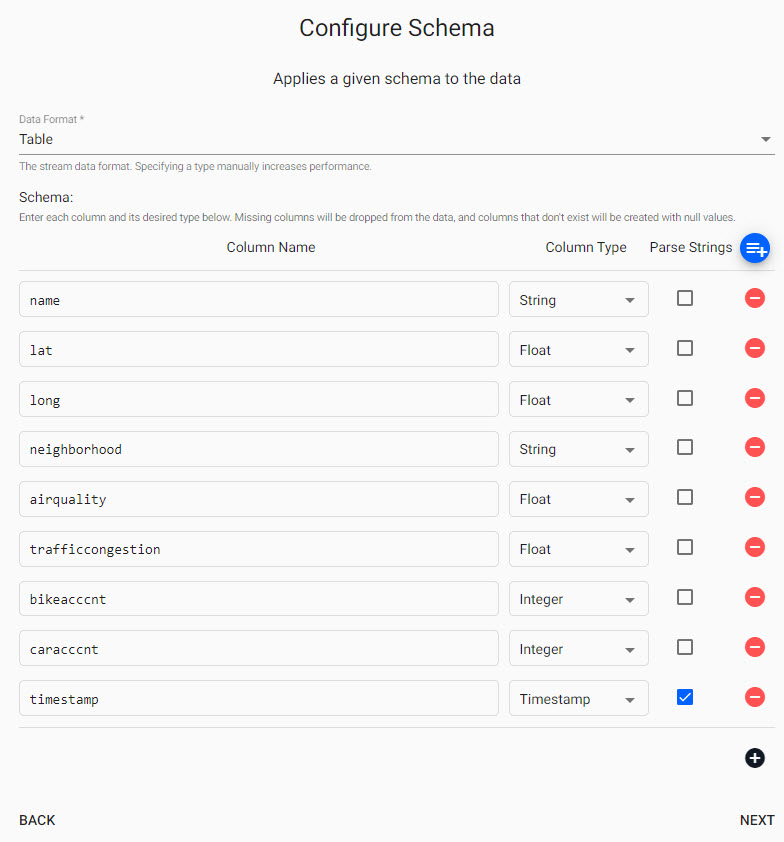
Configure Schema
Imported data requires a schema compatible with the KX Insights Platform. The insights-demo has a predefined set of schemas for each of the data sets available in Free Trial, referenced in the schema table. The configure schema step applies the kdb+ datatypes used by the destination database and required for exploring the data in Insights, to the data we are importing.
The next step applies a schema to the imported data.
| setting | value |
|---|---|
| Apply a Schema | Checked |
| Data Format | Table |
Then attach the schema to the data set, click
Select the insights-demo Schema from the dropdown
then choose the Table, health
check Parse Strings for the timestamp column. This is an essential step, and may cause issues during pipeline deployment if incorrectly set.
Parse Strings
This indicates whether parsing of input string data into other datatypes is required. Generally for all time, timestamp, and string fields, Parse Strings should be ticked unless your input is IPC or RT.
Click Next when done.
Configure Writer
The final step in pipeline creation is to write the imported data to a table in the database. With Free Trial we will use the insights-demo database and assign the imported data to the health table.
| setting | value |
|---|---|
| Database | insights-demo |
| Table | health |
| Deduplicate Stream | Yes |
Click when done. This will complete the import and open the pipeline in the pipeline viewer
Writer - KX Insights Database
The Writer - KX Insights Database node is essential for exploring data in a pipeline. This node defines what assembly and table to write the data too. As part of this, the assembly must also be deployed; deployments of an assembly or pipeline can de done individually, or a pipeline can be associated with an assembly and all pipelines associated with that assembly will be deployed when the latter is deployed.
Pipeline view
The pipeline view allows you to review and edit your pipeline by selecting any of the nodes. However, this is not required as part of our Free Trial tutorial.

Click Save and give the pipeline a name. This name should be unique to the pipeline; for Free Trial, there is a pipeline already named health, so give this new pipeline a name like health-1.
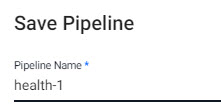
The newly created pipeline will now feature in the list of pipelines in the left-hand-entity tree.
Protocol buffers are Google's language-neutral, platform-neutral, extensible mechanism for serializing structured data – think XML, but smaller, faster, and simpler. Data structure is first defined before specially generated source code read-and-writes structured data, to-and-from a variety of data streams, using a variety of programming languages.
The crime data set we will be using contains events occurring in NYC, organized by precinct, including location coordinates of the call, dispatch times and a description of the crime.
I want to learn more on how protocol buffers work with Kx Insights Platform
I want to learn more about Protocol Buffers
Pipeline Editor
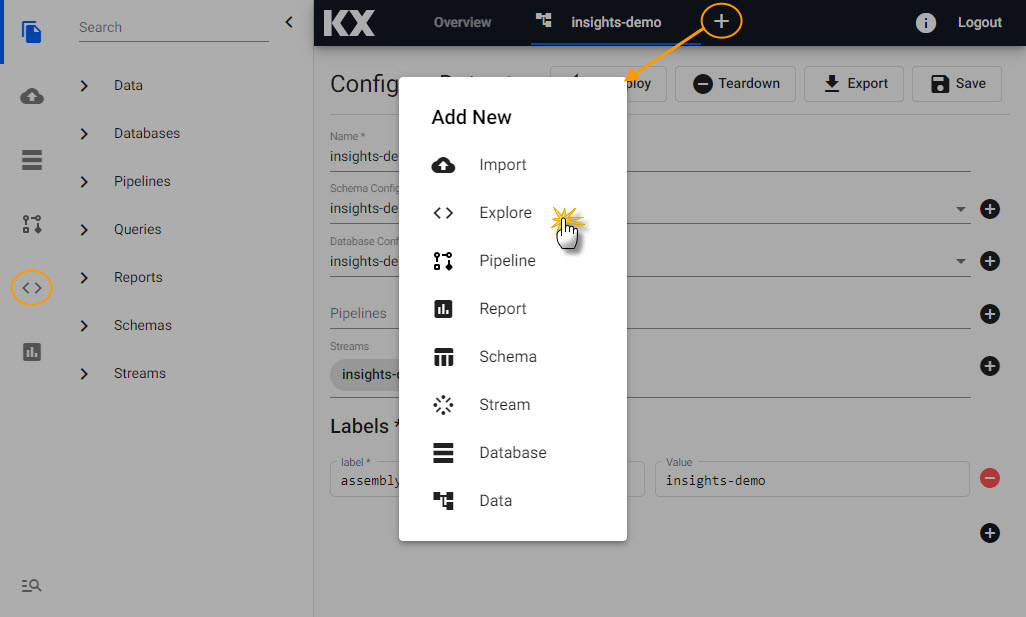
In this example we will not use the Import Wizard to ingest the data, but instead build a pipeline using the pipeline editor.
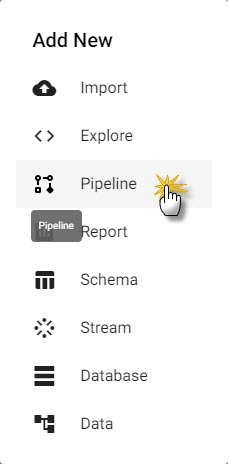
Start by creating a new pipeline; click the [+] icon in the document menu bar and select Pipeline, or select [+] from Pipelines in the entity tree menu on the left while in Overview. This will open a new tab in the Document bar with a draft pipeline
The draft pipeline editor will start with a list of Readers in the left-hand-menu; click-and-drag the Expression node into the central workspace.
Expression Node
Clicking the Expression node will update the properties of the node on the right. The Expression node is a kdb/q editor, here code will be added to take advantage of native REST interfacing functionality (an API supporting interaction with RESTful web services) in the KX Insights Platform using .kurl.sync. This step will require a cut-and-paste of some kdb+/q code:
URL:"https://code.kx.com/kxiwalkthrough/data/crime.msg";
resp:.kurl.sync[(URL;`GET;(::))];
if[200 <> first resp; ' last resp];
"\n" vs last resp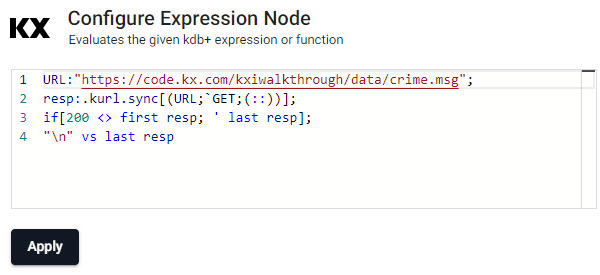
Decoder
The output from aforementioned code will resemble a binary format. The next decoding step will convert the binary format to kdb+/q. To achieve this, drag-and-drop the Protocol Buffers from the list of Decoders.
Transform
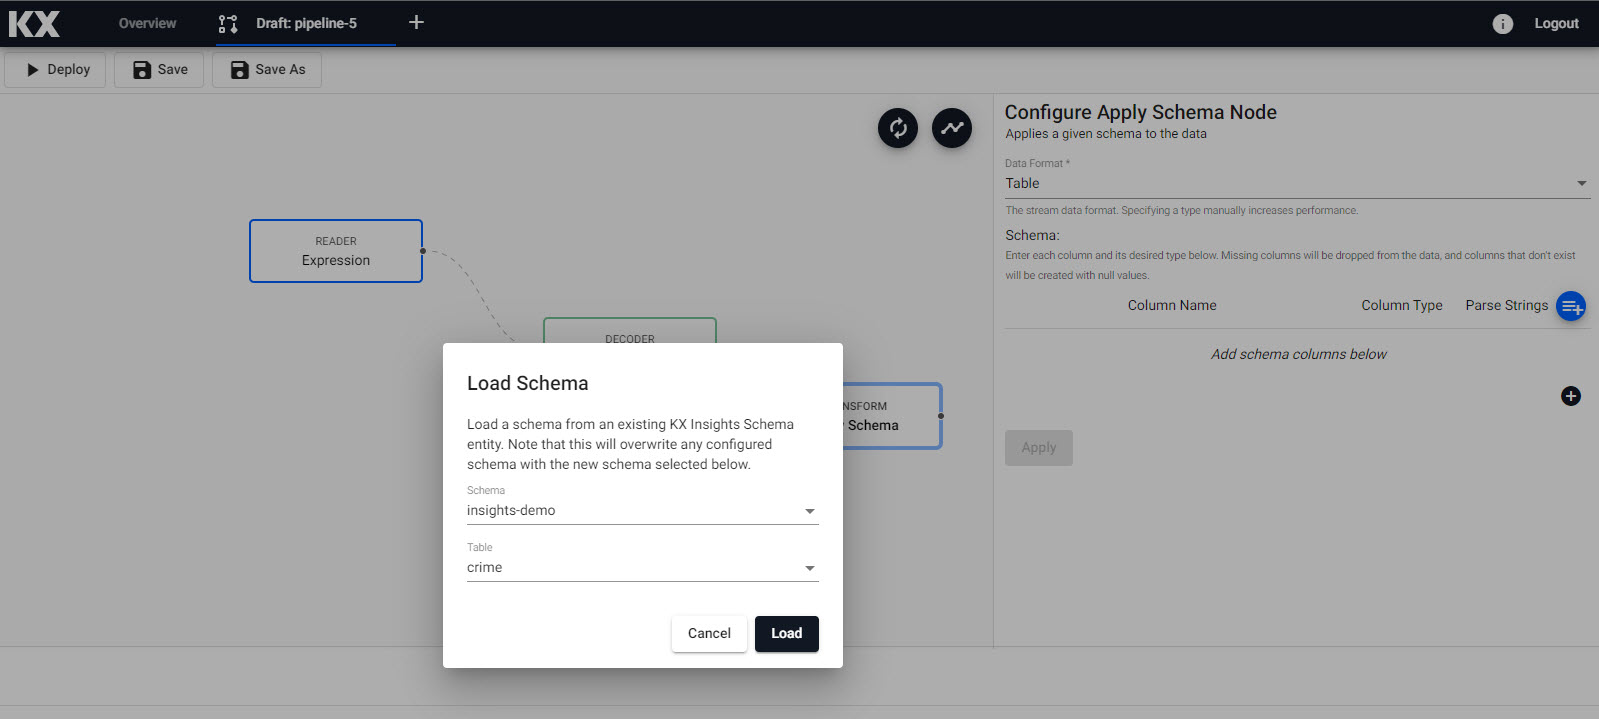
Next, click-and-drag the Apply a Schema node under Transform into the pipeline workspace. The schema transforms the data to a kdb+/q format compatible with the KX Insights Platform. The properties to edit are:
| setting | value |
|---|---|
| Data Format | Table |
| Schema | insights-demo |
| Table | crime |
With the loaded schema we next have to define what parsing we want to use for the data; this is typically done for time, timestamp and string variables and is defined as follows. This is an essential step, and may cause issues during pipeline deployment if incorrectly set:
Parse Strings
This indicates whether parsing of input string data into other datatypes is required. Generally for all time, timestamp, string fields you should have Parse Strings ticked unless your input is IPC or RT.
Link the Apply a Schema transform node to the Protocols Buffer decoder
Writer
The last step of the data ingestion is to define where data will be written too. Click-and-drag into the pipeline workspace KX Insights Database from the list of Writers and connect to our existing pipeline.

| setting | value |
|---|---|
| Database | insights-demo |
| Table | crime |
| Deduplicate Stream | Yes |
Writer - KX Insights Database
The Writer - KX Insights Database node is essential for exploring data in a pipeline. This node defines what assembly and table to write the data too. As part of this, the assembly must also be deployed; deployments of an assembly or pipeline can de done individually, or a pipeline can be associated with an assembly and all pipelines associated with that assembly will be deployed when the latter is deployed.
Save the pipeline; the pipeline name should be unique; for Free Trial, there is a pipeline already named crime, so give this new pipeline a name like crime-1.
The newly created pipeline will now feature in the list of pipelines in the left-hand-entity tree.
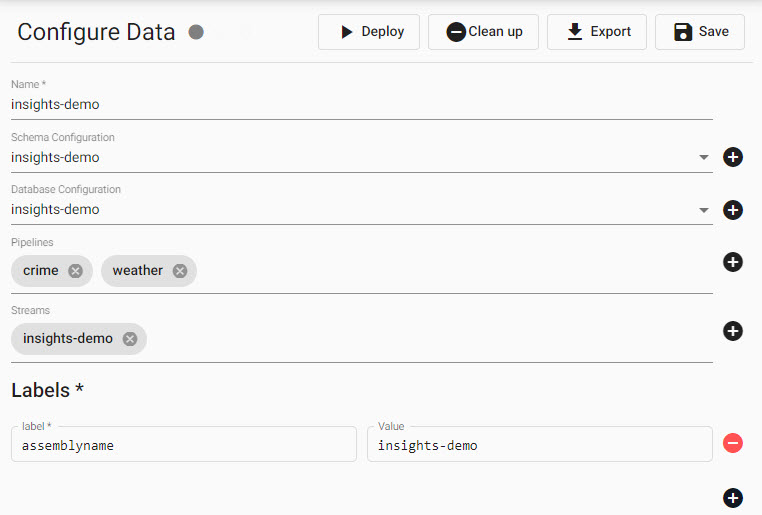
Add a Pipeline to a Data Assembly
A newly created pipeline built via import, using a pipe-node-builder or pre-made as part of Free Trial, must be added to a Data assembly prior to deployment and data exploration. This can be done in the assembly by selecting the pipeline from a list of available pipelines in the dropdown. You can add as many pipelines as needed to that assembly .
Whether you have re-creatred a pipeline or just want to explore the data freely available in Free Trial, add the protocol buffer/crime pipeline to the insights-demo assembly before continuing.
This is what adding crime and weather pipelines to the Insights-demo assembly :
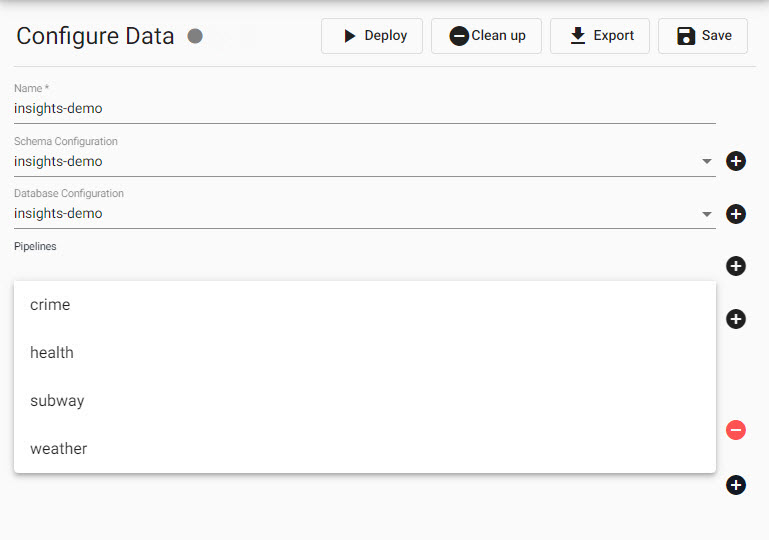
will look like when done
I would like to use the data import wizard to build a Pipeline
I want to learn more about Pipelines
Streams
Streams is how KX Insights Platform pushes data from a source to the platform. For example, real-time events like a ticker price would be streamed data. Free trial does not currently offer a streaming data source. To make use of streaming data, upgrade to the starter Assembly.
I want to learn more about Streams.
Deploy
Before working with data in an Assembly it's first necessary to deploy it. Deployment is a requirement to use insights-demo or any Data assembly you create before you can explore the data. During deployment, the Data assembly will go from Deploying to Ready and will show a solid green-circle next to its name in the left-hand entity tree menu when ready to use.
Check the status of an Data assembly deployment and troubleshoot problems.
Explore
Once an assembly is running with its associated data pipelines, the next step is to query its data with Explore. Explore can be selected from the document bar [+] or by clicking  from the icon menu or Overview page.
Data exploration has two sectons:
Data
Data written to a database is accessed in the Data window.
There are three methods to query data from a database; Query table, SQL or kdb+/q. For new users unfamiliar with SQL or kdb+/q we recommend using the query table as no coding experience is required.
In each case, an Output Variable is defined. It's this Output Variable which is used in the scratchpad to work with your data and is valid only for the current session (the Table name generated by the pipeline is what persists).
For Free Trial, it's not a requirement to use the scratchpad, which requires some knowledge of kdb+/q or Python to explore the data.
The query is the simplest way to explore your data. Available data tables are listed in the dropdown for Table Name.
Next, you need to define the Output Variable; this will be auto-assigned when selecting your first data table but may need to be changed if you decide to use a different data set. The Output Variable is used for queries in the scratchpad.
Mandatory is defining the Start Date and End Date filters, and this range will be dependent on the data used; for example, the crime data is for March 31st 2022.
Additional filters are available, but none of these are required for use in Free Trial.

If you are familiar with SQL you can use a simple query to return data.
SELECT * FROM crimeAn Output Variable has to be defined for use in queries for the scratchpad.
If you are familiar with kdb+/q you can use a simple query to return data.
select from crimeAn Output Variable has to be defined for use in queries for the scratchpad.
Scratchpad
Scratchpad is where data returned from a database and outputted to an Output Variable can be manipulated.
Free Trial users are not required to use the Scratchpad to view their data. Scratchpad queries must reference the Output Variable, and not the database table name, although for Free Trial, the database table and the Output Variable name are the same (and this is okay to do).
A scratchpad example for the weather data set to convert air temperature from fahrenheit to celsius, add the following q or python:
q update airtempcelcius:(airtemp-32)%1.8 from w
python import pykx as kx w = kx.q['w'] df = w.pd() df['airtempcelcius'] = (df['airtemp'] -32 )/ 1.8
In the output, there will be a new column called airtempcelcius!
Troubleshooting
If the database or tables are still not outputting after refreshing your browser, try our Troubleshooting page.
I want to learn more about data exploration
Reports
When you are ready to visualize your data, go to report builder.