Creating assemblies in UI
Create the components of an assembly using a guided wizard.
Set Up
-
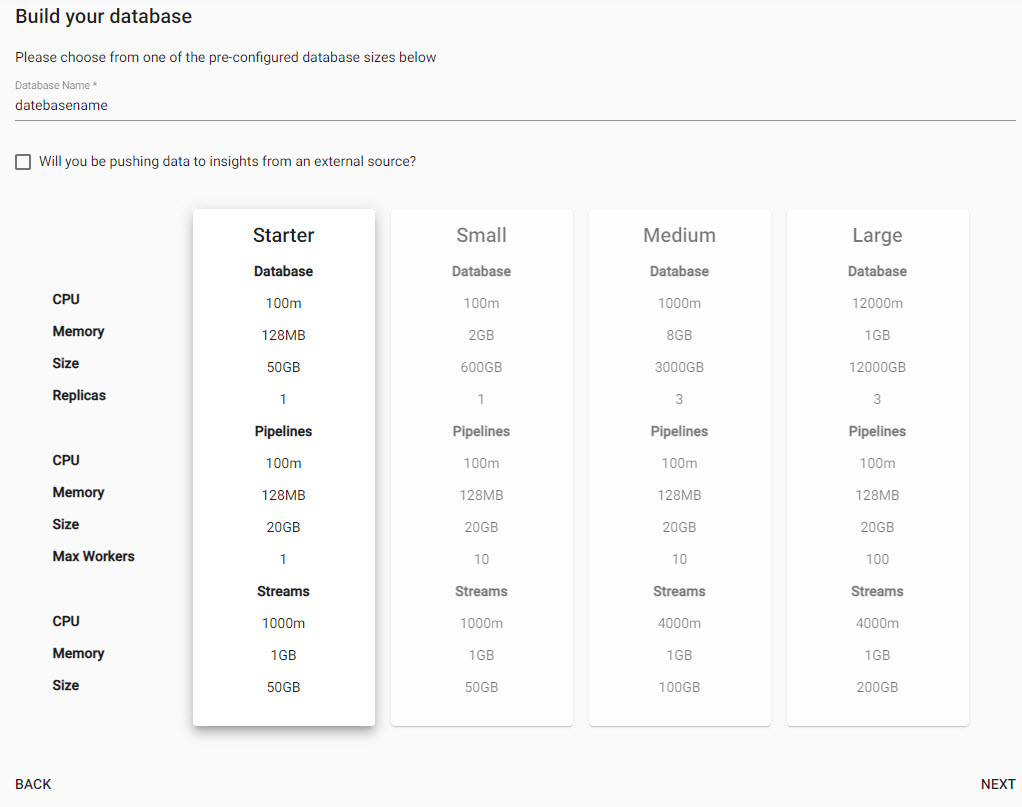
Set a database name and choose whether the data is coming from an external source or not. Finally select the size tier of the assembly. This will determine the resources available to each component in the assembly.
-
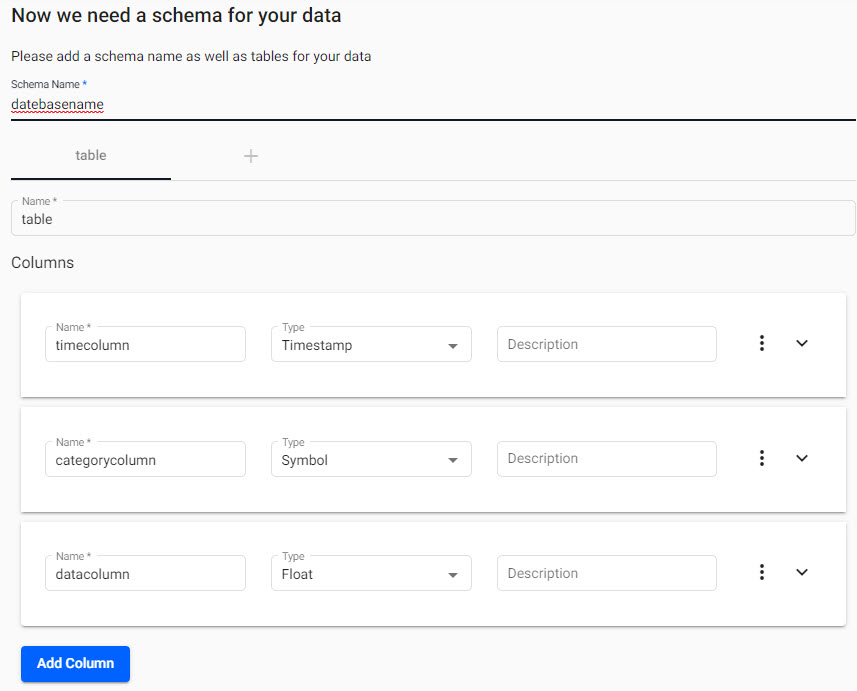
Configure your schema. Here the tables and columns that make up those tables can be added.
-
Define the
Essential Propertiesfor the schema, defining which time data column to partition the data by. OptionalAdvanced Propertiesdefine data sorting for interval, historical or real-time data.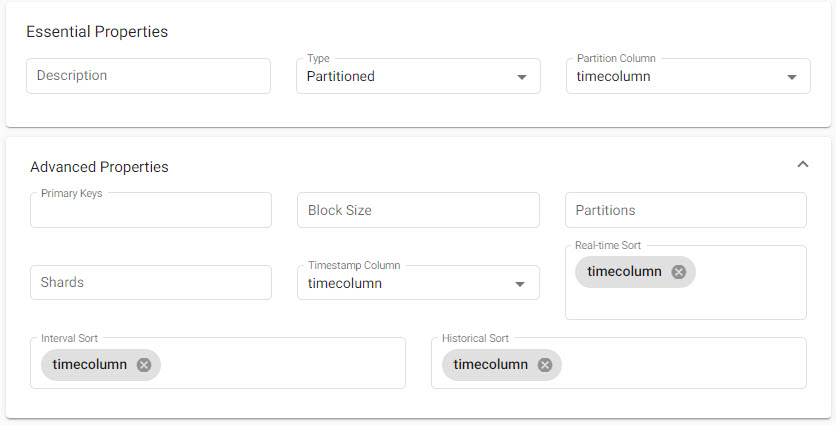
-
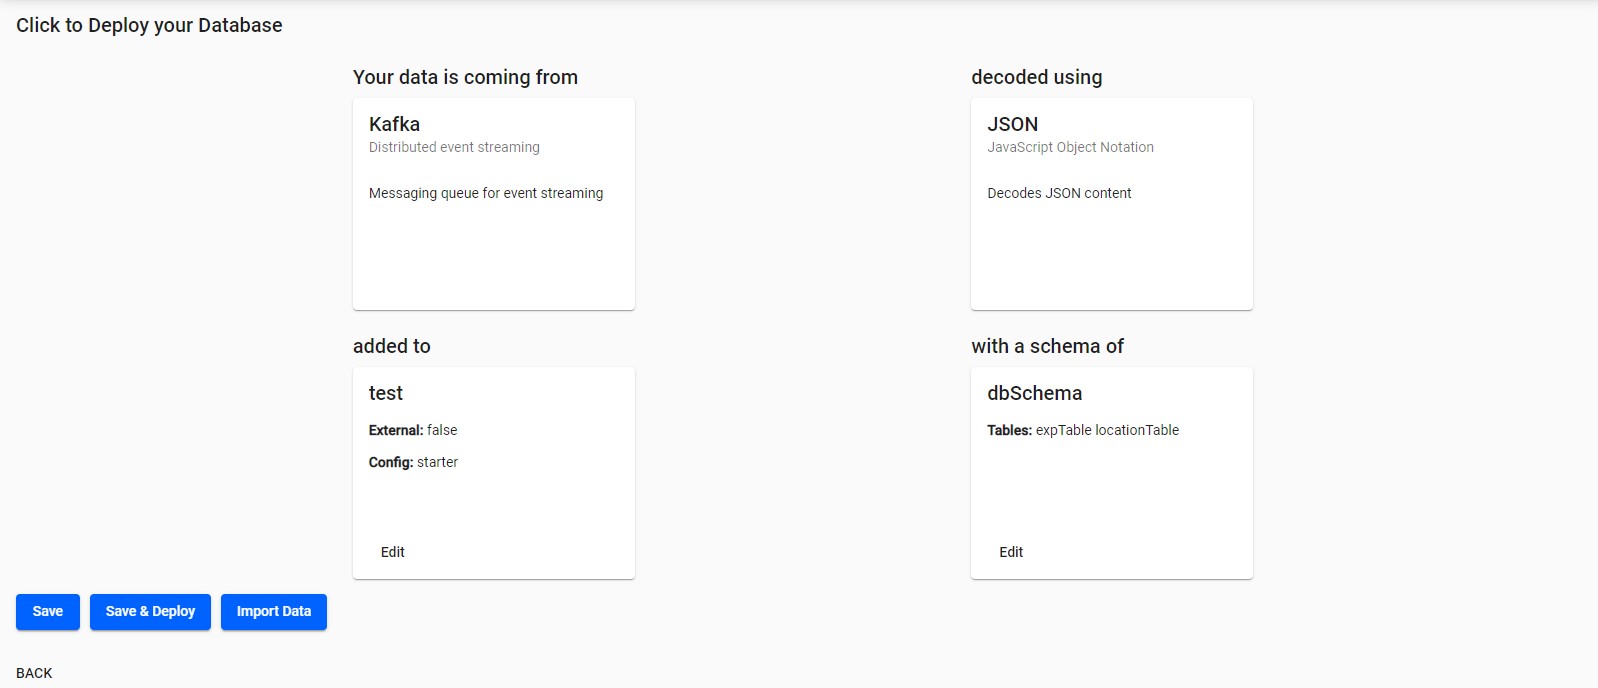
Once the database and schema have been configured a summary of each will be presented.
SaveorSave & Deploythe assembly as is. An option to ingest data and configure a pipeline is available; created pipelines can be associated with the data assembly.
A completed assembly with pipeline details
Once saved and deployed, an assembly will include a database, schema(s), stream(s) and any added pipeline(s).
Troubleshooting
Associated pipelines should have a timestamp data column, and a designated partition column in the schema. Failure to do so could result in a reported error or an empty data set when exploring the data.
It may be necessary to refresh the browser to view a newly deployed assembly in the explore tab.
Should the assembly fail to deploy, check diagnostics for any reported errors.