View States
View States store values accessible to all components of the dashboard. Use them to pass values like user selections or preferences between components and into queries.
Edits can be applied to view states using the View State dialog.
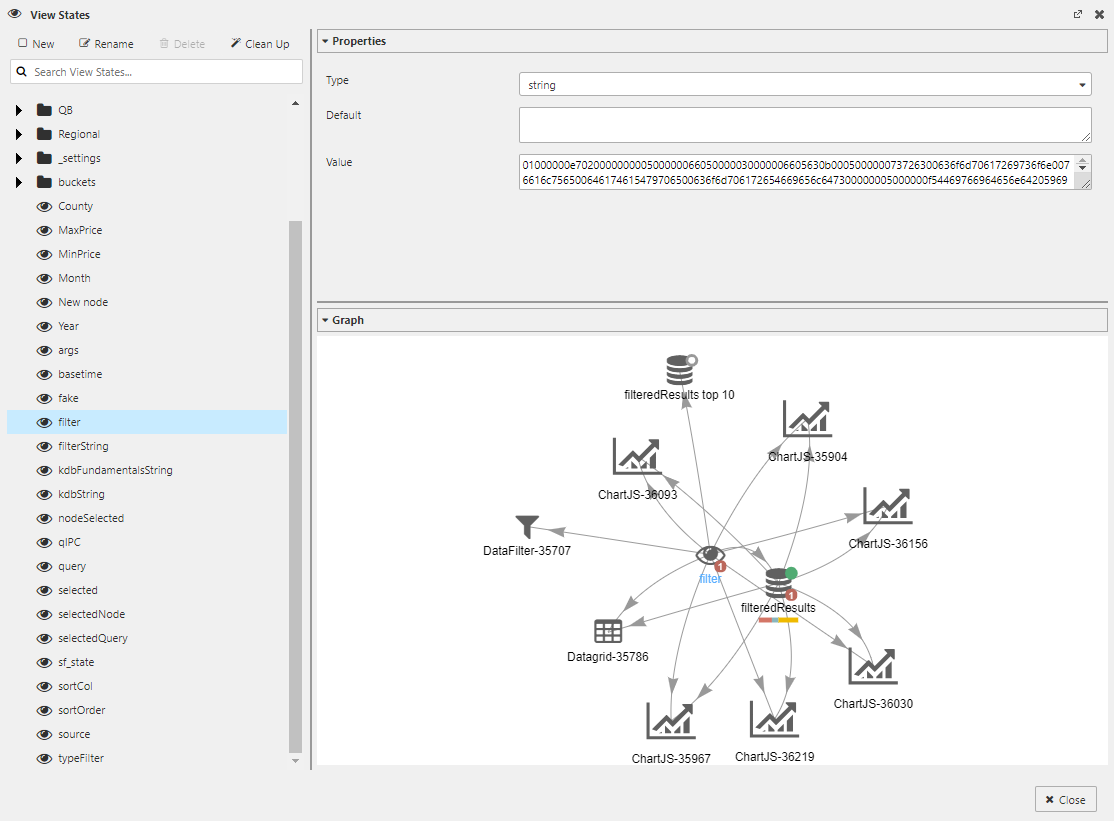
View State dialog showing a selected View State, its properties, and a graphical representation of its relationship to data sources and components
The View State dialog can be opened by clicking on the eye icon  at the top of the Properties Panel.

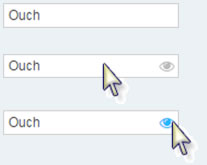
This dialog can also be summoned by clicking inside any input box showing the eye icon .
Hidden eyes
Some inputs offer View States, but the icon is hidden. For some it’s to the left of the  Clear button. If a View State is available, a rollover of the input will display the eye icon.
With a View State paired to a Text Input or Drop Down component, a user’s input can be passed to any dashboard component.
User input
To prevent errors, it may be necessary to include a text prompt to help the user put information in the correct form.
View State Dialog
At the top of the dialog are buttons to create, edit, and delete or clean up view states that are not used.
The dialog consists of 3 main sections - a list of view states and folders on the left, and 2 collapsible panels on the right.
The top right section is the Properties Panel, which is used to specify the type and values for the selected view state.
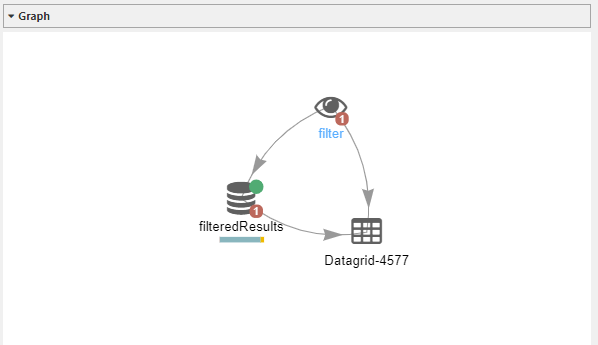
The bottom right section is the View State Graph, which depicts the selected view state and all data sources or components that reference the selected view state.
Component Names in the View State Graph
Each Dashboard component is given an internal name by default, which is displayed in the view state graph:
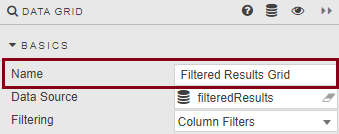
Any component in your Dashboard can be given a user-defined name by assigning a value to its Name property:
If present, the view state graph will display the user-defined name instead of its internal name:
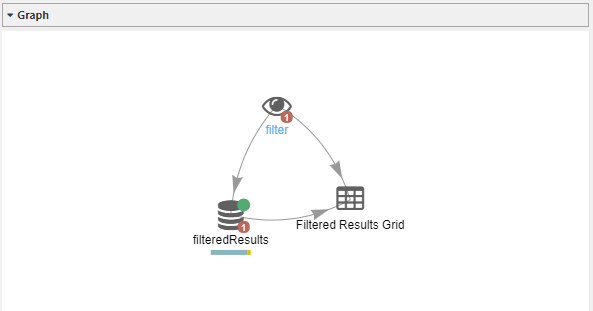
Component Names
Assigning a user-defined name to a component can help identify components in the view state graph.

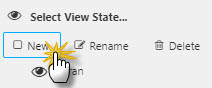
Creating a View State
-
In the Select View State dialog, click New to create a new View State. Name it.
-
Set the Type:
boolean,byte,char,date,datetime,dict,double,float,guid,int,list,long,minute,month,second,short,string,symbol,time,timespan,timestamp -
Set a Default value if required. Components and queries referencing this view state will use the default value when:
- the Reset View State button in the toolbar
 is clicked
 - the Dashboard is loaded, has not been previously saved by the user, and the view state value has not been passed to the Dashboard (i.e. Enable "Share Dashboard")
- the Dashboard is loaded with the Save Viewer State property disabled, the Dashboard has not been previously saved by the user, and the view state value has not been passed to the Dashboard (i.e. Sharing View States across Dashboards with a button)
- the Reset View State button in the toolbar
-
Click Select Item.

Rolling
The rolling feature allows the user to specify a default value that is dynamic. This feature uses syntax that will be evaluated during the same times as documented for the view state's Default field. The rolling feature can be used with the following data types:
date, datetime, minute, month, second, time, timestamp
For each of these types, a checkbox labelled Rolling will be visible above the Default input field. When Rolling is checked, the user will be presented with a text field for rolling syntax.

Valid syntax includes:
- NOW
- The NOW keyword refers to the current moment in time.
- The NOW keyword can be used alone or as part of an expression.
- The NOW keyword can be immediately followed by an operator (+ or -) and an operand.
- NOW+x
- NOW-x
- x refers to a number that is provided by the user who is authoring the rolling syntax.
- The value of x is a multiple of a duration based on the data type.
-
The table below shows the duration associated with x for each data type:
Data Type Duration second seconds minute, time minutes date, datetime, timestamp days month months -
The operator (+, -) is used to add or subtract a duration as part of the expression.
-
For example:
Data Type Expression Result second NOW+10 Adds 10 seconds to NOW time NOW+30 Adds 30 minutes to NOW date NOW-5 Subtracts 5 days from NOW month NOW-10 Subtracts 10 months from NOW Note
For the datetime and timestamp data types, using NOW+x or NOW-x will also set the time value to 00:00:00. To advance or reverse while retaining the current time, use the time format with multiples of 24 hours (i.e. NOW+24:00, NOW+48:00).
- NOW+hh:
mm:ss.sss - NOW-hh:
mm:ss.sss - NOW+hh:
mm:ss.sss adds the specified time duration to the value of NOW. - NOW-hh:
mm:ss.sss subtracts the specified time duration from the value of NOW. - When specifying a time formatted value, the number of hours can exceed 24.
-
For example:
Expression Result NOW+00:30 Adds 30 minutes to NOW NOW-48:00 Subtracts 48 hours from NOW NOW+1:30:10 Adds 1 hour, 30 minutes and 10 seconds to NOW Note
When using the month data type, it is possible for the NOW+hh:
mm:ss.sss expression to result in a different month. - NOW+x@hh:
mm:ss.sss - NOW-x@hh:
mm:ss.sss - NOW+x@hh:
mm:ss.sss adds a specified number of days (x) to NOW, and sets the time to the value specified after the @ sign. - NOW-x@hh:
mm:ss.sss subtracts a specified number of days (x) from NOW, and sets the time to the value specified after the @ sign. - These expressions work with the datetime and timestamp data types.
-
For example:
Expression Result NOW+1@12:00 Adds 1 day to NOW and the time value will be 12:00 NOW-1@23:59:59 Subtracts 1 day from NOW and the time value will be 23:59:59 Note
The rolling syntax expression is expected to have no spaces.
If the Rolling checkbox is checked and no rolling syntax is provided, the keyword NOW will be used.
The T keyword
The use of the T keyword remains functional. However, it is recommended that the NOW keyword be used instead because the T keyword is deprecated.
Weekdays
A weekday is defined as any day within the week except Saturday and Sunday. The rolling feature allows the user to specify what type of day to consider by using a special keyword (e.g. WD). When the keyword WD is present, only weekdays are used to determine the calendar day. The keyword WD can be used with the following data types:
date, datetime, timestamp
Weekday syntax includes:
| Syntax | Description |
|---|---|
| NOW+xWD | Adds a specified number of weekdays (x) to NOW. |
| NOW-xWD | Subtracts a specified number of weekdays (x) from NOW. |
| NOW+xWD@hh: |
Adds a specified number of weekdays (x) to NOW, and sets the time to the value specified after the @ sign. |
| NOW-xWD@hh: |
Subtracts a specified number of weekdays (x) from NOW, and sets the time to the value specified after the @ sign. |
For example:
| Expression | Result |
|---|---|
| NOW+2WD | Adds 2 weekdays to NOW |
| NOW-7WD@1:59:59 | Subtracts 7 weekdays from NOW and the time value will be 1:59:59 |
| NOW+1WD | When value of NOW refers to Friday, the resulting day will be next Monday |
Business Days
A business day can be defined as a day within the week where normal business operations are conducted. Dashboards defines a business day by considering two pieces of information:
- days within the week that are used for work activity (e.g. Monday through Friday)
- exclusionary dates on the calendar (e.g. holidays recognized by the business)
The rolling feature allows the user to specify what type of day to consider by using a special keyword (e.g. BD). When the keyword BD is present, only business days are used to determine the calendar day. The keyword BD can be used with the following data types:
date, datetime, timestamp
Business day syntax includes:
| Syntax | Description |
|---|---|
| NOW+xBD | Adds a specified number of business days (x) to NOW. |
| NOW-xBD | Subtracts a specified number of business days (x) from NOW. |
| NOW+xBD@hh: |
Adds a specified number of business days (x) to NOW, and sets the time to the value specified after the @ sign. |
| NOW-xBD@hh: |
Subtracts a specified number of business days (x) from NOW, and sets the time to the value specified after the @ sign. |
For example:
| Expression | Result |
|---|---|
| NOW+2BD | Adds 2 business days to NOW |
| NOW-7BD@9:00 | Subtracts 7 business days from NOW and the time value will be 9:00 |
| NOW+1BD | When value of NOW refers to December 31, and January 1 is not a business day, the result will be January 2 |
Defining the Workweek and Holidays
When calculating business days, the rolling feature uses 2 files located on the web server where Dashboards has been deployed. The website reference to these files are located in:
http(s)://<website>/modules/<QuickBase Version>/calendar
Where <QuickBase Version> is the text that appears to the right of the QuickBase UI Component when viewing the User Menu's About page.

For the depicted About page, the website reference is: http(s)://<website>/modules/QuickBase_fd61a7a457/calendar
File: workweek.csv
- This file defines which days of the week are considered work days.
- Each day of the week is represented by a number where 1 = Sun, 2 = Mon, etc.
- Only the first 7 valid entries will be used.
- The entries can be separated by a new line or a comma.
- The initial version of this file defines Monday through Friday as work days:
2,3,4,5,6
File: holidayCalendar.csv
- This file contains a list of exclusionary dates (e.g. holidays recognized by the business).
- Dates can be formatted as: YYYY-MM-DD or MM-DD-YYYY
- Leading zeroes are optional for the month and day (e.g. 2024-1-1, 2024-02-02)
- Acceptable (Year Month Day) delimiters are the hyphen, dot and forward slash characters (e.g. 2024-01-01, 2024.01.01, 2024/01/01)
- The entries can be separated by a new line or a comma.
- The initial version of this file defines Jan 1, 2024 as a holiday:
2024-01-01
Work week must be defined for business day calculations
If the work week is not defined (i.e. workweek.csv file does not exist, cannot be read, or is an empty file), business days will not be calculated.
Viewstates in Query Editor
kdb+/q Query Editor
Viewstate parameters can be referenced from with in kdb+/q editor.
1. Function parameters
For a kdb+/q function, viewstates can be defined at the start of the function.
Add the required viewstate parameter enclosed in square brackets. Multiple viewstates can be defined by seperating parameters with semi colons.
Note
The maximum number of parameters permitted is 8; specifying more than eight parameter will cause an error. You can circumvent this restriction by encapsulating multiple parameters in a list or dictionary.
{[x]
    select from table where (column1 = x)
 }
This causes the supplied viewstate to be substituted for all occurrences of the parameter x, the expression to be evaluated and the result returned as the output value.
2. In-query parameters
Alternative approach to add a viewstate parameter is to define an in-query parameter in a kdb+/q query, viewstates can be added to the query using the following syntax <%param%>.
select from table where column1 = <%x%>
This causes the supplied viewstate to be substituted for all occurrences of the parameter x, the expression to be evaluated and the result returned as the output value.
SQL Query Editor
Viewstate parameters can be referenced from with in SQL editor.
1. In query parameters
In your SQL query editor a viewstate parameter can be added to the query using a set of double curly brackets e.g. {{trader}}.
SELECT * FROM table WHERE column1 = {{x}}
This causes the supplied viewstate to be substituted for all occurrences of the parameter x, the expression to be evaluated and the result returned as the output value.
Map Viewstates in Query Editor
As new data sources are defined in the kdb+/q Query Editor, it is often convenient to map them immediately to View States.
This can be done with a single click on the eye-and-gear button.
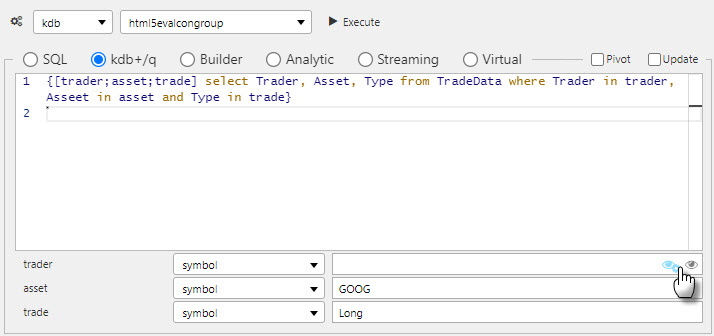
Mapping a query’s trade argument to an eponymous View State
This will update Value to reflect the mapped View State. For example, <%Query/value%> as mapped in the image below:

To edit the View State, click on the eye button to summon the Select View State dialog.

Parameter types
Parameter types must match. A parameter’s type is defined in the Select View State dialog. Check to ensure the same type is assigned in the Query Editor for which the View State is assigned.
In Query Editor, if there is an assigned value prior to creating a View State, the created View State will adopt the assigned value as the default value; ensuring the query will run when executed.
Selected values
Selected Values are available in chart components. Values are captured using:
- Selected Value
- A View State – ‘publishing’ the selection for other components
- Selected Value Attribute
- A column from the component’s Data Source
Data types
When mapping Selected Values to Selected Value Attribute, ensure the data type of the View State matches the data type of the Data Source column; e.g. integer for numbered data.
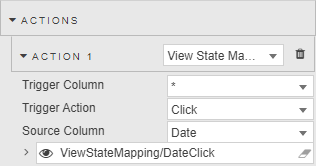
View State Routing
When a user selects a data row in Data Grid, or line point in Charts, represented value(s) can be assigned to viewstate parameters in Actions section.
Sharing View States across dashboards
When sharing View States between different dashboards, matching View States (case sensitive) must be created on the host and destination dashboard. This is relevant when creating Buttons to switch between dashboards.
For more on Actions
Linking components
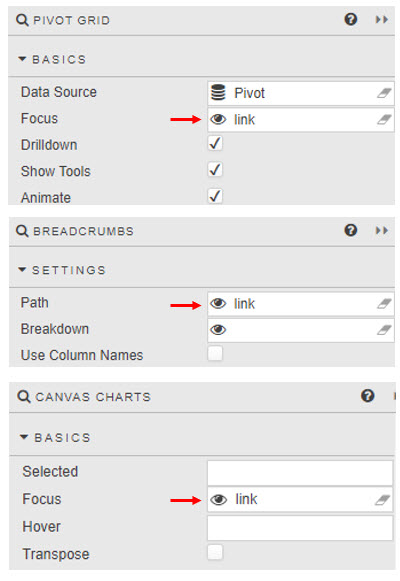
Components can be linked so that changes in one component are reflected in another.
For example, drilling down on the Pivot Grid below results in changes to the linked Breadcrumbs and Canvas Chart.
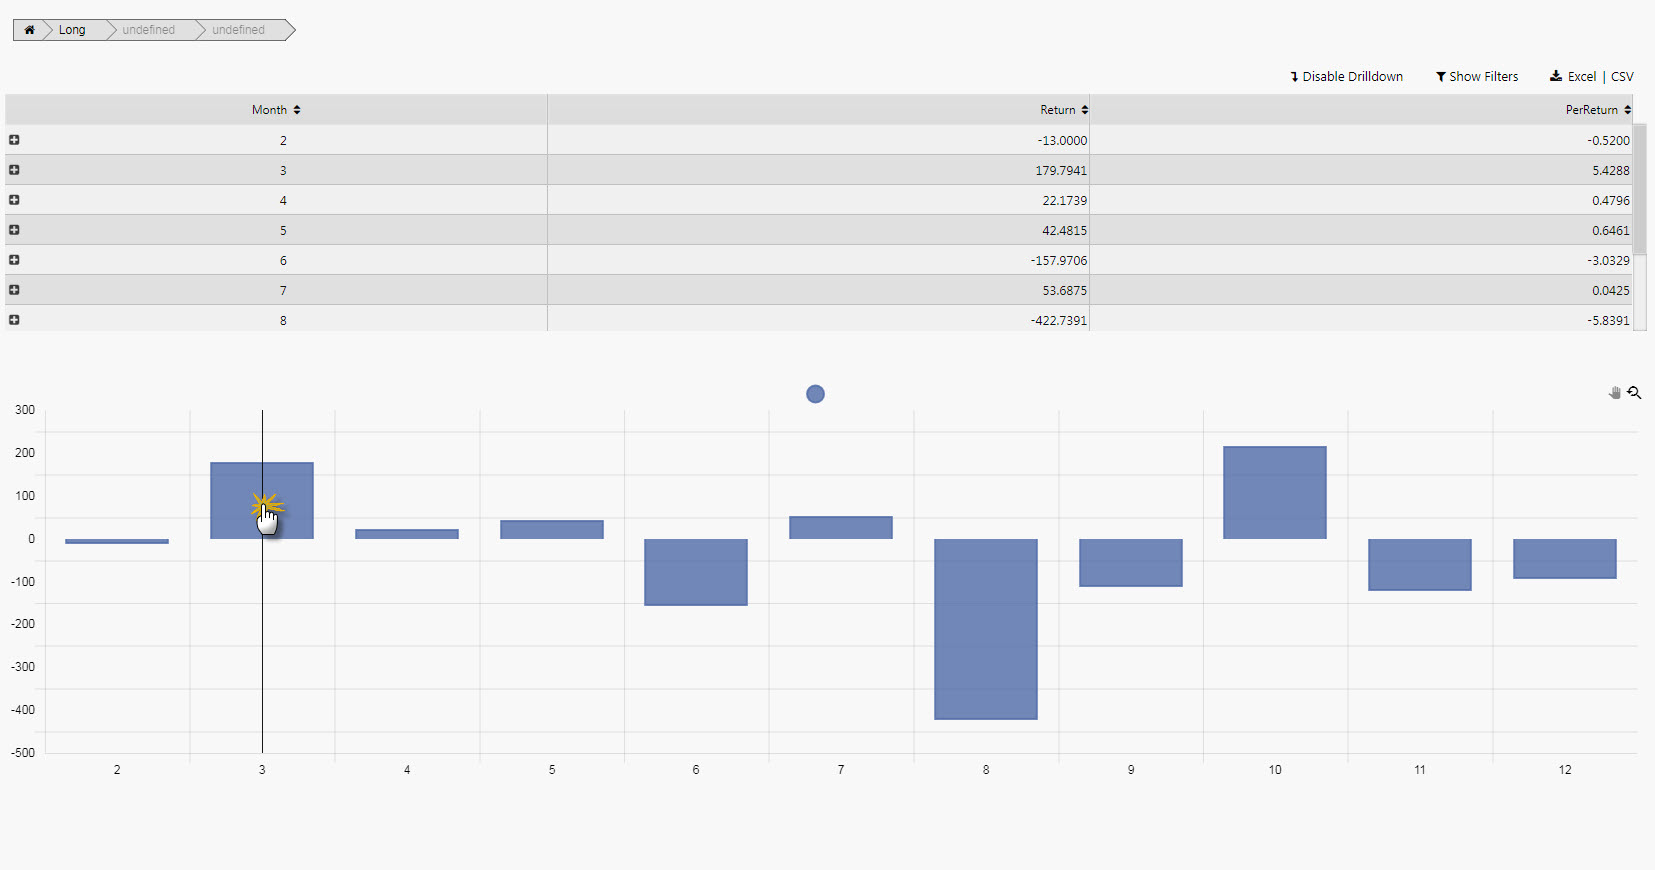
Linked components
On drilldown, becomes
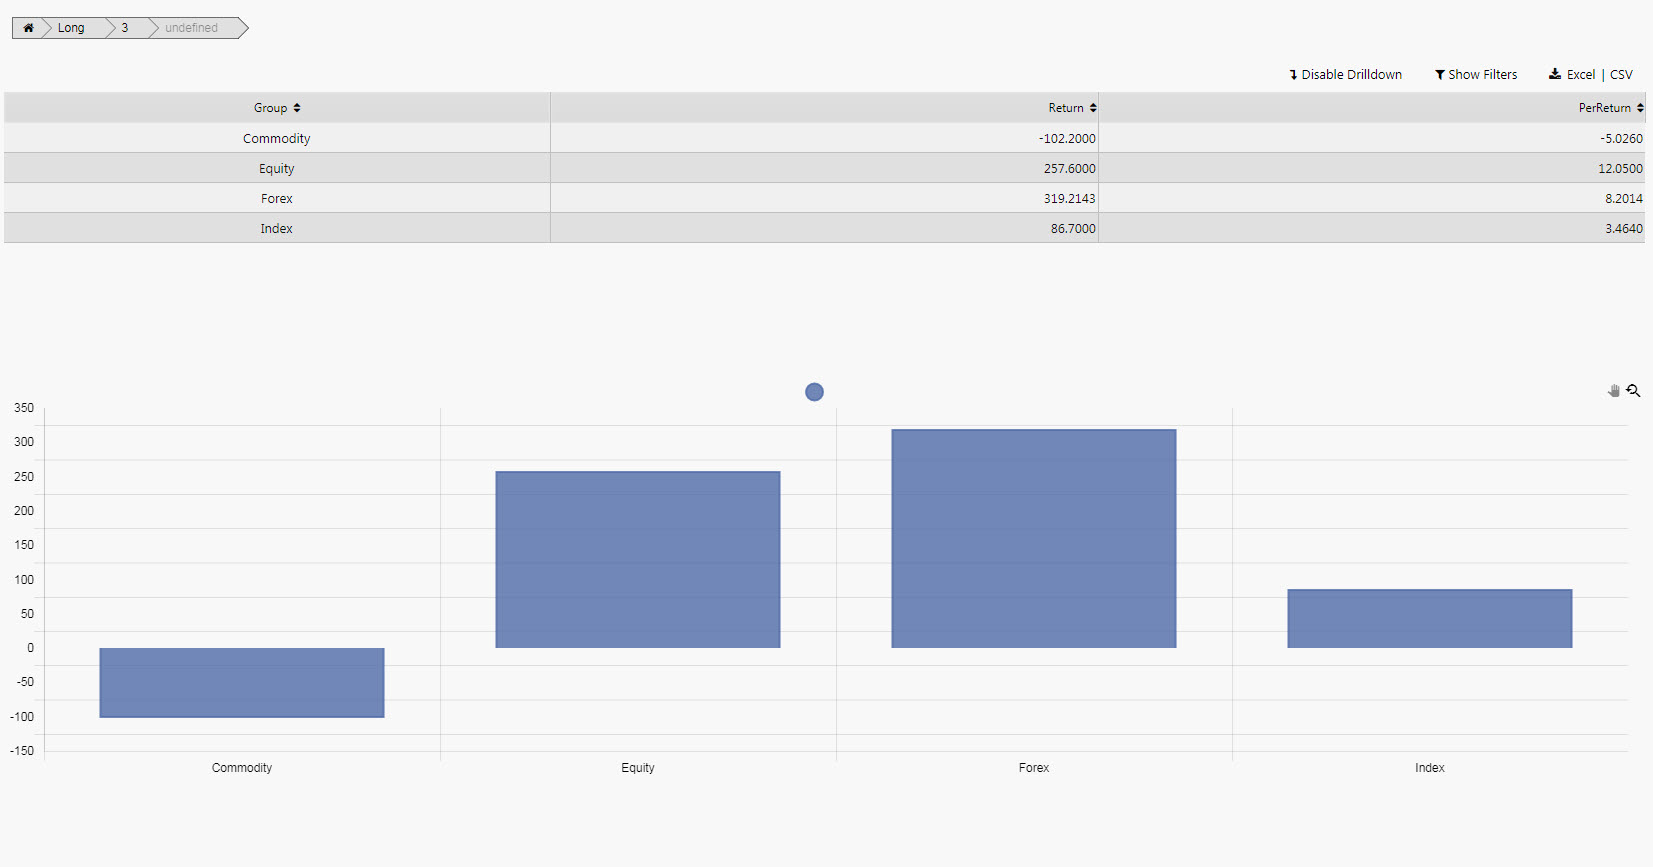
Drill-down on data grid also updates breadcrumbs and canvas bar chart
Link components by creating a View State and setting it as the Focus property of the linked components.
System View States
System view states contain information about the current Dashboard session and are accessible to all components of the dashboard. System view states cannot be modified or deleted using the View State dialog.
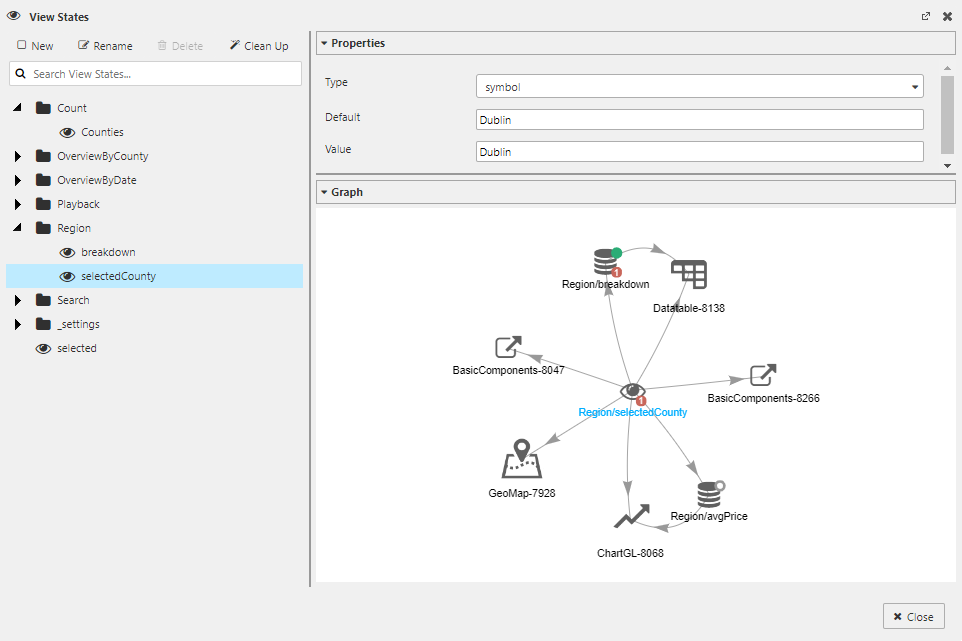
The View State dialog:
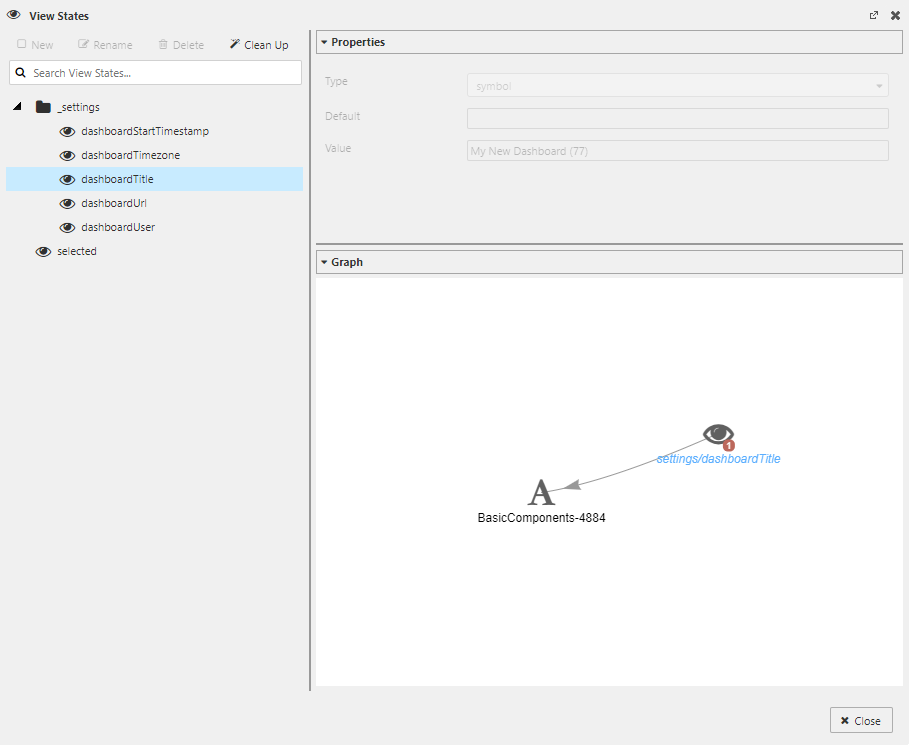
View State dialog showing a selected System View State, its properties, and a graphical representation of its relationship to a Dashboard component
System folder:
- _settings
-
Folder containing the system view states. Users cannot edit this folder or edit view states that appear in this folder.
The following is a list of the system view states:
- dashboardStartTimestamp
-
Provides the date and time for when the dashboard was opened (in UTC format)
- dashboardTimezone
-
Provides the timezone associated with the Dashboard session. The Dashboard User Menu provides a dialog to access this timezone setting.
- dashboardTitle
-
Provides the title of current dashboard. The Name property in the Dashboard Basics section can be used to maintain this value.
- dashboardUrl
-
Provides the url of the current dashboard
- dashboardUser
-
Identifies the user currently logged in to the Dashboards session
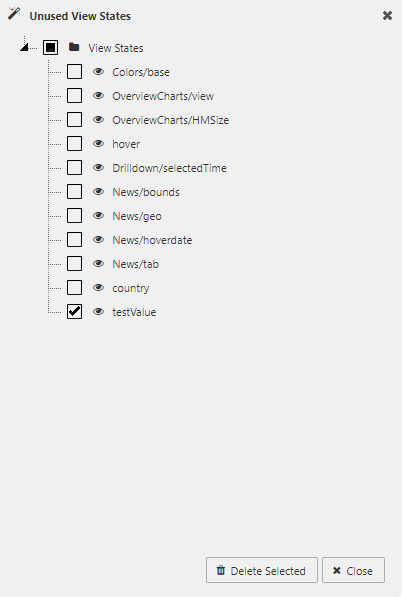
Clean Up
Clicking on the Clean Up button opens the Unused View States dialog.

The Unused View States dialog displays a list of view states that are not being used by the Dashboard. To remove one or more view states, check the checkbox next to its name, and then click on the Delete Selected button. To select the entire list, check the topmost checkbox labeled 'View States'.